
All CSS font attributes: A Comprehensive Guide to Styling Text
CSS font attributes
Here’s a list of CSS font-related properties that you can use to control the appearance and characteristics of fonts:
font-family: |
Specifies the preferred font family or list of font families for text. |
font-size: |
Sets the size of the text. |
font-weight: |
Defines the thickness or boldness of the text. |
font-style: |
Sets the style of the font, such as italic or oblique. |
font-variant: |
Controls the appearance of small-caps text. |
line-height: |
Defines the height of a line of text, affecting vertical spacing between lines. |
letter-spacing: |
Specifies the spacing between characters in a text. |
word-spacing: |
Sets the spacing between words in a text. |
text-align: |
Aligns the text horizontally within its container. |
text-decoration: |
Applies decorative effects to the text, such as underline, overline, or line-through. |
text-transform: |
Specifies the capitalization of the text, such as uppercase or lowercase. |
text-indent: |
Specifies the indentation of the first line of text within a block. |
text-shadow: |
Adds a shadow effect to the text. |
white-space: |
Controls how whitespace characters are handled within the text. |
text-overflow: |
Determines how overflowing text is displayed when it exceeds the container’s boundaries. |
font: |
A shorthand property to set multiple font-related properties in a single declaration. |
These are the key CSS font properties that allow you to customize and style the text on your web pages.
By utilizing these properties effectively, you can achieve various font styles and layouts to enhance the typography on your website.
How to use CSS letter-soacing property?
CSS letter-spacing: complete code in html
To apply the letter-spacing property in HTML, you can use inline CSS, a <style> block, or an external CSS file.
Here’s an example of how you can use the letter-spacing property in different ways within an HTML document:
Inline CSS:
<p style="letter-spacing: 2px;">This is a paragraph with increased letter spacing.</p> <style>
block within HTML:
<!DOCTYPE html>
<html>
<head>
<title>Letter Spacing Example</title>
<style>
p {
letter-spacing: 2px;
}
</style>
</head>
<body>
<p>This is a paragraph with increased letter spacing.</p>
</body>
</html>

Another method:
By External CSS file (styles.css):
<!DOCTYPE html> <html> <head> <title>Letter Spacing Example</title> <link rel="stylesheet" type="text/css" href="styles.css"> </head> <body> <p>This is a paragraph with increased letter spacing.</p> </body> </html>
create css file :
styles.css:
p {
letter-spacing: 2px;
}
Explanation:
1-In each of these examples, the letter-spacing property is set to 2px, which means the text within the <p> element will have an increased letter spacing of 2 pixels. You can adjust the value to your desired letter spacing.
2-Additionally, you can use negative values to decrease the spacing between letters if needed.
How to use CSS word-spacing property?
word-spacing: complete code in html
To apply the word-spacing property in HTML, you can use inline CSS, a <style> block, or an external CSS file.
Here’s an example of how you can use the word-spacing property in different ways within an HTML document:
Inline CSS:
<p style="word-spacing: 5px;">This is a paragraph with increased word spacing.</p>
block within HTML:
<!DOCTYPE html>
<html>
<head>
<title>Word Spacing Example</title>
<style>
p {
word-spacing: 5px;
}
</style>
</head>
<body>
<p>This is a paragraph with increased word spacing.</p>
</body>
</html>
Another method:
By External CSS file (styles.css):
<!DOCTYPE html> <html> <head> <title>Word Spacing Example</title> <link rel="stylesheet" type="text/css" href="styles.css"> </head> <body> <p>This is a paragraph with increased word spacing.</p> </body> </html>
Create CSS file :
styles.css:
p {
word-spacing: 5px;
}
Explanation:
1-In each of these examples, the word-spacing property is set to 5px, which means the text within the <p> element will have an increased spacing of 5 pixels between words.
2-You can adjust the value to your desired word spacing. 3-Additionally, you can use negative values to decrease the spacing between words if needed.
How to use CSS text-align property ?
text-align:complete code in html
To apply the text-align property in HTML, you can use inline CSS, a <style> block, or an external CSS file.
Here’s an example of how you can use the text-align property in different ways within an HTML document:
Inline CSS:
<p style="text-align: center;">This is a paragraph with center-aligned text.</p>
block within HTML:
<!DOCTYPE html>
<html>
<head>
<title>Text Alignment Example</title>
<style>
p {
text-align: center;
}
</style>
</head>
<body>
<p>This is a paragraph with center-aligned text.</p>
</body>
</html>
Another method:
By External CSS file (styles.css):
<!DOCTYPE html> <html> <head> <title>Text Alignment Example</title> <link rel="stylesheet" type="text/css" href="styles.css"> </head> <body> <p>This is a paragraph with center-aligned text.</p> </body> </html>
Create css file :
styles.css:
p {
text-align: center;
}
Explanation:
1-In each of these examples, the text-align property is set to center, which means the text within the <p> element will be horizontally centered within its container.
2-You can also use other values such as left or right to align the text to the left or right, respectively.
3-Note that the text-align property can be applied to various HTML elements, not just <p> tags.
4-You can apply it to headings (<h1>, <h2>, etc.), <div> elements, and other block-level or inline-level elements to control the text alignment within them.
Complete example
text-align:complete code in html
Here’s an example of complete HTML code demonstrating the use of the text-align property:
<!DOCTYPE html>
<html>
<head>
<title>Text Alignment Example</title>
<style>
.center-align {
text-align: center;
}
.right-align {
text-align: right;
}
</style>
</head>
<body>
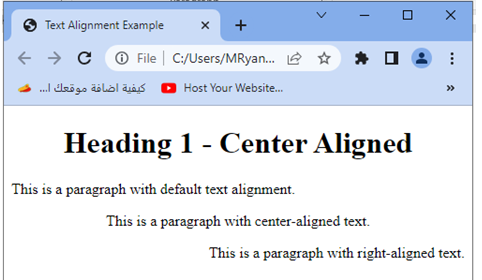
<h1 class="center-align">Heading 1 - Center Aligned</h1>
<p>This is a paragraph with default text alignment.</p>
<p class="center-align">This is a paragraph with center-aligned text.</p>
<p class="right-align">This is a paragraph with right-aligned text.</p>
</body>
</html>
Explanation:
1-In this example, we have defined two classes in the <style> block: .center-align and .right-align.
2-The .center-align class applies text-align: center; to center align the content, while the .right-align class applies text-align: right; to right align the content.
3-We then use these classes to apply different text alignments to the HTML elements within the <body> section.
4-The <h1> element with the class .center-align is center aligned, the first <p> element has the default text alignment (usually left-aligned), the second <p> element with the class .center-align is center aligned, and the third <p> element with the class .right-align is right aligned.
You can customize and apply the text-align property to various elements and classes as needed to control the alignment of text within your HTML document.
How to use CSS text-decoration property?
text-decoration: complete code in html
Here’s an example of complete HTML code demonstrating the use of the text-decoration property:
<!DOCTYPE html>
<html>
<head>
<title>Text Decoration Example</title>
<style>
.underline {
text-decoration: underline;
}
.overline {
text-decoration: overline;
}
.line-through {
text-decoration: line-through;
}
</style>
</head>
<body>
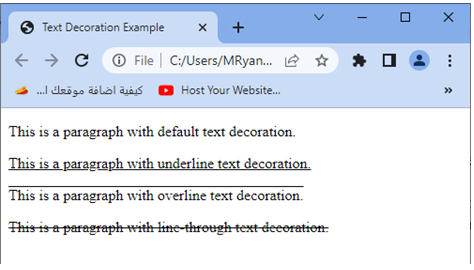
<p>This is a paragraph with default text decoration.</p>
<p class="underline">This is a paragraph with underline text decoration.</p>
<p class="overline">This is a paragraph with overline text decoration.</p>
<p class="line-through">This is a paragraph with line-through text decoration.</p>
</body>
</html>
Explanation:
1-In this example, we have defined three classes in the <style> block: .underline, .overline, and .line-through.
2-The .underline class applies text-decoration: underline; to underline the text, the .overline class applies text-decoration: overline; to add an overline to the text, and the .line-through class applies text-decoration: line-through; to strike through the text.
3-We then use these classes to apply different text decorations to the <p> elements within the <body> section. 4-The first <p> element has the default text decoration (usually none), the second <p> element with the class .underline has an underline text decoration, the third <p> element with the class .overline has an overline text decoration, and the fourth <p> element with the class .line-through has a line-through text decoration.
How to use text-transformation property?
text-transform: complete code in html
Here’s an example of complete HTML code demonstrating the use of the text-transform property:
<!DOCTYPE html>
<html>
<head>
<title>Text Transform Example</title>
<style>
.uppercase {
text-transform: uppercase;
}
.lowercase {
text-transform: lowercase;
}
.capitalize {
text-transform: capitalize;
}
</style>
</head>
<body>
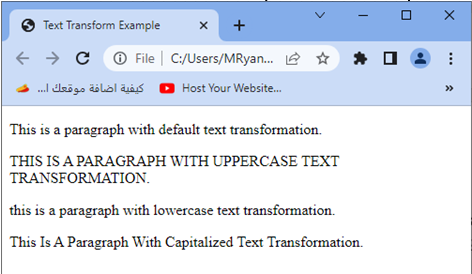
<p>This is a paragraph with default text transformation.</p>
<p class="uppercase">This is a paragraph with uppercase text transformation.</p>
<p class="lowercase">This is a paragraph with lowercase text transformation.</p>
<p class="capitalize">This is a paragraph with capitalized text transformation.</p>
</body>
</html>
Explanation:
1-In this example, we have defined three classes in the <style> block: .uppercase, .lowercase, and .capitalize.
2-The .uppercase class applies text-transform: uppercase; to transform the text to uppercase, the .lowercase class applies text-transform: lowercase; to transform the text to lowercase, and the .capitalize class applies text-transform: capitalize; to capitalize the first letter of each word in the text.
3-We then use these classes to apply different text transformations to the <p> elements within the <body> section.
4-The first <p> element has the default text transformation (usually none), the second <p> element with the class .uppercase has uppercase text, the third <p> element with the class .lowercase has lowercase text, and the fourth <p> element with the class .capitalize has capitalized text.
You can customize and apply the text-transform property to various elements and classes as needed to control the transformation of text within your HTML document.
How to use CSS text-indent property?
CSS text-indent: complete code in html
Here’s an example of complete HTML code demonstrating the use of the text-indent property:
In this example, we have defined a class .indented in the <style> block.
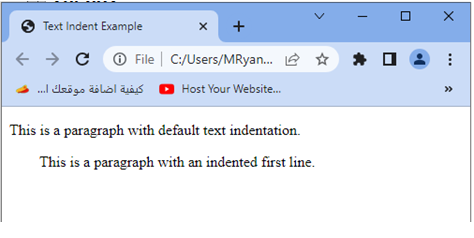
The .indented class applies text-indent: 2em; to indent the first line of the paragraph by 2em (where em is a relative unit based on the font size).
We then use the .indented class to apply the text indentation to the second <p> element within the <body> section.
The first <p> element has the default text indentation.
(usually none), and the second <p> element with the class .indented has an indented first line.
How to use CSS text-shadow property?
CSS text-shadow: complete code in html
Here’s an example of complete HTML code demonstrating the use of the text-shadow property:
<!DOCTYPE html>
<html>
<head>
<title>Text Shadow Example</title>
<style>
.shadowed {
text-shadow: 2px 2px 4px rgba(0, 0, 0, 0.5);
}
</style>
</head>
<body>
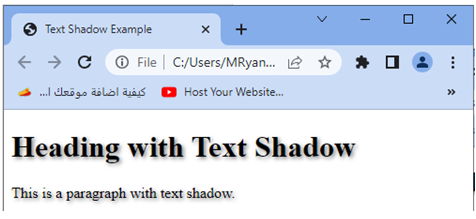
<h1 class="shadowed">Heading with Text Shadow</h1>
<p class="shadowed">This is a paragraph with text shadow.</p>
</body>
</html>
Explanation:
1-In this example, we have defined a class .shadowed in the <style> block.
2-The .shadowed class applies text-shadow: 2px 2px 4px rgba(0, 0, 0, 0.5); to add a text shadow to the elements.
3-The text-shadow property takes several values:
2px specifies the horizontal offset of the shadow.
2px specifies the vertical offset of the shadow.
4px specifies the blur radius of the shadow.
rgba(0, 0, 0, 0.5) defines the color and transparency of the shadow.
In this case, it creates a shadow with black color and 50% transparency.
4-We then use the .shadowed class to apply the text shadow to the <h1> and <p> elements within the <body> section.
5-The <h1> element has the class .shadowed, so it will have a text shadow, and the <p> element also has the class .shadowed, so it will have a text shadow as well.
You can customize the values of text-shadow to achieve different shadow effects, such as changing the offset, blur radius, or color, to match your desired styling.
Note: The text-shadow property may not be supported in older browsers or certain text rendering engines, so it’s a good practice to provide alternative styles for scenarios where text shadow is not supported.
How to use CSS white-space property?
CSS white-space: complete code in html
Here’s an example of complete HTML code demonstrating the use of the white-space property:
<!DOCTYPE html>
<html>
<head>
<title>White Space Example</title>
<style>
.nowrap {
white-space: nowrap;
}
.pre {
white-space: pre;
}
</style>
</head>
<body>
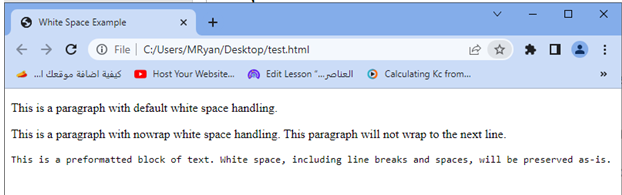
<p>This is a paragraph with default white space handling.</p>
<p class="nowrap">This is a paragraph with nowrap white space handling. This paragraph will not wrap to the next line.</p>
<pre class="pre">This is a preformatted block of text. White space, including line breaks and spaces, will be preserved as-is.</pre>
</body>
</html>
Explanation:
1-In this example, we have defined two classes in the <style> block: .nowrap and .pre.
2-The .nowrap class applies white-space: nowrap; to prevent wrapping of text to the next line, while the .pre class applies white-space: pre; to preserve white space, including line breaks and spaces, as it is.
3-We then use these classes to control the white space handling of the <p> and <pre> elements within the <body> section.
4-The first <p> element has the default white space handling (usually wraps text to the next line), the second <p> element with the class .nowrap has nowrap white space handling (does not wrap text to the next line), and the <pre> element with the class .pre displays a preformatted block of text with preserved white space.
You can customize and apply the white-space property to various elements and classes as needed to control how white space is handled within your HTML document.
How to use CSS text-overflow property?
CSS text-overflow: complete code in html
Here’s an example of complete HTML code demonstrating the use of the text-overflow property:
<!DOCTYPE html>
<html>
<head>
<title>Text Overflow Example</title>
<style>
.ellipsis {
white-space: nowrap;
overflow: hidden;
text-overflow: ellipsis;
}
</style>
</head>
<body>
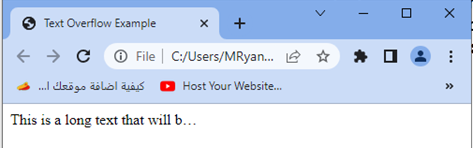
<div class="ellipsis" style="width: 200px;">
This is a long text that will be truncated with an ellipsis if it exceeds the width of the container.
</div>
</body>
</html>
Explanation:
1-In this example, we have defined a class .ellipsis in the <style> block.
2-The .ellipsis class applies the following styles to create a text overflow effect:
- white-space: nowrap; prevents the text from wrapping to the next line.
- overflow: hidden; hides any content that exceeds the dimensions of the container.
- text-overflow: ellipsis; adds an ellipsis (“…”) at the end of the content that is truncated.
3-We then use the .ellipsis class to apply the text overflow effect to a <div> element within the <body> section.
4-The <div> element has a fixed width of 200px, and if the text within it exceeds the available width, it will be truncated with an ellipsis at the end.
You can adjust the width of the container and apply the .ellipsis class to other elements as needed to control the text overflow behavior in your HTML document.
How to use font- shorthand property ?
font: A shorthand property to set multiple font-related properties in a single declaration:complete code in html
Here’s an example of complete HTML code demonstrating the use of the font shorthand property to set multiple font-related properties in a single declaration:
<!DOCTYPE html>
<html>
<head>
<title>Font Shorthand Example</title>
<style>
.custom-font {
font: italic bold 24px/1.5 Arial, sans-serif;
}
</style>
</head>
<body>
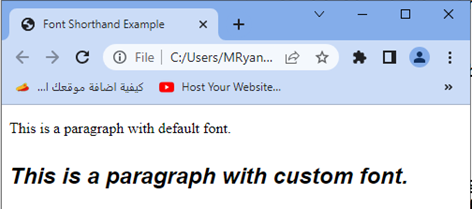
<p>This is a paragraph with default font.</p>
<p class="custom-font">This is a paragraph with custom font.</p>
</body>
</html>
Explanation:
1-In this example, we have defined a class .custom-font in the <style> block.
2-The .custom-font class uses the font shorthand property to set multiple font-related properties:
- italic sets the font style to italic.
- bold sets the font weight to bold.
- 24px sets the font size to 24 pixels.
- /1.5 sets the line height to 1.5 times the font size.
- Arial, sans-serif specifies the font family, with Arial as the preferred font and a fallback of sans-serif.
3-We then use the .custom-font class to apply the custom font styles to the second <p> element within the <body> section.
4-The first <p> element has the default font, and the second <p> element with the class .custom-font has the custom font styles applied.
By using the font shorthand property, you can conveniently set multiple font-related properties in a single declaration, simplifying the code and making it more concise.
You can modify the values of the font shorthand property to match your desired font styles, such as changing the font style, weight, size, line height, and font family.