
CSS Basics: Understanding Selectors, Cascading Order, and Styling | Tutorial
CSS Basics: Selectors, Cascading Order, and Styling
Learn the basics of CSS including selectors, cascading order, and styling. Explore code examples and understand how to create external, internal, and inline CSS styles in HTML. Improve your web design skills with this comprehensive CSS tutorial.
CSS (Cascading Style Sheets) is a language used for describing the look and formatting of a document written in HTML or XML. It allows you to define styles and apply them to elements within the document. The syntax of CSS consists of selectors, properties, and values.
CSS selector ?
CSS selectors allow you to target specific HTML elements and apply styles to them.
Types of selectors
Element Selector:
It selects HTML elements based on their tag name. For example, to select all <h1> elements, you would use the selector h1.
Class Selector:
It selects elements based on the value of their class attribute. Class selectors start with a dot (.) followed by the class name. For example, to select all elements with the class “my-class”, you would use the selector .my-class.
ID Selector:
It selects a single element based on the value of its ID attribute. ID selectors start with a hash (#) followed by the ID name. For example, to select the element with the ID “my-element”, you would use the selector #my-element.
Properties and Values:
CSS properties define the specific style or behavior you want to apply to the selected elements.
Each property is assigned a value to specify the desired effect.
Here’s an example of the syntax:
Selector
{
property1: value1;
property2: value2;
/* more properties */
}
For instance, to set the color and font size of all <p> elements, you can use the following CSS:
P
{
color: blue;
font-size: 16px;
}
Explanation:
1-In the above example, p is the selector, and color and font-size are properties.
2-blue and 16px are the corresponding values assigned to those properties.
3-CSS declarations are enclosed in curly braces ({}) and end with a semicolon (;). You can apply multiple declarations to a single selector by separating them with semicolons.
4-CSS also supports various other selectors, pseudo-classes (e.g., :hover for styling on mouse hover), and pseudo-elements (e.g., ::before to insert content before an element).
5- CSS allows you to group selectors and apply styles to specific elements based on their relationships (e.g., parent-child, sibling).
By using CSS, you can control the layout, colors, fonts, sizes, and other visual aspects of your web page, providing a consistent and appealing appearance across different devices and screen sizes.
Complete code example with html code
Here’s a complete example with HTML and CSS code:
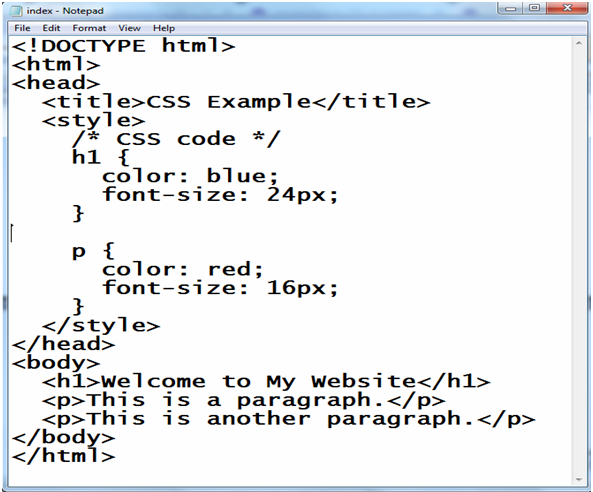
Open notepad or any text editor as you like the write the following code
<!DOCTYPE html>
<html>
<head>
<title>CSS Example</title>
<style>
/* CSS code */
h1 {
color: blue;
font-size: 24px;
}
p {
color: red;
font-size: 16px;
}
</style>
</head>
<body>
<h1>Welcome to My Website</h1>
<p>This is a paragraph.</p>
<p>This is another paragraph.</p>
</body>
</html>
Explanation:
1-In the this example, we have an HTML document enclosed within the <html> tags.
2-Inside the <head> element, we have a <title> tag that sets the title of the webpage.
3-Within the <style> tags, we write our CSS code.
4-In this case, we have two selectors: h1 and p. The h1 selector targets all <h1> elements and applies the specified styles (blue color and a font size of 24 pixels). 5-The p selector targets all <p> elements and applies different styles (red color and a font size of 16 pixels).
6-In the <body> section, we have a <h1> element with the text “Welcome to My Website” and two <p> elements with some sample text.
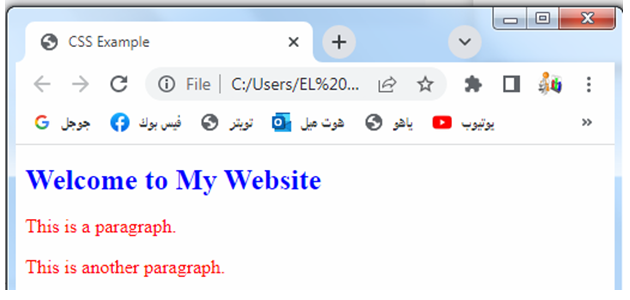
When you open this HTML file in a web browser, you will see the heading in blue color and larger font size, while the paragraphs will be displayed in red color and a slightly smaller font size.
Remember to save the HTML file with a .html extension and the CSS code within the <style> tags or in an external CSS file linked to the HTML file using the <link> tag.
Where we write css code ?
To write CSS code and apply styles to an HTML document, you can follow these step-by-step instructions:
Step 1: Create an HTML file
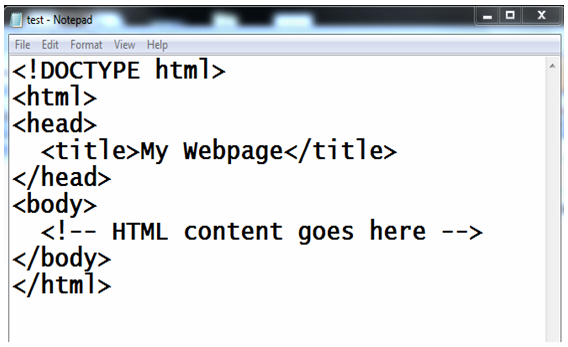
Start by creating a new HTML file with a(name.html) extension.
You can use a text editor like Notepad, Sublime Text, or Visual Studio Code to create and edit the file.
For example:
<!DOCTYPE html> <html> <head> <title>My Webpage</title> </head> <body> <!-- HTML content goes here --> </body> </html>
Step 2: Add a style block or link to an external CSS file
You have two options to include your CSS code:
Option 1: Inline Style
If you prefer to write your CSS code within the HTML file itself, you can add a <style> block inside the <head> section.
For example:
<head>
<title>My Webpage</title>
<style>
/* CSS will be written here */
</style>
</head>
Option 2: External CSS File
Alternatively, you can create a separate CSS file with a(style.css) extension and link it to the HTML file using the <link> tag.
Here’s an example:
<head> <title>My Webpage</title> <link rel="stylesheet" href="styles.css"> </head>
In this case, the CSS code will be written in the “styles.css” file.
Step 3: Write CSS code
Inside the <style> block (for inline styles) or the CSS file (for external styles), you can write your CSS code.
Select the elements you want to style using selectors and apply desired properties and values.
Here’s an example:
h1 {
color: blue;
font-size: 24px;
}
p {
color: red;
font-size: 16px;
}
Explanation:
1-In this example, the CSS code selects all <h1> elements and sets their color to blue and font size to 24 pixels.
It also selects all <p> elements and sets their color to red and font size to 16 pixels.
Step 4: Apply styles to HTML elements
Finally, within the <body> section of your HTML file, add the desired HTML elements (e.g., headings, paragraphs, divs) to which you want to apply the CSS styles.
For example:
<body> <h1>Welcome to My Webpage</h1> <p>This is a paragraph.</p> </body>
In this case, the <h1> element will be styled according to the CSS code for h1, and the <p> element will be styled according to the CSS code for p.
Step 5: Preview the webpage
Save the HTML file, and then open it in a web browser to see the applied styles. The elements should be displayed with the specified CSS properties and values.
That’s it! You have successfully written and applied CSS code to an HTML document.
You can continue adding more CSS rules and HTML elements to further customize the appearance of your webpage.
Types of selectors with complete code ?
There are several types of selectors available. Let’s go through each one with a code example:
Element Selector:
The element selector targets HTML elements based on their tag name.
It selects all instances of that element type on the page.
How to create element selector ?
For example:
p {
color: blue;
}
Explanation:
In the above code, the p selector selects all <p> elements and sets their color to blue.
Class Selector:
The class selector targets elements based on the value of their class attribute.
It starts with a dot (.) followed by the class name.
For example:
.my-class {
font-weight: bold;
}
Explanation:
In the above code, the .my-class selector targets all elements with the class “my-class” and sets their font weight to bold.
To use this selector, add the class attribute to the desired HTML elements:
Example:
<p class="my-class">This paragraph has the class "my-class".</p>
ID Selector:
The ID selector targets a single element based on the value of its id attribute.
It starts with a hash (#) followed by the ID name.
For example:
#my-element {
background-color: yellow;
}
Explanation:
In the above code, the #my-element selector targets the element with the ID “my-element” and sets its background color to yellow.
To use this selector, add the id attribute to the desired HTML element:
<div id="my-element">This div has the ID "my-element".</div>
Attribute Selector:
The attribute selector targets elements based on the value of their attributes. It uses square brackets [ ] to define the attribute and its value.
For example:
input[type="text"] {
border: 1px solid gray;
}
Explanation
In the above code, the input[type=”text”] selector targets all <input> elements with the attribute type set to “text” and sets their border to 1px solid gray.
Pseudo-classes and Pseudo-elements:
Pseudo-classes and pseudo-elements allow you to select elements based on a specific state or position in the document.
Here are a few examples:
a:hover {
color: red;
}
p:first-child {
font-weight: bold;
}
p::before {
content: "Before";
font-style: italic;
}
Explanation:
1-In the above code, the a:hover selector targets anchor elements when they are being hovered over and sets their color to red.
2-The p:first-child selector targets the first child <p> element within its parent and sets its font weight to bold.
3-The p::before selector adds content before each <p> element and styles it with italic font style.
All types of selectrors with complete code example in html
Here’s an example that demonstrates various types of CSS selectors with complete HTML code:
<!DOCTYPE html>
<html>
<head>
<title>CSS Selectors Example</title>
<style>
/* Element Selector */
p {
color: blue;
}
/* Class Selector */
.my-class {
font-weight: bold;
}
/* ID Selector */
#my-element {
background-color: yellow;
}
/* Attribute Selector */
input[type="text"] {
border: 1px solid gray;
}
/* Pseudo-class Selector */
a:hover {
color: red;
}
/* Pseudo-element Selector */
p::before {
content: "Before";
font-style: italic;
}
</style>
</head>
<body>
<h1>Welcome to CSS Selectors Example</h1>
<p>This is a paragraph with the element selector.</p>
<p class="my-class">This is a paragraph with the class selector.</p>
<div id="my-element">This div has the ID selector.</div>
<input type="text" placeholder="Input with attribute selector">
<a href="#">Anchor element with pseudo-class selector</a>
<p>This paragraph has a pseudo-element applied.</p>
</body>
</html>
Explanation:
In the above code, we have included examples for each type of selector:
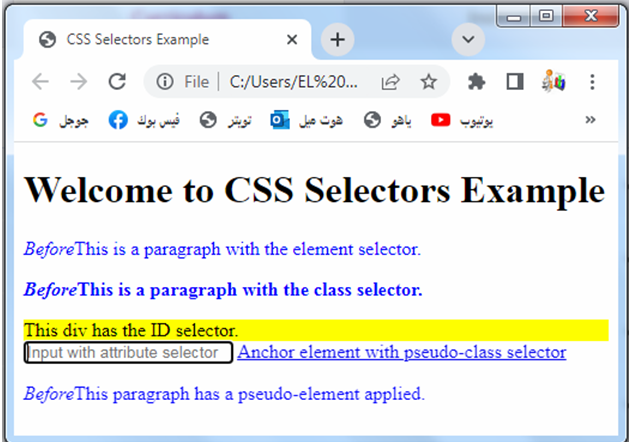
1-Element Selector: The <p> elements are targeted using the element selector, and their color is set to blue.
2-Class Selector: The paragraph with the class “my-class” is targeted using the class selector, and its font weight is set to bold.
3-ID Selector: The <div> element with the ID “my-element” is targeted using the ID selector, and its background color is set to yellow.
4-Attribute Selector: The <input> element with the attribute type set to “text” is targeted using the attribute selector, and its border is set to 1px solid gray.
5-Pseudo-class Selector: The <a> element is targeted with the pseudo-class selector :hover, which changes its color to red when being hovered over.
6-Pseudo-element Selector: The <p> elements have a pseudo-element ::before applied, which adds content “Before” before each <p> element and styles it with italic font style.
When you open this HTML file in a web browser, you will see the effects of the different selectors and their applied styles on the respective elements.
Simple selector with complete code example in html
Here’s a simple selector example with complete HTML code:
<!DOCTYPE html>
<html>
<head>
<title>Simple Selector Example</title>
<style>
/* CSS code */
p {
color: blue;
font-size: 18px;
}
</style>
</head>
<body>
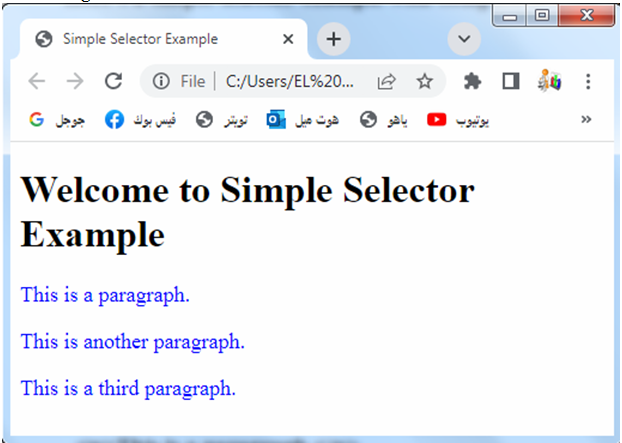
<h1>Welcome to Simple Selector Example</h1>
<p>This is a paragraph.</p>
<p>This is another paragraph.</p>
<p>This is a third paragraph.</p>
</body>
</html>
Explanation:
In the above code, we have a simple example using the element selector to target <p> elements and apply CSS styles to them.
1-CSS code: Inside the <style> tags, we have the selector p which targets all <p> elements. It sets their color to blue and font size to 18 pixels.
2-HTML code: Within the <body> section, we have three <p> elements.
Each paragraph will be affected by the CSS styles defined for the p selector.
When you open this HTML file in a web browser, you will see the three paragraphs displayed with the specified CSS styles. They will have blue text color and a font size of 18 pixels.
This example demonstrates how a simple selector can be used to target specific HTML elements and apply CSS styles to them, providing consistent visual formatting across the selected elements.
Attributes of simple selector
In CSS, a simple selector targets HTML elements based on their tag names.
It does not take any attributes into account. However, you can combine simple selectors with other types of selectors to target elements based on their attributes.
Here’s an example that demonstrates this concept:
<!DOCTYPE html>
<html>
<head>
<title>Simple Selector with Attribute Example</title>
<style>
/* CSS code */
input[type="text"] {
border: 1px solid gray;
padding: 5px;
}
</style>
</head>
<body>
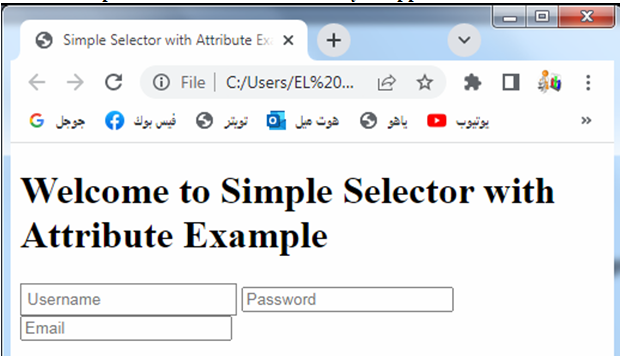
<h1>Welcome to Simple Selector with Attribute Example</h1>
<input type="text" placeholder="Username">
<input type="password" placeholder="Password">
<input type="email" placeholder="Email">
</body>
</html>
Explanation:
In the above code, we are using a simple selector input combined with an attribute selector [type=”text”] to target all <input> elements with the attribute type set to “text”.
1-CSS code: The input[type=”text”] selector targets all <input> elements with the attribute type set to “text”.
It sets a border of 1px solid gray and adds 5 pixels of padding to these input elements.
2-HTML code: Within the <body> section, we have three <input> elements with different type attributes: text, password, and email.
Only the <input> element with type=”text” will be affected by the CSS styles defined for the input[type=”text”] selector.
When you open this HTML file in a web browser, you will see that the input field with type=”text” (the one for entering the username) will have a gray border and 5 pixels of padding.
The other input fields will not have these styles applied to them.
This example demonstrates how you can combine a simple selector with an attribute selector to target specific HTML elements based on their attributes and apply CSS styles to them accordingly.
Simple selector by name
In CSS, you cannot directly target elements by their name using a simple selector.
However, you can achieve similar functionality by using class or ID selectors. Here’s an example that demonstrates this concept:
<!DOCTYPE html>
<html>
<head>
<title>Simple Selector by Name Example</title>
<style>
/* CSS code */
.my-element {
color: blue;
font-size: 18px;
}
</style>
</head>
<body>
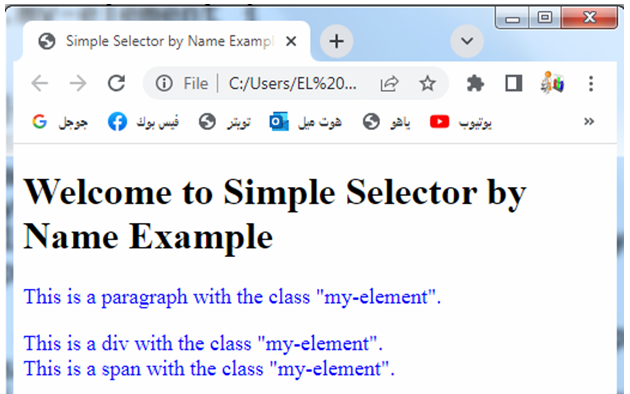
<h1>Welcome to Simple Selector by Name Example</h1>
<p class="my-element">This is a paragraph with the class "my-element".</p>
<div class="my-element">This is a div with the class "my-element".</div>
<span class="my-element">This is a span with the class "my-element".</span>
</body>
</html>
Explanation:
1-In the above code, we are using class selectors to target elements based on their names indirectly.
2-CSS code: The .my-element selector targets all elements with the class “my-element”.
It sets their color to blue and font size to 18 pixels.
3-HTML code: Within the <body> section, we have three elements (a <p>, <div>, and <span>) that all have the class “my-element” applied to them.
These elements will be affected by the CSS styles defined for the .my-element selector.
When you open this HTML file in a web browser, you will see that all three elements (paragraph, div, and span) will have blue text color and a font size of 18 pixels.
By using the class selector, we indirectly target elements by their names and apply consistent styles to them.
Note: If you have the ability to modify the HTML structure and add custom attributes to the desired elements, you can also use attribute selectors to target elements by name. For example, you can add a custom attribute like data-name=”my-element” to the elements and then target them using the attribute selector [data-name=”my-element”].
simple selector by ID with complete code example in html
In CSS, you can target elements by their ID using a simple selector.
Here’s an example that demonstrates targeting elements by ID using a simple selector:
<!DOCTYPE html>
<html>
<head>
<title>Simple Selector by ID Example</title>
<style>
/* CSS code */
#my-element {
color: blue;
font-size: 18px;
}
</style>
</head>
<body>
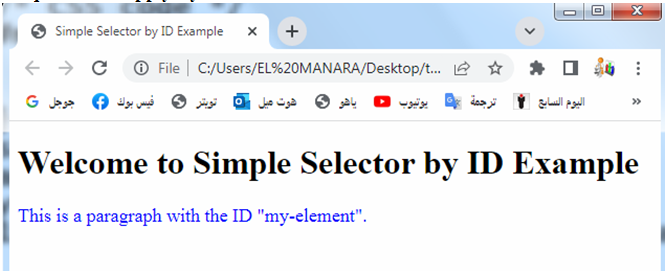
<h1>Welcome to Simple Selector by ID Example</h1>
<p id="my-element">This is a paragraph with the ID "my-element".</p>
</body>
</html>
Explanation:
1-In the above code, we are using the ID selector to target an element directly by its ID.
2-CSS code: The #my-element selector targets the element with the ID “my-element”. It sets its color to blue and font size to 18 pixels.
3-HTML code: Within the <body> section, we have a <p> element with the ID “my-element” applied to it. This element will be affected by the CSS styles defined for the #my-element selector.
When you open this HTML file in a web browser, you will see that the paragraph with the ID “my-element” will have blue text color and a font size of 18 pixels. The ID selector allows you to target a specific element directly by its unique ID and apply styles to it.
It’s important to note that in HTML, the ID attribute must be unique within the document. Therefore, you can only apply the same ID value to a single element.
If you have multiple elements that need to share a common style, it’s recommended to use class selectors instead.
simple selector by class with complete code example
Here’s an example that demonstrates targeting elements by class using a simple selector:
<!DOCTYPE html>
<html>
<head>
<title>Simple Selector by Class Example</title>
<style>
/* CSS code */
.my-class {
color: blue;
font-size: 18px;
}
</style>
</head>
<body>
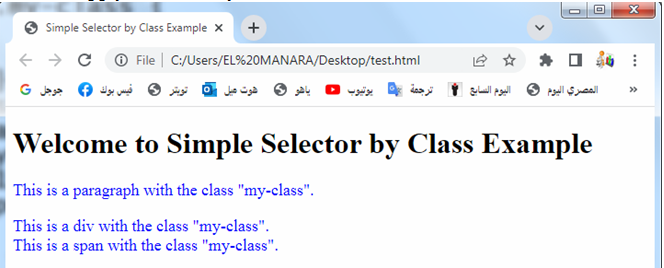
<h1>Welcome to Simple Selector by Class Example</h1>
<p class="my-class">This is a paragraph with the class "my-class".</p>
<div class="my-class">This is a div with the class "my-class".</div>
<span class="my-class">This is a span with the class "my-class".</span>
</body>
</html>
Explanation:
1-In the above code, we are using the class selector to target elements by their class names.
2-CSS code: The .my-class selector targets all elements with the class “my-class”. It sets their color to blue and font size to 18 pixels.
3-HTML code: Within the <body> section, we have a <p> element, a <div> element, and a <span> element, all with the class “my-class” applied to them. These elements will be affected by the CSS styles defined for the .my-class selector.
When you open this HTML file in a web browser, you will see that all three elements (paragraph, div, and span) will have blue text color and a font size of 18 pixels. The class selector allows you to target multiple elements with the same class and apply consistent styles to them.
By using the class selector, you can apply a specific style to multiple elements throughout your HTML document, providing consistent formatting across those elements.
simple universal selector with complete code example in html
Here’s an example that demonstrates the use of a simple universal selector in CSS with complete HTML code:
<!DOCTYPE html>
<html>
<head>
<title>Simple Universal Selector Example</title>
<style>
/* CSS code */
* {
margin: 0;
padding: 0;
box-sizing: border-box;
}
/* Additional CSS styles for demonstration purposes */
body {
font-family: Arial, sans-serif;
background-color: #f2f2f2;
}
h1 {
color: blue;
text-align: center;
}
p {
color: green;
}
a {
text-decoration: none;
color: red;
}
</style>
</head>
<body>
<h1>Welcome to Simple Universal Selector Example</h1>
<p>This is a paragraph.</p>
<p>This is another paragraph.</p>
<a href="#">This is a link</a>
</body>
</html>
Explanation:
1-In the above code, we are using the simple universal selector (*) in CSS to target all elements in the HTML document.
2-CSS code: The * selector targets all elements on the page.
In this example, we’re using it to set the margin and padding of all elements to 0 and applying the box-sizing: border-box property to ensure consistent box sizing throughout the document.
3-Additional CSS styles: We’ve added some additional CSS styles to demonstrate the effect of the universal selector.
For example, we set the font family of the body element, the color of h1 headings, the color of p paragraphs, and the link styles for a elements.
4-HTML code: Within the <body> section, we have an <h1> heading, two <p> paragraphs, and an <a> link. All of these elements will be affected by the CSS styles defined for the universal selector and other selectors.
When you open this HTML file in a web browser, you will see that all the elements in the document are affected by the universal selector’s styles. The margin and padding will be set to 0 for all elements, and the box-sizing: border-box property will ensure consistent box sizing.

The universal selector is a powerful tool for applying global styles or resets to all elements in an HTML document. However, it should be used with caution, as it can override specific styles and potentially lead to unintended consequences.
combinatory selector with complete code example in html
Here’s an example that demonstrates different types of combinator selectors in CSS with complete HTML code:
<!DOCTYPE html>
<html>
<head>
<title>Combinator Selector Example</title>
<style>
/* CSS code */
/* Descendant Selector */
div p {
color: blue;
}
/* Child Selector */
ul > li {
font-weight: bold;
}
/* Adjacent Sibling Selector */
h2 + p {
font-style: italic;
}
/* General Sibling Selector */
p ~ span {
text-decoration: underline;
}
</style>
</head>
<body>
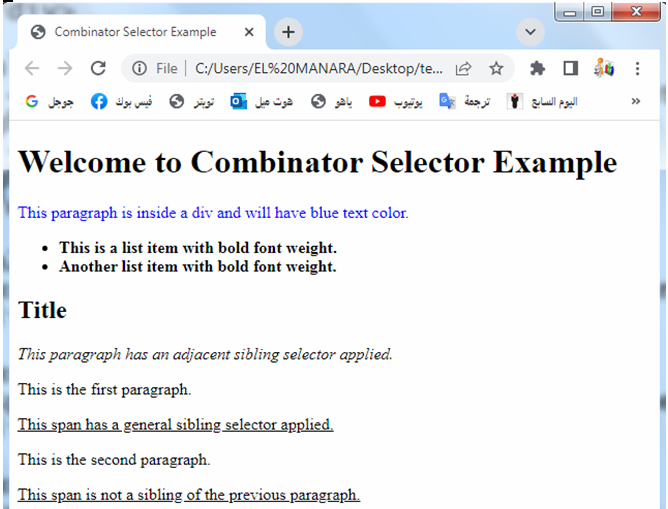
<h1>Welcome to Combinator Selector Example</h1>
<div>
<p>This paragraph is inside a div and will have blue text color.</p>
</div>
<ul>
<li>This is a list item with bold font weight.</li>
<li>Another list item with bold font weight.</li>
</ul>
<h2>Title</h2>
<p>This paragraph has an adjacent sibling selector applied.</p>
<p>This is the first paragraph.</p>
<span>This span has a general sibling selector applied.</span>
<p>This is the second paragraph.</p>
<span>This span is not a sibling of the previous paragraph.</span>
</body>
</html>
Explanation:
In the above code, we have used different combinator selectors to target specific elements based on their relationship to other elements:
1-Descendant Selector: The div p selector targets <p> elements that are descendants of a <div>.
The selected paragraphs will have blue text color.
2-Child Selector: The ul > li selector targets <li> elements that are direct children of a <ul>. The selected list items will have a bold font weight.
3-Adjacent Sibling Selector: The h2 + p selector targets <p> elements that immediately follow an <h2>.
The selected paragraph will have an italic font style.
4-General Sibling Selector: The p ~ span selector targets <span> elements that are siblings of a <p>.
The selected spans will have an underline text decoration.
When you open this HTML file in a web browser, you will see the effects of the combinator selectors on the respective elements. The targeted elements will have the specified styles applied to them based on their relationships with other elements.
pseudo-class selector with complete code example in html
Here’s an example that demonstrates the use of pseudo-class selectors in CSS with complete HTML code:
<!DOCTYPE html>
<html>
<head>
<title>Pseudo-Class Selector Example</title>
<style>
/* CSS code */
/* Link Pseudo-Classes */
a:link {
color: blue;
}
a:hover {
color: red;
}
a:visited {
color: purple;
}
a:active {
color: green;
}
/* Form Pseudo-Classes */
input:focus {
border: 2px solid red;
}
input:required {
background-color: yellow;
}
/* nth-child Pseudo-Class */
ul li:nth-child(odd) {
background-color: lightgray;
}
ul li:nth-child(even) {
background-color: white;
}
</style>
</head>
<body>
<h1>Welcome to Pseudo-Class Selector Example</h1>
<p>Try interacting with the links and form input field:</p>
<a href="#">Normal Link</a>
<br>
<a href="#" class="visited">Visited Link</a>
<br>
<a href="#" class="hover">Hovered Link</a>
<br>
<a href="#" class="active">Active Link</a>
<br><br>
<form>
<label for="name">Name:</label>
<input type="text" id="name" required>
</form>
<br>
<ul>
<li>List Item 1</li>
<li>List Item 2</li>
<li>List Item 3</li>
<li>List Item 4</li>
<li>List Item 5</li>
</ul>
</body>
</html>
Explanation:
In the above code, we have used various pseudo-class selectors to target elements based on their states or positions:
1-Link Pseudo-Classes: The a:link, a:hover, a:visited, and a:active selectors target links in different states.
They set different colors for links based on whether they are unvisited, hovered, visited, or active.
2-Form Pseudo-Classes: The input:focus and input:required selectors target form input fields.
They add styles to the input field when it is focused (clicked or selected) and when it has the “required” attribute.
3-nth-child Pseudo-Class: The ul li:nth-child(odd) and ul li:nth-child(even) selectors target list items within an unordered list.
They apply alternating background colors to the list items based on their positions.
When you open this HTML file in a web browser, you can interact with the links and form input field to see the effects of the pseudo-class selectors. The targeted elements will have the specified styles applied to them based on their states or positions.

pseudo-element selector with complete code example in html
Here’s an example that demonstrates the use of pseudo-element selectors in CSS with complete HTML code:
<!DOCTYPE html>
<html>
<head>
<title>Pseudo-Element Selector Example</title>
<style>
/* CSS code */
/* ::before Pseudo-Element */
.box::before {
content: "Before";
color: red;
font-weight: bold;
}
/* ::after Pseudo-Element */
.box::after {
content: "After";
color: blue;
font-style: italic;
}
/* ::first-letter Pseudo-Element */
p::first-letter {
font-size: 24px;
color: green;
}
/* ::first-line Pseudo-Element */
p::first-line {
font-weight: bold;
text-decoration: underline;
}
</style>
</head>
<body>
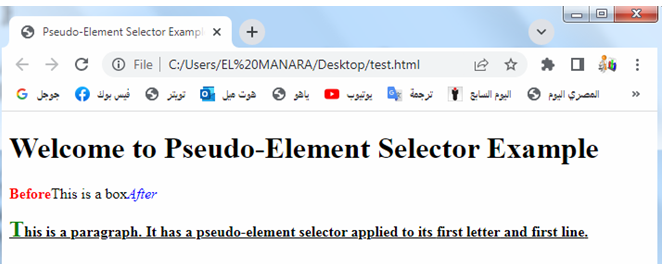
<h1>Welcome to Pseudo-Element Selector Example</h1>
<div class="box">This is a box</div>
<p>
This is a paragraph. It has a pseudo-element selector applied to its <span>first letter</span> and <span>first line</span>.
</p>
</body>
</html>
Explanation:
In the above code, we have used different pseudo-element selectors to style specific parts of elements:
1- ::before Pseudo-Element: The .box::before selector targets the ::before pseudo-element of the element with the class “box”.
It adds content before the element and applies specific styles to it.
2- ::after Pseudo-Element: The .box::after selector targets the ::after pseudo-element of the element with the class “box”.
It adds content after the element and applies specific styles to it.
3- ::first-letter Pseudo-Element: The p::first-letter selector targets the ::first-letter pseudo-element of the <p> element.
It applies styles specifically to the first letter of the paragraph.
4- ::first-line Pseudo-Element: The p::first-line selector targets the ::first-line pseudo-element of the <p> element.
It applies styles specifically to the first line of the paragraph.
When you open this HTML file in a web browser, you will see the effects of the pseudo-element selectors. The targeted parts of the elements will have the specified styles applied to them.
Aattribute selector with complete code example
Here’s an example that demonstrates the use of attribute selectors in CSS with complete HTML code:
<!DOCTYPE html>
<html>
<head>
<title>Attribute Selector Example</title>
<style>
/* CSS code */
/* Attribute Presence Selector */
[title] {
color: blue;
font-weight: bold;
}
/* Attribute Value Selector */
a[href="https://www.example.com"] {
color: red;
text-decoration: underline;
}
/* Attribute Starts With Selector */
a[href^="https://"] {
background-color: yellow;
}
/* Attribute Ends With Selector */
a[href$=".pdf"] {
color: green;
}
/* Attribute Contains Selector */
input[type*="password"] {
background-color: lightgray;
}
</style>
</head>
<body>
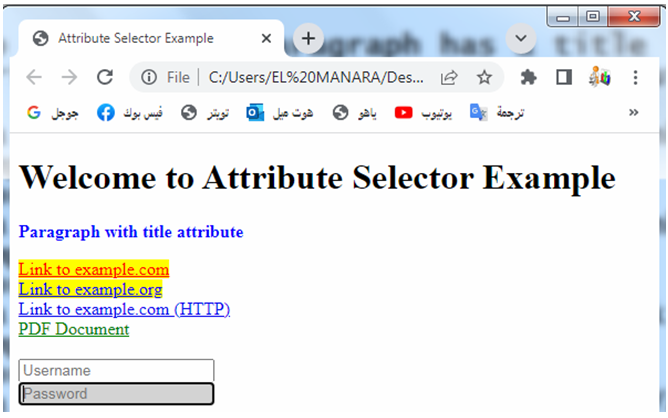
<h1>Welcome to Attribute Selector Example</h1>
<p title="This paragraph has a title attribute">Paragraph with title attribute</p>
<a href="https://www.example.com">Link to example.com</a>
<br>
<a href="https://www.example.org">Link to example.org</a>
<br>
<a href="http://www.example.com">Link to example.com (HTTP)</a>
<br>
<a href="document.pdf">PDF Document</a>
<br><br>
<input type="text" placeholder="Username">
<br>
<input type="password" placeholder="Password">
</body>
</html>
Explanation:
In the above code, we have used different attribute selectors to target elements based on their attributes:
1-Attribute Presence Selector: The [title] selector targets elements that have a title attribute.
It applies blue text color and bold font weight to those elements.
2-Attribute Value Selector: The a[href=”https://www.example.com”] selector targets <a> elements with an href attribute equal to https://www.example.com”.
It applies red text color and underlines the links.
3-Attribute Starts With Selector: The a[href^=”https://”] selector targets <a> elements with an href attribute that starts with “https://”.
It applies a yellow background color to those links.
4-Attribute Ends With Selector: The a[href$=”.pdf”] selector targets <a> elements with an href attribute that ends with “.pdf”.
It applies green text color to those links.
5-Attribute Contains Selector: The input[type*=”password”] selector targets <input> elements with a type attribute containing the word “password”.
It applies a light gray background color to those input fields.
When you open this HTML file in a web browser, you will see the effects of the attribute selectors. The targeted elements will have the specified styles applied to them based on their attributes.
CSS grouping selector with complete code example in html
Here’s an example that demonstrates the use of grouping selectors in CSS with complete HTML code:
<!DOCTYPE html>
<html>
<head>
<title>Grouping Selector Example</title>
<style>
/* CSS code */
/* Grouping Selector */
h1, h2, h3 {
color: blue;
}
p, span {
font-style: italic;
}
</style>
</head>
<body>
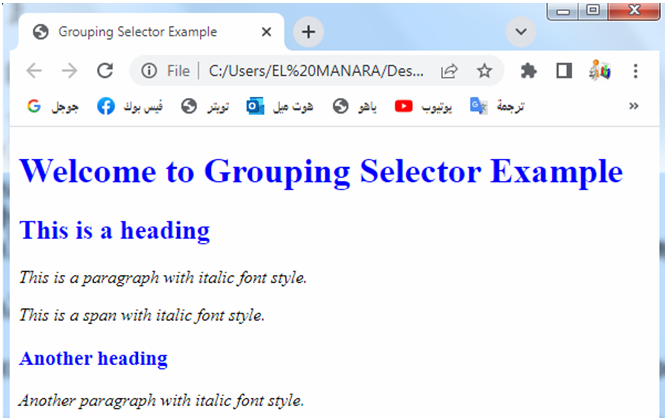
<h1>Welcome to Grouping Selector Example</h1>
<h2>This is a heading</h2>
<p>This is a paragraph with italic font style.</p>
<span>This is a span with italic font style.</span>
<h3>Another heading</h3>
<p>Another paragraph with italic font style.</p>
</body>
</html>
Explanation:
In the above code, we have used grouping selectors to apply styles to multiple elements at once:
1-Grouping Selector: The h1, h2, h3 selector targets <h1>, <h2>, and <h3> elements. It applies a blue color to the headings.
2-Grouping Selector: The p, span selector targets <p> and <span> elements. It applies an italic font style to the paragraphs and spans.
When you open this HTML file in a web browser, you will see the effects of the grouping selectors. The targeted elements will have the specified styles applied to them based on the grouping selectors.
Cascading order
The cascading order, also known as the cascade or specificity, determines how conflicting CSS rules are applied to elements.
The cascading order follows a set of rules to determine which styles take precedence when multiple rules target the same element. The order of precedence is as follows:
1-Inline Styles:
Styles defined directly on an element using the style attribute have the highest precedence. Inline styles override all other styles.
2-ID Selectors:
Styles applied using an ID selector (#elementId) have a higher specificity than other selectors.
If multiple rules target the same element using ID selectors, the last defined rule takes precedence.
3-Class Selectors, Attribute Selectors, and Pseudo-Classes:
Styles applied using class selectors (.className), attribute selectors ([attribute]), or pseudo-classes (:pseudo-class) have lower specificity than ID selectors.
If conflicting rules target the same element using these selectors, the last defined rule takes precedence.
4-Element Selectors and Pseudo-Elements:
Styles applied using element selectors (elementName) or pseudo-elements (::pseudo-element) have the lowest specificity. If conflicting rules target the same element using these selectors, the last defined rule takes precedence.
5-Inheritance:
If no specific styles are applied to an element, it inherits styles from its parent elements. Inheritance allows styles defined on higher-level elements to propagate to their child elements.
It’s important to note that the !important declaration can override the cascading order. When a style rule is defined with the !important keyword, it takes the highest precedence and overrides all other styles, including inline styles and ID selectors. However, it is generally recommended to use !important sparingly as it can make the CSS code harder to maintain.
Understanding the cascading order helps ensure that styles are applied consistently and allows developers to control how conflicting styles are resolved.
complete code example in html
Here’s a complete HTML code example that demonstrates the cascading order in CSS:
<!DOCTYPE html>
<html>
<head>
<title>Cascading Order Example</title>
<style>
/* CSS code */
/* Inline Style */
h1 {
color: red;
font-size: 24px;
}
/* ID Selector */
#heading {
color: blue;
font-weight: bold;
}
/* Class Selector */
.text {
color: green;
font-style: italic;
}
/* Element Selector */
p {
font-size: 18px;
}
</style>
</head>
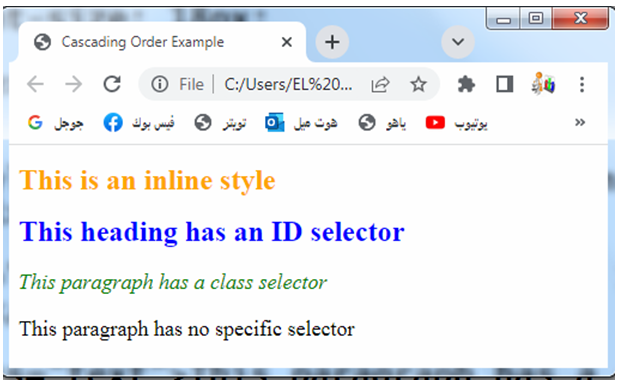
<body>
<h1 style="color: orange;">This is an inline style</h1>
<h1 id="heading">This heading has an ID selector</h1>
<p class="text">This paragraph has a class selector</p>
<p>This paragraph has no specific selector</p>
</body>
</html>
Explanation:
In the above code, we have used different selectors with conflicting styles to demonstrate the cascading order:
1-Inline Style: The inline style applied directly on the <h1> element using the style attribute gives it an orange color. Inline styles have the highest precedence.
2-ID Selector: The #heading selector targets the <h1> element with the ID “heading” and applies a blue color and bold font weight to it.
ID selectors have higher precedence than class and element selectors.
3-Class Selector: The .text selector targets the <p> element with the class “text” and applies a green color and italic font style to it.
4-Element Selector: The p selector targets all <p> elements and sets their font size to 18px. Element selectors have the lowest precedence.
When you open this HTML file in a web browser, you will see that the styles are applied based on the cascading order. The styles defined by the inline style and ID selector take precedence over the class and element selectors.
How to create external css file: step by step ?
To create an external CSS file and link it to your HTML document, follow these step-by-step instructions:
Step 1: Create a new CSS file
Create a new file with a .css extension using a text editor or an integrated development environment (IDE).
You can name it anything you like, but it’s common to use a name that reflects its purpose, such as styles.css.
Step 2: Write CSS code in the external file
In the CSS file, write your CSS code to style your HTML elements.
For example, you can define selectors, properties, and values to set the desired styles.
Here’s an example of CSS code in the external file:
/* styles.css */
body {
font-family: Arial, sans-serif;
background-color: #f0f0f0;
}
h1 {
color: #333333;
text-align: center;
}
p {
font-size: 16px;
line-height: 1.5;
}
Step 3: Save the CSS file
Save the CSS file with the appropriate name and the .css extension.
Make sure to save it in the same directory or folder as your HTML file or in a location accessible to your HTML document.
Step 4: Link the CSS file in the HTML document
In your HTML file, add a <link> element inside the <head> section to link the external CSS file. Set the href attribute to the path of the CSS file.
Here’s an example of how to link the CSS file:
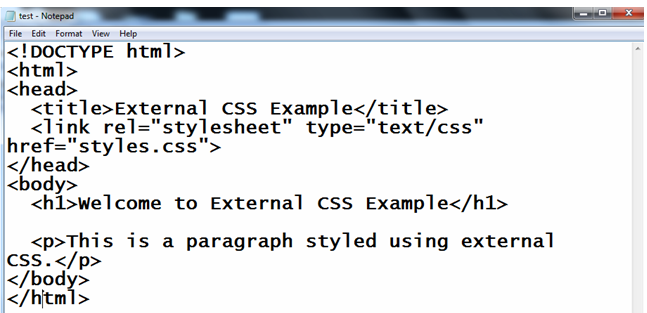
<!DOCTYPE html> <html> <head> <title>External CSS Example</title> <link rel="stylesheet" type="text/css" href="styles.css"> </head> <body> <h1>Welcome to External CSS Example</h1> <p>This is a paragraph styled using external CSS.</p> </body> </html>
Explanation:
In the above code, the <link> element specifies the rel attribute as “stylesheet” to indicate that it’s linking a stylesheet.
The type attribute is set to “text/css” to define the MIME type. Finally, the href attribute points to the path of the CSS file (styles.css in this example).
Step 5: Save and view the HTML document
Save the HTML file, ensuring that it is in the same directory as the CSS file. Open the HTML file in a web browser, and you will see that the styles defined in the external CSS file are applied to the HTML elements.
By linking an external CSS file to your HTML document, you can easily manage and apply consistent styles across multiple web pages by modifying the CSS file.
How to create internal css in:step by step ?
To create internal CSS in HTML, follow these step-by-step instructions:
Step 1: Create a new HTML file
Create a new file with a .html extension using a text editor or an integrated development environment (IDE). You can name it anything you like.
Step 2: Set up the basic HTML structure
In the HTML file, set up the basic HTML structure by adding the required HTML tags. Here’s an example of a basic HTML structure:
<!DOCTYPE html> <html> <head> <title>Internal CSS Example</title> </head> <body> <!-- Your HTML content goes here --> </body> </html>
Step 3: Add the <style> element within the <head> section
Inside the <head> section of your HTML file, add the <style> element to define the internal CSS styles. The <style> element is used to enclose your CSS code within the HTML document.
Here’s an example:
<!DOCTYPE html>
<html>
<head>
<title>Internal CSS Example</title>
<style>
/* Your CSS code goes here */
body {
font-family: Arial, sans-serif;
background-color: #f0f0f0;
}
h1 {
color: #333333;
text-align: center;
}
p {
font-size: 16px;
line-height: 1.5;
}
</style>
</head>
<body>
<!-- Your HTML content goes here -->
<h1>Welcome to Internal CSS Example</h1>
<p>This is a paragraph styled using internal CSS.</p>
</body>
</html>
Step 4: Save and view the HTML document
Save the HTML file with the appropriate name and the .html extension. Open the HTML file in a web browser, and you will see that the styles defined within the <style> element are applied to the HTML elements.
In the example above, the CSS code is placed inside the <style> element. The CSS code targets specific HTML elements (e.g., body, h1, p) and sets the desired styles for those elements.
Using internal CSS allows you to define styles within the HTML document itself. However, note that internal CSS applies only to that specific HTML file. If you want to reuse styles across multiple HTML files, it’s recommended to use an external CSS file and link it to your HTML documents.
How to create css inline in html: step by step?
To create CSS inline in HTML, follow these step-by-step instructions:
Step 1: Create a new HTML file
Create a new file with a .html extension using a text editor or an integrated development environment (IDE). You can name it anything you like.
Step 2: Set up the basic HTML structure
In the HTML file, set up the basic HTML structure by adding the required HTML tags. Here’s an example of a basic HTML structure:
<!DOCTYPE html> <html> <head> <title>Inline CSS Example</title> </head> <body> <!-- Your HTML content goes here --> </body> </html>
Step 3: Add inline styles to HTML elements
Inside the <body> section of your HTML file, add the desired HTML elements and apply inline styles using the style attribute.
The style attribute allows you to define CSS properties and values directly within the HTML tag.
Here’s an example:
<!DOCTYPE html> <html> <head> <title>Inline CSS Example</title> </head> <body> <!-- Your HTML content goes here --> <h1 style="color: blue; text-align: center;">Welcome to Inline CSS Example</h1> <p style="font-size: 16px; line-height: 1.5;">This is a paragraph styled using inline CSS.</p> </body> </html>
In the above code, the <h1> element has inline styles defined using the style attribute.
The color property is set to “blue” and the text-align property is set to “center”. Similarly, the <p> element has inline styles defined for font-size and line-height.
Step 4: Save and view the HTML document
Save the HTML file with the appropriate name and the .html extension.
Open the HTML file in a web browser, and you will see that the inline styles defined within the HTML tags are applied to the HTML elements.
Using inline styles allows you to define styles directly within the HTML tags.
It gives you the flexibility to apply specific styles to individual elements. However, note that inline styles can make the HTML code harder to maintain and reuse styles across multiple elements.
It’s recommended to use inline styles sparingly and consider using internal CSS or external CSS for more comprehensive styling.
Cascading order with complete code example in html
Here’s a complete HTML code example that demonstrates the cascading order in CSS:
<!DOCTYPE html>
<html>
<head>
<title>Cascading Order Example</title>
<style>
/* CSS code */
/* Inline Style */
h1 {
color: red;
font-size: 24px;
}
/* ID Selector */
#heading {
color: blue;
font-weight: bold;
}
/* Class Selector */
.text {
color: green;
font-style: italic;
}
/* Element Selector */
p {
font-size: 18px;
}
</style>
</head>
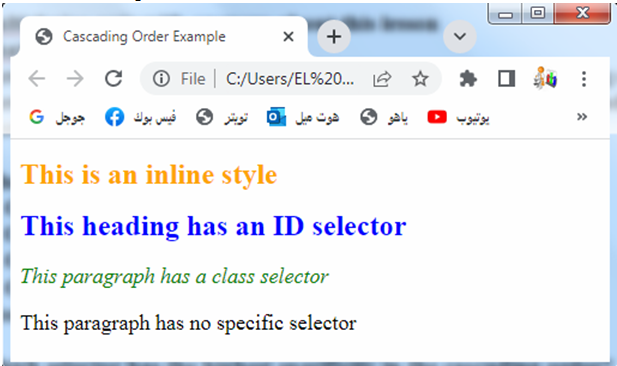
<body>
<h1 style="color: orange;">This is an inline style</h1>
<h1 id="heading">This heading has an ID selector</h1>
<p class="text">This paragraph has a class selector</p>
<p>This paragraph has no specific selector</p>
</body>
</html>
Explanation:
In the above code, we have used different selectors with conflicting styles to demonstrate the cascading order:
1-Inline Style: The inline style applied directly on the <h1> element using the style attribute gives it an orange color.
Inline styles have the highest precedence.
2-ID Selector: The #heading selector targets the <h1> element with the ID “heading” and applies a blue color and bold font weight to it.
ID selectors have higher precedence than class and element selectors.
3-Class Selector: The .text selector targets the <p> element with the class “text” and applies a green color and italic font style to it.
4-Element Selector: The p selector targets all <p> elements and sets their font size to 18px.
Element selectors have the lowest precedence.
When you open this HTML file in a web browser, you will see that the styles are applied based on the cascading order. The styles defined by the inline style and ID selector take precedence over the class and element selectors.
Quiz with answers about this lesson
Here’s a multiple-choice quiz about CSS and the cascading order. Each question is followed by four possible answers, labeled A, B, C, and D. The correct answer is indicated with [Correct Answer].
1-What does CSS stand for?
- Cascading Style Sheets
- Creative Style System
- Computer Styling Software
- Current Style Selector
[Correct Answer: A]
2-Which selector has the highest specificity in the cascading order?
- Class Selector
- ID Selector
- Element Selector
- Inline Style
[Correct Answer: B]
3-What is the purpose of the “style” attribute in HTML?
- To link an external CSS file
- To define inline styles
- To specify pseudo-elements
- To group multiple selectors
[Correct Answer: B]
4-Which CSS selector targets all elements of a specific type?
- Class Selector
- ID Selector
- Element Selector
- Universal Selector
[Correct Answer: C]
5-Which selector has the lowest specificity in the cascading order?
- Class Selector
- ID Selector
- Element Selector
- Universal Selector
[Correct Answer: D]
6-What is the purpose of the “style” tag in HTML?
- To define inline styles
- To link an external CSS file
- To specify pseudo-classes
- To group multiple selectors
[Correct Answer: A]
7-Which selector is represented by a dot (.) in CSS?
- Class Selector
- ID Selector
- Element Selector
- Attribute Selector
[Correct Answer: A]
8-Which selector is represented by a hash/pound sign (#) in CSS?
- Class Selector
- ID Selector
- Element Selector
- Pseudo-Class Selector
[Correct Answer: B]
9-Which selector targets elements based on a specific attribute value?
- Class Selector
- ID Selector
- Element Selector
- Attribute Selector
[Correct Answer: D]
10-What is the default inheritance behavior in CSS?
- Styles are inherited from child elements to parent elements.
- Styles are inherited from parent elements to child elements.
- Styles are not inherited by any elements.
- Inheritance behavior can be specified using the “inherit” keyword.
[Correct Answer: B]
11-Which of the following is not a valid CSS unit of measurement?
- px
- em
- vh
- cm
- ex
[Correct Answer: E]
12-What is the correct syntax for applying multiple CSS classes to an HTML element?
- class=”class1,class2″
- class=”class1 class2″
- class=”class1;class2″
- class=”class1 & class2″
[Correct Answer: B]
13-Which CSS property is used to add space between the border and content of an element?
- margin
- padding
- border
- spacing
[Correct Answer: B]
14-What is the purpose of the CSS box model?
- It defines the layout and positioning of elements on a web page.
- It specifies the visual style and appearance of elements.
- It determines the dimensions and spacing of elements.
- It controls the behavior and interactivity of elements.
[Correct Answer: C]
15-Which CSS property is used to create rounded corners on an element?
- border-radius
- corner-radius
- box-radius
- border-style
[Correct Answer: A]
16-Which CSS property is used to control the transparency of an element?
- opacity
- transparency
- visibility
- background-opacity
[Correct Answer: A]
17-What is the purpose of the CSS “float” property?
- It controls the horizontal alignment of an element.
- It controls the vertical alignment of an element.
- It controls the stacking order of overlapping elements.
- It controls the display of an element as a block or inline.
[Correct Answer: A]
18-Which CSS property is used to control the spacing between lines of text?
- line-height
- text-spacing
- letter-spacing
- line-spacing
[Correct Answer: A]
19-What does the CSS property “display: none” do?
- It hides the element from view.
- It makes the element transparent.
- It removes the element from the document flow.
- It collapses the element’s margin and padding.
[Correct Answer: A]
20-Which CSS property is used to create drop shadows for an element?
- box-shadow
- text-shadow
- drop-shadow
- shadow-effect
[Correct Answer: A]
21-Which CSS property is used to change the background color of an element?
- background-color
- color
- background-image
- border-color
[Correct Answer: A]
22-Which CSS property is used to align text horizontally within an element?
- text-align
- align
- justify
- float
[Correct Answer: A]
23-Which CSS property is used to change the font family of an element?
- font-family
- font-style
- font-size
- font-weight
[Correct Answer: A]
24-What does the CSS property “position: relative” do?
- It positions an element relative to its normal position.
- It positions an element absolutely within its containing element.
- It positions an element at a fixed position on the screen.
- It positions an element based on the flow of the document.
[Correct Answer: A]
25-Which CSS property is used to control the visibility of an element?
- visibility
- display
- opacity
- hidden
[Correct Answer: A]
26-What is the purpose of the CSS “media queries”?
- To apply different styles based on the user’s device or screen size.
- To apply animation effects to elements.
- To control the layout and positioning of elements.
- To specify font styles and sizes.
[Correct Answer: A]
27-Which CSS property is used to control the order of elements within a flex container?
- order
- flex-order
- flex-direction
- flex-wrap
[Correct Answer: A]
28-What is the purpose of the CSS “transition” property?
- To specify the duration and timing function for CSS animations.
- To create smooth transitions between different CSS states.
- To control the transformation and rotation of elements.
- To apply gradient backgrounds to elements.
[Correct Answer: B]
29-Which CSS property is used to control the spacing between columns of a CSS grid?
- grid-column-gap
- column-gap
- gap
- grid-gap
[Correct Answer: B]
30-What is the purpose of the CSS “transform” property?
- To apply 3D transformations to elements.
- To scale, rotate, or translate elements.
- To create transitions and animations.
- To control the visibility of elements.
[Correct Answer: B]