HTML Canvas :Colors, Styles, and Shadows
HTML Canvas :Colors, Styles, and Shadows
In HTML canvas, you can apply colors, styles, and shadows to create visually appealing and engaging graphics.
Here’s an explanation of how you can use colors, styles, and shadows in HTML canvas:
Colors:
Fill Color: Use the fillStyle property of the canvas context to set the fill color. You can specify colors using CSS color values such as named colors, RGB, RGBA, HSL, or HEX values.
Stroke Color: Use the strokeStyle property of the canvas context to set the stroke color. It works similarly to fillStyle and accepts the same color values.
Styles:
Solid Color:
The default style is a solid color fill and stroke. You can set it by assigning a color value to the fillStyle and strokeStyle properties.
Gradient:
You can create linear or radial gradients using the createLinearGradient(x0, y0, x1, y1) or createRadialGradient(x0, y0, r0, x1, y1, r1) methods of the canvas context. Gradients allow you to smoothly transition from one color to another.
Pattern:
You can create patterns using the createPattern(image, repetition) method of the canvas context. The image parameter can be an HTMLImageElement, HTMLCanvasElement, or HTMLVideoElement, and the repetition parameter specifies how the pattern should be repeated.
Shadows:
Shadow Color:
Use the shadowColor property of the canvas context to set the color of the shadow.
Shadow Blur:
Use the shadowBlur property of the canvas context to specify the blur radius of the shadow.
Shadow Offset:
Use the shadowOffsetX and shadowOffsetY properties of the canvas context to set the horizontal and vertical offsets of the shadow.
Here’s an example that demonstrates how to use colors, styles, and shadows in HTML canvas:
<!DOCTYPE html>
<html>
<head>
<title>Canvas Colors, Styles, and Shadows Example</title>
<style>
canvas {
border: 1px solid black;
}
</style>
</head>
<body>
<canvas id="myCanvas" width="400" height="200"></canvas>
<script>
// Get the canvas element and the 2D rendering context
var canvas = document.getElementById("myCanvas");
var ctx = canvas.getContext("2d");
// Set fill color
ctx.fillStyle = "blue";
// Set stroke color
ctx.strokeStyle = "red";
// Draw a filled rectangle
ctx.fillRect(50, 50, 200, 100);
// Draw a stroked rectangle
ctx.lineWidth = 4;
ctx.strokeRect(50, 50, 200, 100);
// Create a linear gradient
var gradient = ctx.createLinearGradient(0, 0, 400, 0);
gradient.addColorStop(0, "yellow");
gradient.addColorStop(1, "green");
// Set the fill style to the gradient
ctx.fillStyle = gradient;
// Draw a filled rectangle with gradient
ctx.fillRect(50, 160, 200, 100);
// Set the shadow properties
ctx.shadowColor = "rgba(0, 0, 0, 0.5)";
ctx.shadowBlur = 10;
ctx.shadowOffsetX = 5;
ctx.shadowOffsetY = 5;
// Draw a rectangle with shadow
ctx.fillStyle = "purple";
ctx.fillRect(270, 50, 100, 100);
</script>
</body>
</html>
In this example:
1-we create a canvas with a width of 400 pixels and a height of 200 pixels. We get the 2D rendering context of the canvas using getContext(“2d”).
2-We set the fill color using ctx.fillStyle and the stroke color using ctx.strokeStyle.
3-We use ctx.fillRect(x, y, width, height) to draw a filled rectangle and ctx.strokeRect(x, y, width, height) to draw a stroked rectangle. The parameters represent the position and dimensions of the rectangle.
4-We create a linear gradient using ctx.createLinearGradient(x0, y0, x1, y1) and add color stops to it using gradient.addColorStop(offset, color). The gradient is then used as the fill style for the next rectangle.
5-We set the shadow color using ctx.shadowColor, the blur radius using ctx.shadowBlur, and the shadow offsets using ctx.shadowOffsetX and ctx.shadowOffsetY. These properties create a shadow effect when drawing shapes.
6-Finally, we draw a rectangle with a shadow by setting the shadow properties and the fill color, and then using ctx.fillRect() to draw the rectangle.
When you run this code, you will see filled and stroked rectangles, a rectangle with a gradient fill, and a rectangle with a shadow effect on the canvas.

fillStyle:
Here’s a complete code example that demonstrates the usage of fillStyle in HTML canvas
<!DOCTYPE html>
<html>
<head>
<title>Canvas fillStyle Example</title>
<style>
canvas {
border: 1px solid black;
}
</style>
</head>
<body>
<canvas id="myCanvas" width="400" height="200"></canvas>
<script>
// Get the canvas element and the 2D rendering context
var canvas = document.getElementById("myCanvas");
var ctx = canvas.getContext("2d");
// Set fill style to a solid color
ctx.fillStyle = "blue";
// Draw a filled rectangle
ctx.fillRect(50, 50, 200, 100);
// Set fill style to a linear gradient
var gradient = ctx.createLinearGradient(0, 0, 400, 0);
gradient.addColorStop(0, "yellow");
gradient.addColorStop(1, "green");
ctx.fillStyle = gradient;
// Draw a filled rectangle with gradient
ctx.fillRect(50, 160, 200, 100);
</script>
</body>
</html>
In this example:
1-we create a canvas with a width of 400 pixels and a height of 200 pixels. We get the 2D rendering context of the canvas using getContext(“2d”).
2-We set the fillStyle property to a solid color by assigning it the value “blue”. This sets the fill color to blue.
3-We use the fillRect(x, y, width, height) method to draw a filled rectangle. The parameters represent the position and dimensions of the rectangle. In this case, we draw a blue rectangle at coordinates (50, 50) with a width of 200 pixels and a height of 100 pixels.
4-Next, we set the fillStyle property to a linear gradient by creating a gradient using ctx.createLinearGradient(x0, y0, x1, y1). We add color stops to the gradient using gradient.addColorStop(offset, color). In this example, we create a gradient that transitions from yellow to green, spanning the entire width of the canvas.
5-Finally, we use ctx.fillRect(x, y, width, height) again to draw another filled rectangle, but this time we use the gradient as the fill style. This rectangle will be filled with the linear gradient we defined earlier.
When you run this code, you will see a blue filled rectangle and a gradient-filled rectangle on the canvas.

strokeStyle:
Here’s a complete code example that demonstrates the usage of strokeStyle in HTML canvas:
<!DOCTYPE html>
<html>
<head>
<title>Canvas strokeStyle Example</title>
<style>
canvas {
border: 1px solid black;
}
</style>
</head>
<body>
<canvas id="myCanvas" width="400" height="200"></canvas>
<script>
// Get the canvas element and the 2D rendering context
var canvas = document.getElementById("myCanvas");
var ctx = canvas.getContext("2d");
// Set stroke style to a solid color
ctx.strokeStyle = "red";
// Draw a stroked rectangle
ctx.lineWidth = 4;
ctx.strokeRect(50, 50, 200, 100);
// Set stroke style to a linear gradient
var gradient = ctx.createLinearGradient(0, 0, 400, 0);
gradient.addColorStop(0, "yellow");
gradient.addColorStop(1, "green");
ctx.strokeStyle = gradient;
// Draw a stroked rectangle with gradient
ctx.lineWidth = 6;
ctx.strokeRect(50, 160, 200, 100);
</script>
</body>
</html>
In this example:
1- we create a canvas with a width of 400 pixels and a height of 200 pixels. We get the 2D rendering context of the canvas using getContext(“2d”).
2-We set the strokeStyle property to a solid color by assigning it the value “red”. This sets the stroke color to red.
3-We use the strokeRect(x, y, width, height) method to draw a stroked rectangle. The parameters represent the position and dimensions of the rectangle. In this case, we draw a red stroked rectangle at coordinates (50, 50) with a width of 200 pixels and a height of 100 pixels.
4-Next, we set the strokeStyle property to a linear gradient by creating a gradient using ctx.createLinearGradient(x0, y0, x1, y1). We add color stops to the gradient using gradient.addColorStop(offset, color). In this example, we create a gradient that transitions from yellow to green, spanning the entire width of the canvas.
5-Finally, we use ctx.strokeRect(x, y, width, height) again to draw another stroked rectangle, but this time we use the gradient as the stroke style. This rectangle will be stroked with the linear gradient we defined earlier. We also modify the lineWidth property to set the width of the stroke to 6 pixels.
When you run this code, you will see a red stroked rectangle and a gradient-stroked rectangle on the canvas.

shadowColor:
Here’s a complete code example that demonstrates the usage of shadowColor in HTML canvas:
<!DOCTYPE html>
<html>
<head>
<title>Canvas shadowColor Example</title>
<style>
canvas {
border: 1px solid black;
}
</style>
</head>
<body>
<canvas id="myCanvas" width="400" height="200"></canvas>
<script>
// Get the canvas element and the 2D rendering context
var canvas = document.getElementById("myCanvas");
var ctx = canvas.getContext("2d");
// Set the shadow color
ctx.shadowColor = "rgba(0, 0, 0, 0.5)";
// Draw a rectangle with shadow
ctx.fillStyle = "purple";
ctx.shadowBlur = 10;
ctx.shadowOffsetX = 5;
ctx.shadowOffsetY = 5;
ctx.fillRect(50, 50, 200, 100);
</script>
</body>
</html>
In this example:
1-we create a canvas with a width of 400 pixels and a height of 200 pixels.
2-We get the 2D rendering context of the canvas using getContext(“2d”).
3-We set the shadowColor property to “rgba(0, 0, 0, 0.5)”. This sets the color of the shadow to a semi-transparent black color.
4-We set the fill style to “purple” using ctx.fillStyle. This will be the color of the rectangle we draw.
5-We set the shadowBlur property to 10 to specify the blur radius of the shadow.
6-We set the shadowOffsetX and shadowOffsetY properties to 5 to specify the horizontal and vertical offset of the shadow from the rectangle.
7-Finally, we use ctx.fillRect(x, y, width, height) to draw a filled rectangle with the specified fill color, and the shadow effect will be applied to the rectangle.
When you run this code, you will see a purple rectangle with a shadow effect on the canvas.

shadowBlur:
Here’s a complete code example that demonstrates the usage of shadowBlur in HTML canvas:
<!DOCTYPE html>
<html>
<head>
<title>Canvas shadowBlur Example</title>
<style>
canvas {
border: 1px solid black;
}
</style>
</head>
<body>
<canvas id="myCanvas" width="400" height="200"></canvas>
<script>
// Get the canvas element and the 2D rendering context
var canvas = document.getElementById("myCanvas");
var ctx = canvas.getContext("2d");
// Set the shadow blur
ctx.shadowBlur = 10;
// Draw a rectangle with shadow
ctx.fillStyle = "blue";
ctx.fillRect(50, 50, 200, 100);
</script>
</body>
</html>
In this example:
1- we create a canvas with a width of 400 pixels and a height of 200 pixels.
2-We get the 2D rendering context of the canvas using getContext(“2d”).
3-We set the shadowBlur property to 10. This specifies the blur radius of the shadow. A larger value creates a more blurred shadow effect.
4-We set the fill style to “blue” using ctx.fillStyle. This will be the color of the rectangle we draw.
5-Finally, we use ctx.fillRect(x, y, width, height) to draw a filled rectangle with the specified fill color, and the shadow effect with the specified blur radius will be applied to the rectangle.
When you run this code, you will see a blue rectangle with a shadow effect on the canvas. The shadow will have a blur radius of 10 pixels, creating a blurred appearance around the edges of the rectangle.

shadowOffsetX:
Here’s a complete code example that demonstrates the usage of shadowOffsetX in HTML canvas:
<!DOCTYPE html>
<html>
<head>
<title>Canvas shadowOffsetX Example</title>
<style>
canvas {
border: 1px solid black;
}
</style>
</head>
<body>
<canvas id="myCanvas" width="400" height="200"></canvas>
<script>
// Get the canvas element and the 2D rendering context
var canvas = document.getElementById("myCanvas");
var ctx = canvas.getContext("2d");
// Set the shadow offset
ctx.shadowOffsetX = 5;
// Draw a rectangle with shadow
ctx.fillStyle = "purple";
ctx.shadowColor = "rgba(0, 0, 0, 0.5)";
ctx.shadowBlur = 10;
ctx.fillRect(50, 50, 200, 100);
</script>
</body>
</html>
In this example:
1- we create a canvas with a width of 400 pixels and a height of 200 pixels.
2-We get the 2D rendering context of the canvas using getContext(“2d”).
3-We set the shadowOffsetX property to 5. This specifies the horizontal offset of the shadow from the rectangle.
A positive value moves the shadow to the right, while a negative value moves it to the left.
4-We set the fill style to “purple” using ctx.fillStyle. This will be the color of the rectangle we draw.
5-We set the shadowColor property to “rgba(0, 0, 0, 0.5)” to specify the color of the shadow. This sets the shadow to a semi-transparent black color.
6-We set the shadowBlur property to 10 to specify the blur radius of the shadow. This creates a blurred effect around the edges of the shadow.
7-Finally, we use ctx.fillRect(x, y, width, height) to draw a filled rectangle with the specified fill color. The rectangle will have a shadow with the specified horizontal offset, color, and blur radius applied to it.
When you run this code, you will see a purple rectangle with a shadow effect on the canvas. The shadow will be offset horizontally by 5 pixels to the right.

Another complete code example
Here’s a complete code example that demonstrates the usage of shadowOffsetY in HTML canvas:
<!DOCTYPE html>
<html>
<head>
<title>Canvas shadowOffsetY Example</title>
<style>
canvas {
border: 1px solid black;
}
</style>
</head>
<body>
<canvas id="myCanvas" width="400" height="200"></canvas>
<script>
// Get the canvas element and the 2D rendering context
var canvas = document.getElementById("myCanvas");
var ctx = canvas.getContext("2d");
// Set the shadow offset
ctx.shadowOffsetY = 5;
// Draw a rectangle with shadow
ctx.fillStyle = "blue";
ctx.shadowColor = "rgba(0, 0, 0, 0.5)";
ctx.shadowBlur = 10;
ctx.fillRect(50, 50, 200, 100);
</script>
</body>
</html>
In this example:
1- we create a canvas with a width of 400 pixels and a height of 200 pixels.
2-We get the 2D rendering context of the canvas using getContext(“2d”).
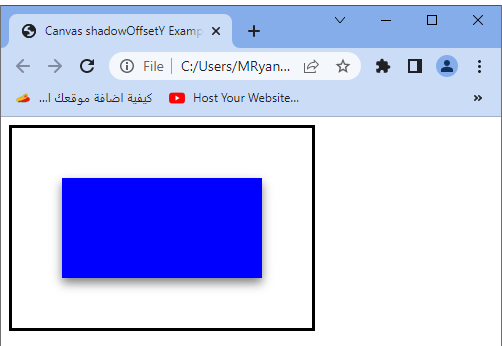
3-We set the shadowOffsetY property to 5. This specifies the vertical offset of the shadow from the rectangle. A positive value moves the shadow downwards, while a negative value moves it upwards.
4-We set the fill style to “purple” using ctx.fillStyle. This will be the color of the rectangle we draw.
5-We set the shadowColor property to “rgba(0, 0, 0, 0.5)” to specify the color of the shadow. This sets the shadow to a semi-transparent black color.
6-We set the shadowBlur property to 10 to specify the blur radius of the shadow. This creates a blurred effect around the edges of the shadow.
7-Finally, we use ctx.fillRect(x, y, width, height) to draw a filled rectangle with the specified fill color. The rectangle will have a shadow with the specified vertical offset, color, and blur radius applied to it.
When you run this code, you will see a purple rectangle with a shadow effect on the canvas. The shadow will be offset vertically by 5 pixels downwards.