
HTML Canvas Gradients: Linear Gradients, Radial Gradients
HTML Canvas Gradients
HTML Canvas provides the ability to create gradients, which allow you to smoothly transition between colors. There are two types of gradients you can create: linear gradients and radial gradients. Here’s an explanation of both types along with a complete code example for each:
Types of HTML Canvas gradients
There are two types of gradients you can create in HTML Canvas: linear gradients and radial gradients. Here’s an explanation of each type along with a complete code example for each:
HTML Canvas Gradients: Linear Gradients:
A linear gradient is a gradient that transitions between colors in a straight line. It has a start point and an end point, and the colors smoothly blend from one to another along that line.
How To create a linear gradient on a canvas, you’ll need to follow these steps:
1-Get the 2D rendering context of the canvas using getContext(“2d”).
2-Create a gradient object using createLinearGradient(x0, y0, x1, y1) method of the rendering context. x0 and y0 represent the starting point of the gradient, while x1 and y1 represent the ending point.
3-Add color stops to the gradient using the addColorStop(offset, color) method of the gradient object. offset represents a value between 0 and 1, indicating the position along the gradient line, while color represents the color at that position.
4-Use the gradient as the value for the fillStyle or strokeStyle property of the rendering context.
5-Draw shapes or paths using the rendering context methods like fill() or stroke().
Here’s a complete code example that demonstrates how to create a linear gradient and draw a rectangle with the gradient fill:
<!DOCTYPE html>
<html>
<head>
<title>Linear Gradient Example</title>
<style>
canvas {
border: 1px solid black;
}
</style>
</head>
<body>
<canvas id="myCanvas" width="400" height="300"></canvas>
<script>
// Get the canvas element and the 2D rendering context
var canvas = document.getElementById("myCanvas");
var ctx = canvas.getContext("2d");
// Create a linear gradient
var gradient = ctx.createLinearGradient(0, 0, 400, 0);
gradient.addColorStop(0, "blue");
gradient.addColorStop(1, "green");
// Set the fill style to the gradient
ctx.fillStyle = gradient;
// Draw a rectangle with the gradient fill
ctx.fillRect(50, 50, 300, 200);
</script>
</body>
</html>
In this example:
1-we create a canvas with a width of 400 pixels and a height of 300 pixels.
2-We get the 2D rendering context of the canvas using getContext(“2d”).
3-Then, we create a linear gradient using createLinearGradient(0, 0, 400, 0), which represents a gradient that starts from the top-left corner (0, 0) and ends at the top-right corner (400, 0).
4-We add color stops to the gradient using addColorStop(offset, color).
In this case, we set a blue color at offset 0 (start of the gradient) and a green color at offset 1 (end of the gradient).
5-Next, we set the fillStyle property of the rendering context to the gradient, indicating that we want to use it as the fill color for subsequent drawing operations.
6-Finally, we draw a rectangle on the canvas using fillRect(x, y, width, height). The rectangle is filled with the linear gradient.
When you run this code, you will see a rectangle on the canvas with a smooth color transition from blue to green.

HTML Canvas: Radial Gradients:
A radial gradient is a gradient that transitions between colors in a circular or elliptical shape. It has a starting circle and an ending circle, and the colors blend from one circle to another.
To create a radial gradient on a canvas, you can follow these steps:
1-Get the 2D rendering context of the canvas using getContext(“2d”).
2-Create a gradient object using createRadialGradient(x0, y0, r0, x1, y1, r1) method of the rendering context. x0 and y0 represent the center of the starting circle, r0 represents the radius of the starting circle, x1 and y1 represent the center of the ending circle, and r1 represents the radius of the ending circle.
3-Add color stops to the gradient using the addColorStop(offset, color) method of the gradient object. offset represents a value between 0 and 1, indicating the position along the gradient from the starting circle to the ending circle, while color represents the color at that position.
4-Use the gradient as the value for the fillStyle or strokeStyle property of the rendering context.
5-Draw shapes or paths using the rendering context methods like fill() or stroke().
Here’s a complete code example that demonstrates how to create a radial gradient and draw a circle with the gradient fill:
<!DOCTYPE html>
<html>
<head>
<title>Radial Gradient Example</title>
<style>
canvas {
border: 1px solid black;
}
</style>
</head>
<body>
<canvas id="myCanvas" width="400" height="400"></canvas>
<script>
// Get the canvas element and the 2D rendering context
var canvas = document.getElementById("myCanvas");
var ctx = canvas.getContext("2d");
// Create a radial gradient
var gradient = ctx.createRadialGradient(200, 200, 50, 200, 200, 150);
gradient.addColorStop(0, "red");
gradient.addColorStop(1, "yellow");
// Set the fill style to the gradient
ctx.fillStyle = gradient;
// Draw a circle with the gradient fill
ctx.beginPath();
ctx.arc(200, 200, 150, 0, 2 * Math.PI);
ctx.fill();
</script>
</body>
</html>
In this example:
1- we create a canvas with a width and height of 400 pixels. We get the 2D rendering context of the canvas using getContext(“2d”).
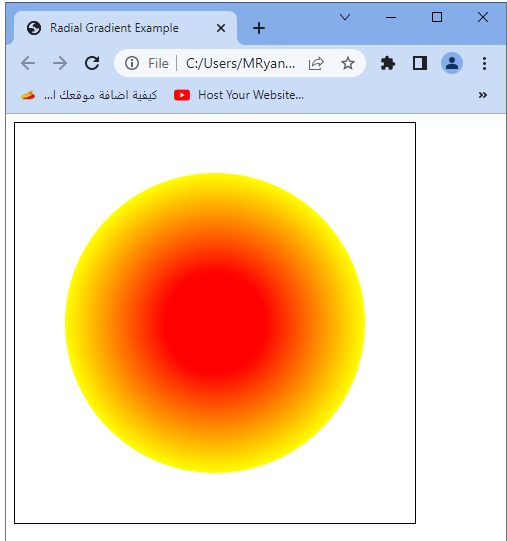
2-Then, we create a radial gradient using createRadialGradient(200, 200, 50, 200, 200, 150), which represents a gradient that starts from a circle centered at (200, 200) with a radius of 50 and ends at a circle centered at (200, 200) with a radius of 150.
3-We add color stops to the gradient using addColorStop(offset, color). In this case, we set a red color at offset 0 (center of the starting circle) and a yellow color at offset 1 (center of the ending circle).
4-Next, we set the fillStyle property of the rendering context to the gradient, indicating that we want to use it as the fill color for subsequent drawing operations.
5-Finally, we draw a circle on the canvas using beginPath(), arc(x, y, radius, startAngle, endAngle), and fill(). The circle is filled with the radial gradient.
When you run this code, you will see a circle on the canvas with a smooth color transition from red at the center to yellow at the outer edges.
HTML Canvas :Using createLinearGradient()
Here’s an example that demonstrates how to use createLinearGradient() to create a linear gradient and apply it to a shape on the canvas:
<!DOCTYPE html>
<html>
<head>
<title>Linear Gradient Example</title>
<style>
canvas {
border: 1px solid black;
}
</style>
</head>
<body>
<canvas id="myCanvas" width="400" height="300"></canvas>
<script>
// Get the canvas element and the 2D rendering context
var canvas = document.getElementById("myCanvas");
var ctx = canvas.getContext("2d");
// Create a linear gradient
var gradient = ctx.createLinearGradient(0, 0, 400, 0);
gradient.addColorStop(0, "red");
gradient.addColorStop(0.5, "yellow");
gradient.addColorStop(1, "blue");
// Set the fill style to the gradient
ctx.fillStyle = gradient;
// Draw a rectangle with the gradient fill
ctx.fillRect(50, 50, 300, 200);
</script>
</body>
</html>
In this example:
1-we create a canvas with a width of 400 pixels and a height of 300 pixels. We get the 2D rendering context of the canvas using getContext(“2d”).
2-Then, we create a linear gradient using createLinearGradient(0, 0, 400, 0). This gradient starts from the top-left corner of the canvas (0, 0) and ends at the top-right corner (400, 0).
3-We add color stops to the gradient using addColorStop(offset, color). In this case, we set a red color at offset 0 (start of the gradient), a yellow color at offset 0.5 (middle of the gradient), and a blue color at offset 1 (end of the gradient).
4-Next, we set the fillStyle property of the rendering context to the gradient, indicating that we want to use it as the fill color for subsequent drawing operations.
5-Finally, we draw a rectangle on the canvas using fillRect(x, y, width, height). The rectangle is filled with the linear gradient.
When you run this code, you will see a rectangle on the canvas with a smooth color transition from red to yellow to blue from left to right.

HTML Canvas: Using createRadialGradient():
Here’s an example that demonstrates how to use createRadialGradient() to create a radial gradient and apply it to a shape on the canvas:
<!DOCTYPE html>
<html>
<head>
<title>Radial Gradient Example</title>
<style>
canvas {
border: 1px solid black;
}
</style>
</head>
<body>
<canvas id="myCanvas" width="400" height="400"></canvas>
<script>
// Get the canvas element and the 2D rendering context
var canvas = document.getElementById("myCanvas");
var ctx = canvas.getContext("2d");
// Create a radial gradient
var gradient = ctx.createRadialGradient(200, 200, 50, 200, 200, 150);
gradient.addColorStop(0, "red");
gradient.addColorStop(0.5, "yellow");
gradient.addColorStop(1, "blue");
// Set the fill style to the gradient
ctx.fillStyle = gradient;
// Draw a circle with the gradient fill
ctx.beginPath();
ctx.arc(200, 200, 150, 0, 2 * Math.PI);
ctx.fill();
</script>
</body>
</html>
In this example:
1- we create a canvas with a width and height of 400 pixels. We get the 2D rendering context of the canvas using getContext(“2d”).
2-Then, we create a radial gradient using createRadialGradient(200, 200, 50, 200, 200, 150). This gradient starts from a circle centered at (200, 200) with a radius of 50 and ends at a circle centered at (200, 200) with a radius of 150.
3-We add color stops to the gradient using addColorStop(offset, color). In this case, we set a red color at offset 0 (center of the starting circle), a yellow color at offset 0.5 (middle of the gradient), and a blue color at offset 1 (center of the ending circle).
4-Next, we set the fillStyle property of the rendering context to the gradient, indicating that we want to use it as the fill color for subsequent drawing operations.
5-Finally, we draw a circle on the canvas using beginPath(), arc(x, y, radius, startAngle, endAngle), and fill(). The circle is filled with the radial gradient.
When you run this code, you will see a circle on the canvas with a smooth color transition from red at the center to yellow in the middle and blue at the outer edges.
