HTML Canvas Methods: fill(), stroke(), arc(), arcTo(x)
HTML Canvas Methods: fill(), stroke(), arc(), arcTo(x):
In this lesson we will study some of HTML Canvas methods suck as: fill() methos, stroke() method, arc() method and arcTo(x) method.
fill() method:
Fills the current path with the current fill style, creating a solid shape.
The fill() method is used to fill the current path or shape with the current fill style in the HTML canvas. It takes the current path and fills the enclosed area with the specified color or pattern.
Here’s an example code snippet that demonstrates the usage of fill():
<!DOCTYPE html>
<html>
<head>
<title>Canvas fill Example</title>
<style>
canvas {
border: 1px solid black;
}
</style>
</head>
<body>
<canvas id="myCanvas" width="400" height="200"></canvas>
<script>
// Get the canvas element
var canvas = document.getElementById("myCanvas");
// Get the 2D rendering context
var ctx = canvas.getContext("2d");
// Draw a rectangle
ctx.rect(50, 50, 200, 100);
// Set the fill style
ctx.fillStyle = "blue";
// Fill the shape
ctx.fill();
</script>
</body>
</html>
In this example:
1- we create a canvas with a width of 400 pixels and a height of 200 pixels.
2-We get the canvas element using document.getElementById(“myCanvas”).
3-Next, we get the 2D rendering context of the canvas by calling getContext(“2d”) on the canvas object.
This gives us access to the methods and properties for drawing and manipulating graphics.
4-We use ctx.rect(x, y, width, height) to define a rectangle shape. This will create a rectangle with a top-left position at (50, 50) and dimensions of 200 pixels wide and 100 pixels high.
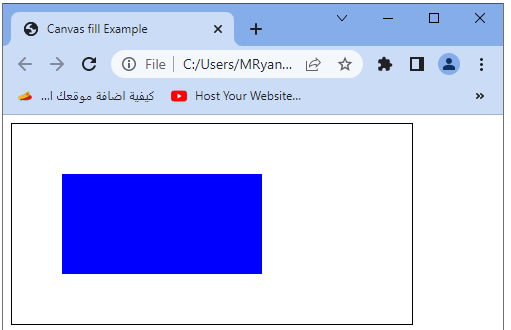
5-After defining the rectangle, we set the fill style to “blue” using ctx.fillStyle and call ctx.fill() to fill the shape with the specified color.
When you run this code, you will see a filled blue rectangle on the canvas. The fill() method takes the current path and fills the enclosed area with the specified fill style, which in this case is the color blue.
stroke() method:
Strokes the current path with the current stroke style, creating an outline.
The stroke() method is used to stroke, or draw the outline, of the current path or shape with the current stroke style in the HTML canvas. It traces the path defined by the current drawing commands and creates a visible outline using the specified line style.
Here’s an example code snippet that demonstrates the usage of stroke():
<!DOCTYPE html>
<html>
<head>
<title>Canvas stroke Example</title>
<style>
canvas {
border: 1px solid black;
}
</style>
</head>
<body>
<canvas id="myCanvas" width="400" height="200"></canvas>
<script>
// Get the canvas element
var canvas = document.getElementById("myCanvas");
// Get the 2D rendering context
var ctx = canvas.getContext("2d");
// Draw a rectangle
ctx.rect(50, 50, 200, 100);
// Set the stroke style
ctx.strokeStyle = "blue";
// Stroke the shape
ctx.stroke();
</script>
</body>
</html>
In this example:
1- we create a canvas with a width of 400 pixels and a height of 200 pixels.
2-We get the canvas element using document.getElementById(“myCanvas”).
3-Next, we get the 2D rendering context of the canvas by calling getContext(“2d”) on the canvas object.
This gives us access to the methods and properties for drawing and manipulating graphics.
4-We use ctx.rect(x, y, width, height) to define a rectangle shape.
This will create a rectangle with a top-left position at (50, 50) and dimensions of 200 pixels wide and 100 pixels high.
5-After defining the rectangle, we set the stroke style to “blue” using ctx.strokeStyle and call ctx.stroke() to stroke, or draw the outline, of the shape with the specified color.
When you run this code, you will see a blue outline of the rectangle on the canvas. The stroke() method traces the path defined by the current drawing commands and creates a visible outline using the specified stroke style, which in this case is the color blue.

arc(x, y, radius, startAngle, endAngle, anticlockwise):
Adds an arc to the current path, specified by a center point, radius, start angle, end angle, and rotation direction.
The arc(x, y, radius, startAngle, endAngle, anticlockwise) method is used to draw an arc or a portion of a circle on the HTML canvas. It defines a curved line segment based on the specified parameters.
Here’s a breakdown of the parameters:
x and y: The coordinates of the center of the arc.
radius: The radius of the arc.
startAngle: The starting angle, in radians, where the arc begins.
endAngle: The ending angle, in radians, where the arc ends.
anticlockwise: An optional boolean parameter that specifies the direction of drawing. If true, the arc is drawn in the counter-clockwise direction; if false or omitted, it is drawn in the clockwise direction.
Here’s an example code snippet that demonstrates the usage of arc(x, y, radius, startAngle, endAngle, anticlockwise):
<!DOCTYPE html>
<html>
<head>
<title>Canvas arc Example</title>
<style>
canvas {
border: 1px solid black;
}
</style>
</head>
<body>
<canvas id="myCanvas" width="400" height="400"></canvas>
<script>
// Get the canvas element
var canvas = document.getElementById("myCanvas");
// Get the 2D rendering context
var ctx = canvas.getContext("2d");
// Draw a circle
var centerX = canvas.width / 2;
var centerY = canvas.height / 2;
var radius = 100;
var startAngle = 0;
var endAngle = Math.PI * 2;
var anticlockwise = false;
ctx.beginPath();
ctx.arc(centerX, centerY, radius, startAngle, endAngle, anticlockwise);
ctx.closePath();
// Set the fill style
ctx.fillStyle = "blue";
// Fill the circle
ctx.fill();
</script>
</body>
</html>
In this example:
1- we create a canvas with a width and height of 400 pixels.
2-We get the canvas element using document.getElementById(“myCanvas”).
3-Next, we get the 2D rendering context of the canvas by calling getContext(“2d”) on the canvas object. This gives us access to the methods and properties for drawing and manipulating graphics.
4-We define the parameters for drawing a circle: centerX and centerY represent the center coordinates of the circle, radius defines the radius of the circle, startAngle and endAngle specify the angles at which the arc begins and ends, and anticlockwise determines the direction of drawing (in this case, clockwise).
5-We use ctx.beginPath() to start a new path, ctx.arc(x, y, radius, startAngle, endAngle, anticlockwise) to draw the arc or circle, and ctx.closePath() to close the path.
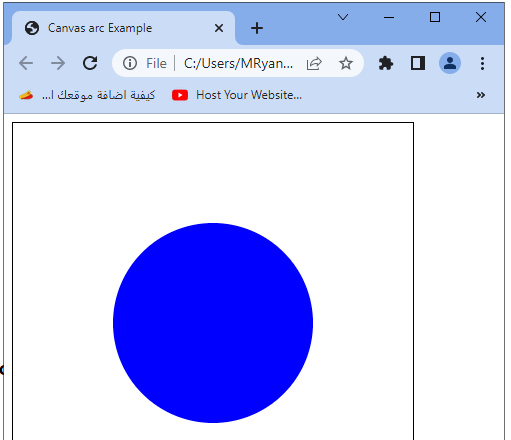
6-After defining the arc, we set the fill style to “blue” using ctx.fillStyle and call ctx.fill() to fill the circle with the specified color.
When you run this code, you will see a filled blue circle on the canvas. The arc(x, y, radius, startAngle, endAngle, anticlockwise) method allows you to draw arcs or portions of circles on the canvas.
arcTo(x1, y1, x2, y2, radius):
Adds an arc to the current path, specified by two tangent points, a radius, and the curvature.
The arcTo(x1, y1, x2, y2, radius) method is used to draw a curved line segment connecting two lines using an arc on the HTML canvas. It creates a rounded corner effect by specifying a control point and a radius for the arc.
Here’s a breakdown of the parameters:
x1 and y1: The coordinates of the starting point of the first line.
x2 and y2: The coordinates of the ending point of the second line.
radius: The radius of the arc that connects the lines.
Here’s an example code snippet that demonstrates the usage of arcTo(x1, y1, x2, y2, radius):
<!DOCTYPE html>
<html>
<head>
<title>Canvas arcTo Example</title>
<style>
canvas {
border: 1px solid black;
}
</style>
</head>
<body>
<canvas id="myCanvas" width="400" height="200"></canvas>
<script>
// Get the canvas element
var canvas = document.getElementById("myCanvas");
// Get the 2D rendering context
var ctx = canvas.getContext("2d");
// Define the points and radius
var x1 = 50;
var y1 = 50;
var x2 = 200;
var y2 = 50;
var radius = 50;
// Draw the lines and arc
ctx.beginPath();
ctx.moveTo(x1, y1);
ctx.lineTo(x2, y2);
ctx.arcTo(x2, y2, x2 + radius, y2, radius);
ctx.lineTo(x2 + radius, y2 + radius);
ctx.stroke();
</script>
</body>
</html>
In this example:
1-we create a canvas with a width of 400 pixels and a height of 200 pixels.
2-We get the canvas element using document.getElementById(“myCanvas”).
3-Next, we get the 2D rendering context of the canvas by calling getContext(“2d”) on the canvas object. This gives us access to the methods and properties for drawing and manipulating graphics.
4-We define the starting point of the first line as (x1, y1) and the ending point of the second line as (x2, y2). We also specify the radius of the arc.
5-We use ctx.beginPath() to start a new path and ctx.moveTo(x1, y1) to move the cursor to the starting point of the first line.
6-Then, we use ctx.lineTo(x2, y2) to draw a straight line from the starting point to the ending point.
7-Next, we call ctx.arcTo(x2, y2, x2 + radius, y2, radius) to draw the arc that connects the lines. This method takes the coordinates of the ending point of the first line (x2, y2), the control point (x2 + radius, y2), and the radius of the arc.
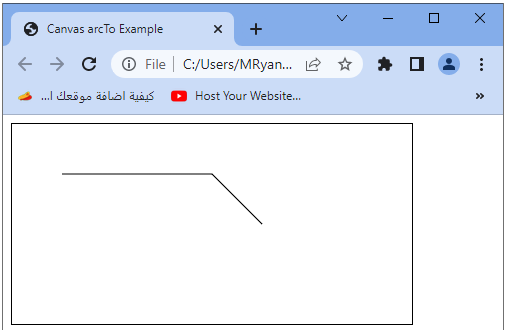
8-Finally, we use ctx.lineTo(x2 + radius, y2 + radius) to draw a straight line from the arc to another point, and ctx.stroke() to stroke, or draw the outline, of the path.
When you run this code, you will see a curved line segment with a rounded corner effect on the canvas. The arcTo(x1, y1, x2, y2, radius) method allows you to create smooth connections between two lines using an arc.