HTML iframes – Complete Guide, Examples, and Best Practices
HTML Iframes – Complete Guide, Examples, and Best Practices
HTML iframes (inline frames) are HTML elements that allow you to embed another HTML document within the current document.
They are commonly used to display external content, such as web pages, videos, maps, or advertisements, within a webpage. iframes provide a way to include content from different sources or domains seamlessly.
How to create iframe in HTML ?
To create an iframe, you need to use the <iframe> element in HTML and specify its attributes.
The most important attribute is the src attribute, which determines the source URL of the content you want to display within the iframe.
Here’s an example of the basic structure if iframe in HTML:
<iframe src="url_of_external_content"></iframe>
Uses of HTML Iframes :
1-Embedding external content:
Iframes are commonly used to embed external content within a webpage, such as videos from YouTube or maps from Google Maps.
2-Advertisements:
Iframes are often used to display advertisements from third-party providers. This allows websites to monetize their content by including ads from ad networks or sponsors.
3-Displaying content from different domains:
Iframes can display content from different domains without affecting the main page’s styles or functionality.
This is useful for integrating content from external sources web pages with maintaining the security and integrity of the main webpage.
4- Enhancing the functionality and interactivity of webpages:
They provide a way to include dynamic and interactive content from external sources, making webpages more engaging and feature-rich.
Additionally, iframes facilitate the modularization of web content by allowing different components to be developed independently and seamlessly integrated into a single webpage.
How to create HTML Iframe with Complete Code Example?
Here’s a complete code example that demonstrates the usage of an iframe:
<!DOCTYPE html> <html> <head> <title>Example Iframe</title> </head> <body> <h1>Welcome to My Website</h1> <p>Check out this embedded video:</p> <iframe src="https://www.youtube.com/embed/dQw4w9WgXcQ" width="560" height="315" frameborder="0" allowfullscreen></iframe> <p>That was a Rickroll!</p> </body> </html>

Explanation:
1-In this example, an iframe is used to embed a YouTube video (a classic Rickroll) within the webpage.
2-The src attribute specifies the URL of the video
3-The width and height attributes control the dimensions of the iframe.
4- The frameborder attribute is set to “0” to remove the border around the iframe
4- The allowfullscreen attribute enables fullscreen mode for the embedded video.
HTML Iframes options :
Here are some common options and attributes you can use with HTML iframes, along with complete code examples:
1-Setting width and height:
You can specify the width and height of the iframe using the width and height attributes.
Here’s an example:
<iframe src="url_of_external_content" width="500" height="300"></iframe>
How to set width and height if HTML Iframe ?
Here’s a complete code example demonstrating how to set the width and height of an iframe using HTML:
<!DOCTYPE html> <html> <head> <title>Setting Width and Height of Iframe</title> </head> <body> <h1>Welcome to My Website</h1> <p>Check out this embedded iframe:</p> <iframe src="https://www.example.com" width="500" height="300"></iframe> <p>This iframe has a width of 500 pixels and a height of 300 pixels.</p> </body> </html>

Explanation:
1-In this example, the <iframe> element is used to embed an iframe within the webpage.
2-The src attribute specifies the URL of the content to be displayed within the iframe, in this case, https://www.example.com.
3-The width attribute is set to “500” pixels, and the height attribute is set to “300” pixels.
Adjust the width and height values to your desired dimensions according to your specific needs.
When you open the HTML file in a web browser, you will see the embedded iframe with the specified width and height.
How to control the visibility of the HTML ifame?
You can control the visibility of the iframe’s border using the frameborder attribute.
Set it to “0” to remove the border, or “1” to display the border.
Here’s an example:
<iframe src="url_of_external_content" frameborder="0"></iframe>
Allowing fullscreen mode:
To allow the content within the iframe to be displayed in fullscreen mode, you can use the allowfullscreen attribute.
Here’s an example:
<iframe src="url_of_external_content" allowfullscreen></iframe>
How to make HTML iframe in fullscreen mode?
Here’s a complete code example showing how to allow fullscreen mode for an iframe using HTML:
<!DOCTYPE html> <html> <head> <title>Allowing Fullscreen Mode for Iframe</title> </head> <body> <h1>Welcome to My Website</h1> <p>Check out this embedded iframe:</p> <iframe src="https://www.example.com" allowfullscreen></iframe> <p>You can click the fullscreen button to expand the iframe.</p> </body> </html>

Explanation:
1-In this example, the <iframe> element is used to embed an iframe within the webpage.
2-The src attribute specifies the URL of the content to be displayed within the iframe, in this case, https://www.example.com.
3-The allowfullscreen attribute is added to the <iframe> element.
The allowfullscreen attribute enables the fullscreen mode option for the embedded iframe.
If you click the fullscreen button within the iframe it expands to the full screen.
Note: The availability and functionality of fullscreen mode may vary depending on the browser and the security settings in place.
When you open the HTML file in a web browser, you will see the embedded iframe with the option to enter fullscreen mode.
How to add a tilte for the HTML iframe ?
You can add a title for the iframe using the title attribute. This helps with accessibility and provides a description of the content within the iframe.
Here’s an example:
<iframe src="url_of_external_content" title="Embedded Content"></iframe>
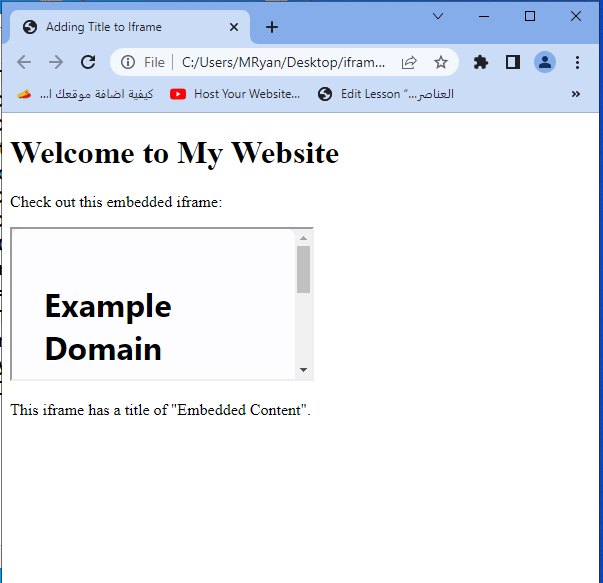
Adding a title:complete code example
Here’s a complete code example demonstrating how to add a title to an iframe using HTML:
<!DOCTYPE html> <html> <head> <title>Adding Title to Iframe</title> </head> <body> <h1>Welcome to My Website</h1> <p>Check out this embedded iframe:</p> <iframe src="https://www.example.com" title="Embedded Content"></iframe> <p>This iframe has a title of "Embedded Content".</p> </body> </html>
Exaplanition:
1-In this example, the <iframe> element is used to embed an iframe within the webpage.
2-The src attribute specifies the URL of the content to be displayed within the iframe, in this case, https://www.example.com.
3-The title attribute is added to the <iframe> element with the value of “Embedded Content”.
The title attribute provides a title or description for the iframe, which is useful for accessibility purposes. Screen readers and can use this title to provide information about the embedded content to users who may have visual impairments.
When you open the HTML file in a web browser, the iframe will have a title of “Embedded Content”.
How to wait the loading of HTML iframe ?
Lazy loading:
If you want to delay the loading of the iframe content until it’s visible on the screen, you can use the loading attribute with the value “lazy”.
Here’s an example:
<iframe src="url_of_external_content" loading="lazy"></iframe>
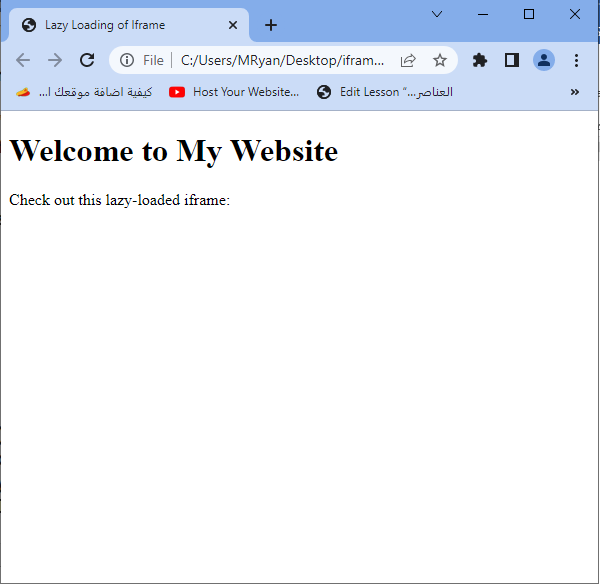
Lazy loading:complete code example
Lazy loading of iframes typically involves using JavaScript and the Intersection Observer API to load the iframe content only when it becomes visible on the screen.
Here’s a complete code example demonstrating lazy loading of an iframe using HTML and JavaScript:
<!DOCTYPE html>
<html>
<head>
<title>Lazy Loading of Iframe</title>
<style>
.lazy-iframe {
height: 0;
overflow: hidden;
}
</style>
</head>
<body>
<h1>Welcome to My Website</h1>
<p>Check out this lazy-loaded iframe:</p>
<div class="lazy-iframe" data-src="https://www.example.com">
<p>Loading iframe...</p>
</div>
<script>
document.addEventListener('DOMContentLoaded', function() {
var lazyIframes = Array.from(document.querySelectorAll('.lazy-iframe'));
var observer = new IntersectionObserver(function(entries) {
entries.forEach(function(entry) {
if (entry.isIntersecting) {
var iframe = entry.target;
var iframeSrc = iframe.getAttribute('data-src');
// Replace the placeholder content with the iframe
iframe.innerHTML = '<iframe src="' + iframeSrc + '" frameborder="0" allowfullscreen></iframe>';
// Stop observing the iframe once it has been loaded
observer.unobserve(iframe);
}
});
});
lazyIframes.forEach(function(iframe) {
observer.observe(iframe);
});
});
</script>
</body>
</html>
Explanation:
1-In this example, the iframe is initially represented by a placeholder <div> element with the class name lazy-iframe.
2-The data-src attribute is used to store the URL of the content to be loaded in the iframe.
3-The JavaScript code utilizes the Intersection Observer API to observe when the lazy-iframe elements come into view.
4-Once an element becomes visible, the data-src value is retrieved, and an iframe is dynamically created within the element, replacing the placeholder content.
When you open the HTML file in a web browser, the iframes will be lazy-loaded as they become visible on the screen, replacing the placeholder content with the actual iframe content.
Remember to replace “https://www.example.com” with the actual URL of the content you want to embed in the iframe.
Note: The Intersection Observer API may not be supported in older browsers. If you need to support older browsers, consider using a polyfill to ensure compatibility.
How to create responsive HTML iframe ?
Responsive iframes:
To make the iframe responsive and adapt to different screen sizes, you can use CSS techniques like setting the width to “100%” and controlling the aspect ratio using padding.
Here’s an example:
<style>
.responsive-iframe {
position: relative;
padding-bottom: 56.25%; /* 16:9 aspect ratio */
height: 0;
overflow: hidden;
}
.responsive-iframe iframe {
position: absolute;
top: 0;
left: 0;
width: 100%;
height: 100%;
}
</style>
<div class="responsive-iframe">
<iframe src="url_of_external_content" frameborder="0"></iframe>
</div>
In this example, the responsive-iframe class creates a container div that maintains a 16:9 aspect ratio. The iframe is positioned absolutely inside the container, filling the available space.
Remember to replace “url_of_external_content” with the actual URL of the content you want to embed.
Responsive iframes:complete code example
Here’s a complete code example demonstrating how to create responsive iframes using HTML and CSS:
<!DOCTYPE html>
<html>
<head>
<title>Responsive Iframe Example</title>
<style>
.responsive-iframe-container {
position: relative;
width: 100%;
padding-bottom: 56.25%; /* 16:9 aspect ratio (modify as needed) */
}
.responsive-iframe-container iframe {
position: absolute;
top: 0;
left: 0;
width: 100%;
height: 100%;
}
</style>
</head>
<body>
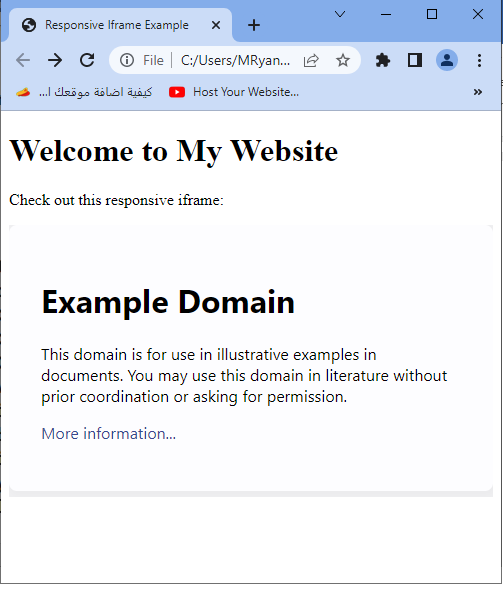
<h1>Welcome to My Website</h1>
<p>Check out this responsive iframe:</p>
<div class="responsive-iframe-container">
<iframe src="https://www.example.com" frameborder="0" allowfullscreen></iframe>
</div>
</body>
</html>
Explanation:
1-In this example, the <div> element with the class responsive-iframe-container serves as the container for the responsive iframe.
2-The CSS styles set the container’s width to 100% of its parent element and define the aspect ratio using padding-bottom, based on a 16:9 aspect ratio (you can modify it as needed).
3-The <iframe> element is positioned absolutely within the container, spanning the entire width and height of the container using the CSS properties width: 100% and height: 100%.
When you open the HTML file in a web browser, the iframe will be responsive and adapt to different screen sizes. It will maintain the specified aspect ratio and automatically adjust its dimensions to fit the available space within the container.
Remember to replace “https://www.example.com” with the actual URL of the content you want to embed in the iframe.
Feel free to customize the CSS styles and aspect ratio values to suit your specific requirements and design preferences.
How to control the Scrolling behavior of HTML iframe ?
You can control the scrolling behavior of the iframe using the scrolling attribute. Set it to “auto” to allow scrolling when necessary, or “yes” to always display scrollbars.
Here’s an example:
<iframe src="url_of_external_content" scrolling="auto"></iframe>
Scrolling behavior:complete code example
Certainly! Here’s a complete code example demonstrating how to control the scrolling behavior of an iframe using HTML:
<!DOCTYPE html> <html> <head> <title>Scrolling Iframe Example</title> </head> <body> <h1>Welcome to My Website</h1> <p>Check out this iframe with scrolling:</p> <iframe src="https://www.example.com" scrolling="auto"></iframe> <p>This iframe allows scrolling when necessary.</p> </body> </html>

Explanation:
1-In this example, the <iframe> element is used to embed an iframe within the webpage.
2-The src attribute specifies the URL of the content to be displayed within the iframe, in this case, https://www.example.com.
3-The scrolling attribute is set to “auto”.
The scrolling attribute controls the scrolling behavior of the iframe.
By setting it to “auto”, the iframe allows scrolling when necessary.
If the content within the iframe exceeds the available space, scrollbars will be displayed to allow the user to scroll and view the entire content.
When you open the HTML file in a web browser, you will see the embedded iframe with scrolling enabled. If the content within the iframe requires scrolling, the scrollbars will be displayed accordingly.
Try to modify the scrolling attribute value to “yes” if you want to always display scrollbars, or “no” if you want to disable scrolling completely for the iframe.
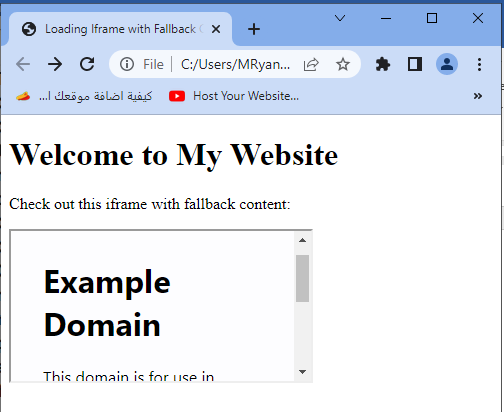
How to load fallback contenet instead of HTML iframe ?
Loading a fallback content:
You can provide fallback content to be displayed if the iframe fails to load.
This is useful for scenarios where the iframe source is not accessible or unsupported.
Here’s an example:
<iframe src="url_of_external_content"> <p>Your browser does not support iframes.</p> </iframe>
In this example, the <p> element serves as a fallback message if the iframe fails to load.
Loading a fallback content:complete code example
Here’s a complete code example demonstrating how to load a fallback content if the iframe fails to load using HTML:
<!DOCTYPE html>
<html>
<head>
<title>Loading Iframe with Fallback Content</title>
</head>
<body>
<h1>Welcome to My Website</h1>
<p>Check out this iframe with fallback content:</p>
<iframe src="https://www.example.com">
<p>Your browser does not support iframes.</p>
</iframe>
</body>
</html>
Explanation :
1-In this example, the <iframe> element is used to embed an iframe within the webpage.
2-The src attribute specifies the URL of the content to be displayed within the iframe, in this case, [https://www.example.com].
3-Inside the <iframe> element, a <p> element is provided with the message “Your browser does not support iframes.” This serves as the fallback content that will be displayed if the iframe fails to load. If the iframe is unsupported or inaccessible, the fallback content will be shown instead.
When you open the HTML file in a web browser, the iframe will attempt to load the content from the specified URL. If the loading fails, the fallback content will be displayed instead.
Try to modify the fallback content to suit your needs, such as displaying an error message or alternative content to inform the user about the failure to load the iframe.
How to set sandbox attribute for HTML iframe ?
Setting a sandbox:
The sandbox attribute allows you to restrict the capabilities of the iframe, enhancing security.
You can specify a set of sandboxing options such as allow-forms, allow-scripts, allow-same-origin, etc.
Here’s an example:
<iframe src="url_of_external_content" sandbox="allow-scripts"></iframe>
Setting a sandbox:complete code example
Certainly! Here’s a complete code example demonstrating how to set a sandbox for an iframe using HTML:
<!DOCTYPE html> <html> <head> <title>Sandboxed Iframe Example</title> </head> <body> <h1>Welcome to My Website</h1> <p>Check out this sandboxed iframe:</p> <iframe src="https://www.example.com"sandbox="allow-scripts"></iframe> <p>This iframe is sandboxed with scripts allowed.</p> </body> </html>

Exaplanation:
1-In this example, the <iframe> element is used to embed an iframe within the webpage.
2-The src attribute specifies the URL of the content to be displayed within the iframe, in this case, https://www.example.com.
3-The sandbox attribute is set to “allow-scripts”.
The sandbox attribute allows you to restrict the capabilities of the iframe for enhanced security.
In this case, the allow-scripts value allows the iframe to execute scripts but restricts other potentially harmful actions.
When you open the HTML file in a web browser, you will see the embedded iframe with the specified sandboxing applied. The iframe will be restricted according to the defined sandbox options.
Try to modify the sandbox attribute to include other sandboxing options as needed, such as allow-forms, allow-popups, allow-same-origin, etc. Customize the sandbox options based on your specific security requirements and the functionality you want to allow within the iframe.
Lazy loading with Intersection Observer:
You can implement lazy loading of iframes using the Intersection Observer API, which loads the iframe only when it comes into view.
Here’s an example:
<script>
document.addEventListener('DOMContentLoaded', function() {
var observer = new IntersectionObserver(function(entries) {
entries.forEach(function(entry) {
if (entry.isIntersecting) {
entry.target.src = entry.target.dataset.src;
observer.unobserve(entry.target);
}
});
});
var iframes = document.querySelectorAll('iframe[data-src]');
iframes.forEach(function(iframe) {
observer.observe(iframe);
});
});
</script>
<iframe data-src="url_of_external_content"></iframe>
Exaplanation:
1-In this example, the iframe initially has a data-src attribute instead of src, and the Intersection Observer API is used to observe when the iframe enters the viewport.
2-Once it becomes visible, the data-src value is assigned to the src attribute, triggering the loading of the iframe content.
Lazy loading with Intersection Observer:complete code example
Here’s a complete code example demonstrating lazy loading of an iframe using the Intersection Observer API in JavaScript:
<!DOCTYPE html>
<html>
<head>
<title>Lazy Loading of Iframe using Intersection Observer</title>
</head>
<body>
<h1>Welcome to My Website</h1>
<p>Check out this lazy-loaded iframe:</p>
<div id="lazy-iframe" data-src="https://www.example.com">
<p>Loading iframe...</p>
</div>
<script>
document.addEventListener('DOMContentLoaded', function() {
var lazyIframe = document.getElementById('lazy-iframe');
var observer = new IntersectionObserver(function(entries) {
entries.forEach(function(entry) {
if (entry.isIntersecting) {
var iframeSrc = lazyIframe.getAttribute('data-src');
// Replace the placeholder content with the iframe
lazyIframe.innerHTML = '<iframe src="' + iframeSrc + '" frameborder="0" allowfullscreen></iframe>';
// Stop observing the iframe once it has been loaded
observer.unobserve(lazyIframe);
}
});
});
observer.observe(lazyIframe);
});
</script>
</body>
</html>

Exaplanation:
1-In this example, the iframe is initially represented by a placeholder <div> element with the id lazy-iframe.
2-The data-src attribute is used to store the URL of the content to be loaded in the iframe.
3-The JavaScript code utilizes the Intersection Observer API to observe when the lazy-iframe element comes into view.
Once it becomes visible, the data-src value is retrieved, and an iframe is dynamically created within the element, replacing the placeholder content.
When you open the HTML file in a web browser, the iframe will be lazy-loaded as it becomes visible on the screen, replacing the placeholder content with the actual iframe content.
Remember to replace “https://www.example.com” with the actual URL of the content you want to embed in the iframe.
Note: The Intersection Observer API may not be supported in older browsers. If you need to support older browsers, consider using a polyfill to ensure compatibility.
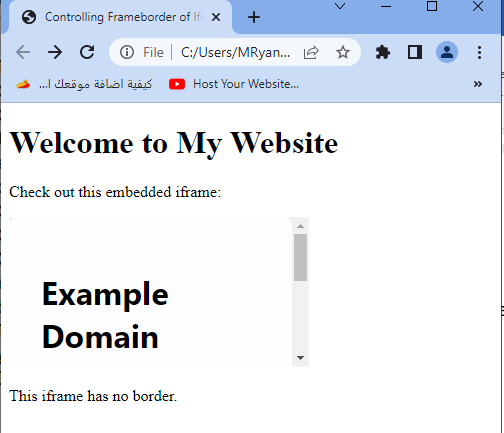
How to control frameboder ?
Controlling frameborder: complete code example
Here’s a complete code example demonstrating how to control the frameborder of an iframe using HTML:
<!DOCTYPE html> <html> <head> <title>Controlling Frameborder of Iframe</title> </head> <body> <h1>Welcome to My Website</h1> <p>Check out this embedded iframe:</p> <iframe src="https://www.example.com" frameborder="0"></iframe> <p>This iframe has no border.</p> </body> </html>

Explanation:
1-In this example, the <iframe> element is used to embed an iframe within the webpage.
2-The src attribute specifies the URL of the content to be displayed within the iframe, in this case, https://www.example.com.
3-The frameborder attribute is set to “0”.
4-The frameborder attribute controls the visibility of the border around the iframe. By setting it to “0”, the border is removed, making the iframe appear without any visible border.
When you open the HTML file in a web browser, you will see the embedded iframe without any border around it.
Try to modify the frameborder value to “1” if you want to display a border around the iframe.
How to remove the border of iframe by using CSS ?
Iframe – Remove the Border
To remove the border from an iframe, you can use CSS to style the iframe element.
Here’s a complete code example:
<!DOCTYPE html>
<html>
<head>
<title>Removing Border from Iframe</title>
<style>
iframe {
border: none;
}
</style>
</head>
<body>
<h1>Welcome to My Website</h1>
<p>Check out this iframe without a border:</p>
<iframe src="https://www.example.com"></iframe>
<p>This iframe has no border.</p>
</body>
</html>
Explanation:
1-In this example, the CSS style selector iframe is used to target the <iframe> element.
2-The border property is set to “none”, which removes the border around the iframe.
When you open the HTML file in a web browser, you will see the embedded iframe without any visible border.
Try to adjust the CSS styles as needed to customize the appearance of the iframe further.
How to specify a traget for a link within an iframe ?
Iframe – Target for a Link
To specify a target for a link within an iframe, you can use the target attribute on the <a> (anchor) tag. Here’s a complete code example:
<!DOCTYPE html> <html> <head> <title>Iframe Link Target Example</title> </head> <body> <h1>Welcome to My Website</h1> <p>Check out this iframe with a link:</p> <iframe src="https://www.example.com"></iframe> <p>Click the link below to open it in a new tab:</p> <a href="https://www.example.com" target="_blank">Open Link in New Tab</a> </body> </html>
Explanation:
1-In this example, the <a> (anchor) tag is used to create a link.
The href attribute specifies the URL of the link, in this case, https://www.example.com. The target attribute is set to “_blank” to open the link in a new tab or window.
2-When you click the “Open Link in New Tab” link, the linked content will open in a new tab or window, depending on the user’s browser settings.
Try to adjust the href attribute to specify the actual URL of the link you want to target.
Remember that the behavior of opening links in new tabs or windows can be controlled by the user’s browser settings, so it’s not always guaranteed to open in a new tab.
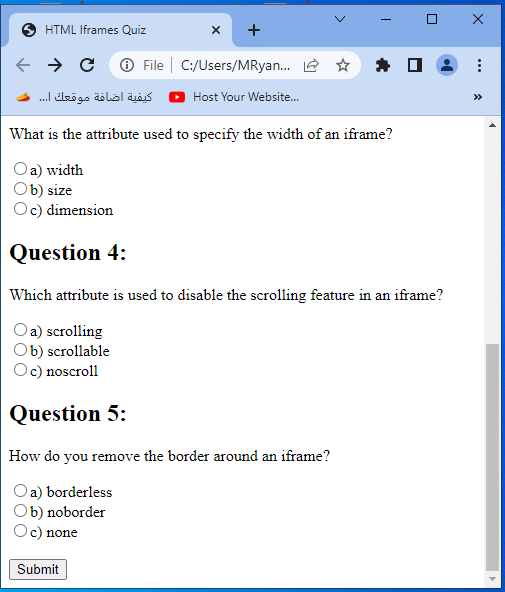
Multichoice quiz about HTML iframes with answers
<!DOCTYPE html>
<html>
<head>
<title>HTML Iframes Quiz</title>
</head>
<body>
<h1>HTML Iframes Quiz</h1>
<form>
<h2>Question 1:</h2>
<p>Which HTML element is used to create an iframe?</p>
<input type="radio" name="q1" value="a">a) <frame><br>
<input type="radio" name="q1" value="b">b) <iframe><br>
<input type="radio" name="q1" value="c">c) <embed><br>
<h2>Question 2:</h2>
<p>How do you set the source URL for an iframe?</p>
<input type="radio" name="q2" value="a">a) src<br>
<input type="radio" name="q2" value="b">b) href<br>
<input type="radio" name="q2" value="c">c) url<br>
<h2>Question 3:</h2>
<p>What is the attribute used to specify the width of an iframe?</p>
<input type="radio" name="q3" value="a">a) width<br>
<input type="radio" name="q3" value="b">b) size<br>
<input type="radio" name="q3" value="c">c) dimension<br>
<h2>Question 4:</h2>
<p>Which attribute is used to disable the scrolling feature in an iframe?</p>
<input type="radio" name="q4" value="a">a) scrolling<br>
<input type="radio" name="q4" value="b">b) scrollable<br>
<input type="radio" name="q4" value="c">c) noscroll<br>
<h2>Question 5:</h2>
<p>How do you remove the border around an iframe?</p>
<input type="radio" name="q5" value="a">a) borderless<br>
<input type="radio" name="q5" value="b">b) noborder<br>
<input type="radio" name="q5" value="c">c) none<br>
<br>
<input type="submit" value="Submit">
</form>
<script>
document.querySelector('form').addEventListener('submit', function(e) {
e.preventDefault();
var correctAnswers = {
q1: 'b',
q2: 'a',
q3: 'a',
q4: 'a',
q5: 'c'
};
var totalQuestions = Object.keys(correctAnswers).length;
var score = 0;
for (var i = 1; i <= totalQuestions; i++) {
var answer = document.querySelector('input[name="q' + i + '"]:checked');
if (answer && answer.value === correctAnswers['q' + i]) {
score++;
}
}
var result = (score / totalQuestions) * 100;
alert('Your score: ' + result + '%');
});
</script>
</body>
</html>