
Introduction to SVG: Shapes, Attributes, and Code Examples
Introduction to SVG: Shapes, Attributes, and Code Examples
What is SVG ?
SVG stands for Scalable Vector Graphics.
It is a widely used vector graphics format that allows for the creation and display of two-dimensional images using XML (Extensible Markup Language).
SVG files are typically used for web graphics and can be scaled and resized without losing image quality.
Unlike raster graphics formats (such as JPEG or PNG), which store images as a grid of pixels, SVG stores images as a set of mathematical instructions that define lines, curves, shapes, and colors. This means that SVG images are resolution-independent and can be scaled up or down without any loss of quality.
SVG files can be created and edited using various software programs, including graphic design software like Adobe Illustrator, Inkscape, or online SVG editors. They can be embedded directly into HTML documents and are supported by all major web browsers, making them an ideal choice for creating interactive and dynamic graphics on the web.
SVG images can contain a wide range of elements, including basic shapes (such as rectangles, circles, and polygons), text, gradients, patterns, transparency, and even animations. This flexibility and interactivity make SVG a powerful format for creating complex and visually appealing graphics on the web.
SVG Advantages
SVG offers several advantages over other image formats, particularly when it comes to web graphics. Here are some of the key advantages of SVG:
Scalability:
SVG is resolution-independent, meaning it can be scaled up or down without losing quality. Whether you view an SVG image on a small mobile screen or a large desktop monitor, it will maintain its sharpness and clarity.
Small File Size:
SVG files are typically smaller in size compared to raster image formats like JPEG or PNG. This is because SVG stores graphics as mathematical instructions rather than a grid of pixels. Smaller file sizes result in faster loading times, reduced bandwidth usage, and improved web page performance.
Textual Content:
SVG allows for the inclusion of text within the image file itself. This means that the text remains selectable, searchable, and editable, making it more accessible for users and easier to update and maintain.
Scalable Animations:
SVG supports animation capabilities, allowing for the creation of interactive and dynamic graphics. Animation effects, such as fading, scaling, rotation, and transitions, can be applied to SVG elements, enhancing user experience and engagement.
Accessibility:
SVG images can be made accessible by adding text alternatives (e.g., using the <title> and <desc> elements) and providing meaningful descriptions for visually impaired users. This ensures that the content is accessible to a wider audience.
Editability:
SVG files can be easily edited and modified using various software tools, including graphic design software like Adobe Illustrator or free applications like Inkscape.
This makes it convenient to make changes to SVG graphics as needed.
Search Engine Optimization (SEO):
SVG images are text-based and can be indexed by search engines, improving their visibility in search results. Additionally, the small file size and faster loading times of SVG files contribute to a better user experience, which is a positive ranking factor for search engines.
CSS Styling:
SVG can be styled using CSS (Cascading Style Sheets). This allows for greater control over the appearance and behavior of SVG elements, making it easier to customize and integrate them into web designs.
Overall, SVG offers a versatile and efficient way to create and display graphics on the web, providing flexibility, interactivity, and accessibility.
step by step how to create SVG Images ?
To create SVG images, you can follow these general steps:
1-Determine the Design: Decide on the concept and design of your SVG image. Consider the shapes, lines, text, and other elements you want to include.
2-Choose a Tool: Select a software tool or editor to create your SVG image. Some popular options include Adobe Illustrator, Inkscape, Sketch, or online editors like SVG-Edit or Vectr.
3-Set up the Canvas: Open your chosen software and create a new document or canvas. Specify the dimensions for your SVG image, such as width and height.
4-Add Shapes and Elements: Start building your SVG image by adding shapes and elements. These can include rectangles, circles, polygons, lines, and curves. Use the drawing tools provided by your software to create and position these elements as desired.
5-Apply Styling: Customize the appearance of your SVG image using colors, gradients, strokes, fills, and other styling options. You can use the software’s interface or edit the SVG code directly to apply the desired styles.
6-Include Text: If your design requires text, add it to your SVG image. Specify the font, size, alignment, and other text properties. Make sure to position the text appropriately within your design.
7-Group and Organize: Organize your SVG image by grouping related elements together.
This can make it easier to manage and manipulate different parts of the image.
8-Add Effects and Animations (optional): If you want to enhance your SVG image with effects or animations, you can apply them at this stage. Effects can include gradients, shadows, transparency, or filters. Animations can be created using CSS or SVG animation syntax.
9-Test and Preview: Preview your SVG image within the software to ensure it looks as intended.
Make any necessary adjustments to the design, styling, or positioning to achieve the desired result.
10-Save and Export: Once you are satisfied with your SVG image, save the file in the SVG format. Choose an appropriate file name and location on your computer.
Additionally, some software may offer options for exporting the SVG image to other formats, such as PNG, if needed.
After exporting the SVG image, you can use it in your web projects by embedding it directly into HTML code or linking to it as a separate file.
Remember to follow best practices for optimizing SVG images, such as removing unnecessary code, minimizing file size, and ensuring accessibility by providing alternative text and descriptions.
Each software tool may have its own specific steps and interface, but these general guidelines should help you get started with creating SVG images.
Creating SVG Images in HTML
How to create SVG image in HTML?
To create and display SVG images directly in HTML, you can follow these steps:
1-Open a text editor or an HTML editor of your choice.
2-Create a new HTML document by typing the following code:
<!DOCTYPE html> <html> <head> <title>SVG Image Example</title> </head> <body> </body> </html>
3-Within the <body> tags, add an <svg> element to define the SVG image.
Specify the desired width and height attributes to set the dimensions of the image.
For example:
<svg width="200" height="200"> <!-- SVG elements will go here --> </svg>
4-Inside the <svg> element, you can add various SVG elements to create your image.
These elements can include shapes, text, gradients, and more.
Here’s an example of a simple SVG image with a rectangle and a circle:
<svg width="200" height="200"> <rect x="50" y="50" width="100" height="100" fill="blue"/> <circle cx="100" cy="100" r="40" fill="red"/> </svg>
5-Customize the SVG elements by adding attributes to define their properties.
For example, you can use the x, y, width, and height attributes for shapes to specify their position and size.
You can use attributes like fill to set the color, stroke to define the outline color, and stroke-width to control the outline thickness.
6-Save the HTML file with an appropriate name and the .html extension.
7-Open the HTML file in a web browser, and you should see your SVG image displayed.
You can continue adding more SVG elements, styling, and animations to create complex and interactive SVG images directly within your HTML document.
Remember to follow proper HTML syntax and structure, and don’t forget to close your tags appropriately.
Note: For more advanced SVG manipulation and interactivity, you might need to use JavaScript libraries like D3.js or Snap.svg.
complete code example
Here’s a complete HTML code example that creates an SVG image with a rectangle and a circle:
<!DOCTYPE html> <html> <head> <title>SVG Image Example</title> </head> <body> <svg width="200" height="200"> <rect x="50" y="50" width="100" height="100" fill="blue"/> <circle cx="100" cy="100" r="40" fill="red"/> </svg> </body> </html>
Save the above code into an HTML file with a .html extension (e.g., svg_image.html), and then open the file in a web browser. You should see a blue rectangle and a red circle displayed within an SVG container with a width and height of 200 pixels.

Try to customize the attributes of the <rect> and <circle> elements to adjust the position, size, and colors of the shapes. You can also add additional SVG elements or apply styling attributes to create more complex images.
Remember to keep the HTML structure intact, including the DOCTYPE declaration, opening and closing <html>, <head>, and <body> tags.
Once you have the SVG image displaying correctly, you can further enhance it with additional SVG elements, styling, animations, or even interactivity using JavaScript and SVG libraries.
SVG Shapes
SVG (Scalable Vector Graphics) supports various shape elements that you can use to create different shapes within your SVG images.
Here are some commonly used SVG shape elements:
<rect>:
Represents a rectangle or square shape. It has attributes like x, y, width, height, rx, and ry for defining the position, size, and rounded corners of the rectangle.
<circle>:
Represents a circle shape. It has attributes like cx, cy, and r for specifying the center coordinates and radius of the circle.
<ellipse>:
Represents an ellipse shape. It has attributes like cx, cy, rx, and ry for defining the center coordinates and the horizontal and vertical radii of the ellipse.
<line>:
Represents a straight line segment. It has attributes like x1, y1, x2, and y2 for specifying the coordinates of the starting and ending points of the line.
<polyline>:
Represents a series of connected straight line segments. It has the points attribute that defines a set of coordinates for the vertices of the polyline.
<polygon>:
Represents a closed shape with straight line segments. It is similar to <polyline>, but it automatically connects the last point to the first point, creating a closed shape.
<path>:
Represents a complex shape defined by a series of commands and coordinates.
The d attribute of the <path> element contains the path data, which consists of commands like M, L, C, and more, along with corresponding coordinates.
These shape elements can be customized with various attributes like fill for defining the fill color, stroke for specifying the outline color, stroke-width for controlling the outline thickness, and others to achieve the desired appearance.
You can combine these shape elements, apply styling attributes, and use transformations to create intricate and visually appealing SVG images with different shapes and designs.
SVG Rectangle – <rect>:
complete code example
The <rect> element in SVG is used to create rectangles or squares within an SVG image.
It has attributes that define the position, size, and appearance of the rectangle.
Here’s an explanation of the key attributes:
- x: Specifies the x-coordinate of the top-left corner of the rectangle.
- y: Specifies the y-coordinate of the top-left corner of the rectangle.
- width: Defines the width of the rectangle.
- height: Defines the height of the rectangle.
- rx (optional): Specifies the horizontal radius of the rounded corners, giving the rectangle rounded edges.
- ry (optional): Specifies the vertical radius of the rounded corners, allowing for elliptical edges.
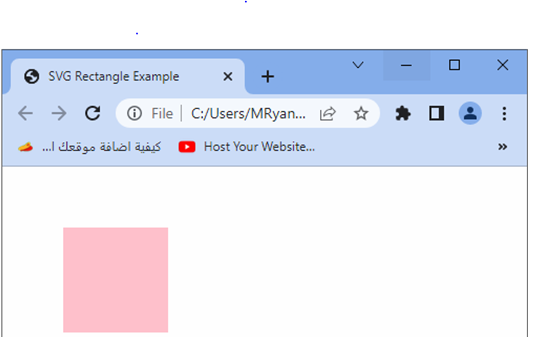
Here’s a complete HTML code example that demonstrates the usage of the <rect> element to create a blue rectangle within an SVG image:
<!DOCTYPE html> <html> <head> <title>SVG Rectangle Example</title> </head> <body> <svg width="200" height="200"> <rect x="50" y="50" width="100" height="100" fill="pink"/> </svg> </body> </html>
Explanation:
In the above example
1- we set the SVG container’s width and height to 200 pixels.
2-Then, within the <svg> element, we use the <rect> element to create a rectangle with a top-left corner positioned at (x=50, y=50).
The rectangle has a width of 100 pixels and a height of 100 pixels.
3-We set the fill attribute to “blue” to specify the rectangle’s fill color.
You can adjust the values of the attributes to change the position, size, and appearance of the rectangle.
Try to experiment by modifying the attribute values or adding additional attributes to style the rectangle further.
4-Save the above code into an HTML file (e.g., rectangle.html), and then open the file in a web browser.
You should see a blue rectangle displayed within the SVG container.
Remember to maintain the HTML structure, including the DOCTYPE declaration, opening and closing <html>, <head>, and <body> tags, as well as the <svg> and <rect> elements, to ensure the code functions correctly.
SVG Rectangle – <rect>: attributes, complete code example
The <rect> element in SVG is used to create rectangles or squares within an SVG image.
It has several attributes that define the position, size, and appearance of the rectangle.
Here’s an explanation of the key attributes:
- x: Specifies the x-coordinate of the top-left corner of the rectangle.
- y: Specifies the y-coordinate of the top-left corner of the rectangle.
- width: Defines the width of the rectangle.
- height: Defines the height of the rectangle.
- rx (optional): Specifies the horizontal radius of the rounded corners, giving the rectangle rounded edges.
- ry (optional): Specifies the vertical radius of the rounded corners, allowing for elliptical edges.
- fill (optional): Defines the fill color of the rectangle.
- stroke (optional): Specifies the color of the rectangle’s outline.
- stroke-width (optional): Defines the thickness of the rectangle’s outline.
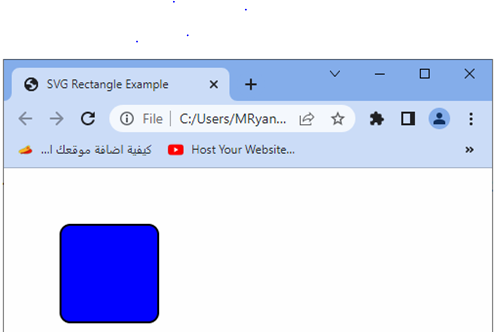
Here’s a complete HTML code example that demonstrates the usage of the <rect> element with various attributes to create and style a rectangle within an SVG image:
<!DOCTYPE html> <html> <head> <title>SVG Rectangle Example</title> </head> <body> <svg width="200" height="200"> <rect x="50" y="50" width="100" height="100" rx="10" ry="10" fill="blue" stroke="black" stroke-width="2"/> </svg> </body> </html>
Explanation:
1-In the above example, we set the width and height of the SVG container to 200 pixels.
2-Within the <svg> element, we use the <rect> element to create a rectangle:
The x attribute is set to 50, placing the rectangle 50 units from the left side of the SVG container.
The y attribute is set to 50, positioning the rectangle 50 units from the top of the SVG container.
The width attribute is set to 100, defining the width of the rectangle as 100 pixels.
The height attribute is set to 100, defining the height of the rectangle as 100 pixels.
The rx and ry attributes are set to 10, creating rounded corners with a horizontal radius of 10 and a vertical radius of 10.
The fill attribute is set to “blue”, specifying the fill color of the rectangle.
The stroke attribute is set to “black”, defining the color of the rectangle’s outline.
The stroke-width attribute is set to 2, specifying the thickness of the rectangle’s outline.
3-Save the above code into an HTML file (e.g., rectangle.html) and open it in a web browser.
You should see a rectangle with rounded corners and a blue fill color, outlined in black with a thickness of 2 pixels.
Try to modify the attribute values or add additional attributes to further customize the rectangle’s position, size, and appearance.
Ensure that you maintain the HTML structure, including the DOCTYPE declaration, opening and closing <html>, <head>, and <body> tags, as well as the <svg> and <rect> elements, for the code to work correctly.
SVG <circle>:
The <circle> element in SVG is used to create circles within an SVG image. It has attributes that define the position, size, and appearance of the circle.
Here’s an explanation of the key attributes:
- cx: Specifies the x-coordinate of the center of the circle.
- cy: Specifies the y-coordinate of the center of the circle.
- r: Defines the radius of the circle.
- fill (optional): Defines the fill color of the circle.
- stroke (optional): Specifies the color of the circle’s outline.
- stroke-width (optional): Defines the thickness of the circle’s outline.
Here’s a complete HTML code example that demonstrates the usage of the <circle> element with various attributes to create and style a circle within an SVG image:
<!DOCTYPE html> <html> <head> <title>SVG Circle Example</title> </head> <body> <svg width="200" height="200"> <circle cx="100" cy="100" r="50" fill="red" stroke="black" stroke-width="2"/> </svg> </body> </html>
Explanation:
1-In the above example, we set the width and height of the SVG container to 200 pixels.
2-Within the <svg> element, we use the <circle> element to create a circle:
- -The cx attribute is set to 100, placing the center of the circle at 100 units from the left side of the SVG container.
- -The cy attribute is set to 100, positioning the center of the circle at 100 units from the top of the SVG container.
- -The r attribute is set to 50, defining the radius of the circle as 50 pixels.
- -The fill attribute is set to “red”, specifying the fill color of the circle.
- -The stroke attribute is set to “black”, defining the color of the circle’s outline.
- -The stroke-width attribute is set to 2, specifying the thickness of the circle’s outline.
3-Save the above code into an HTML file (e.g., circle.html) and open it in a web browser.
You should see a red circle centered within the SVG container, outlined in black with a thickness of 2 pixels.

Try to modify the attribute values or add additional attributes to further customize the circle’s position, size, and appearance.
Ensure that you maintain the HTML structure, including the DOCTYPE declaration, opening and closing <html>, <head>, and <body> tags, as well as the <svg> and <circle> elements, for the code to work correctly.
SVG <ellipse>SVG <ellipse>:
The <ellipse> element in SVG is used to create ellipses within an SVG image.
It has attributes that define the position, size, and appearance of the ellipse.
Here’s an explanation of the key attributes:
- cx: Specifies the x-coordinate of the center of the ellipse.
- cy: Specifies the y-coordinate of the center of the ellipse.
- rx: Defines the horizontal radius of the ellipse.
- ry: Defines the vertical radius of the ellipse.
- fill (optional): Defines the fill color of the ellipse.
- stroke (optional): Specifies the color of the ellipse’s outline.
- stroke-width (optional): Defines the thickness of the ellipse’s outline.
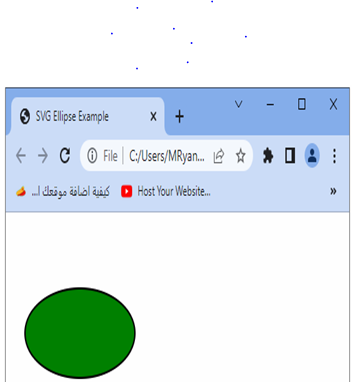
Here’s a complete HTML code example that demonstrates the usage of the <ellipse> element with various attributes to create and style an ellipse within an SVG image:
<!DOCTYPE html> <html> <head> <title>SVG Ellipse Example</title> </head> <body> <svg width="200" height="200"> <ellipse cx="100" cy="100" rx="80" ry="40" fill="green" stroke="black" stroke-width="2"/> </svg> </body> </html>
Explanation:
1-In the above example, we set the width and height of the SVG container to 200 pixels.
2-Within the <svg> element, we use the <ellipse> element to create an ellipse:
- The cx attribute is set to 100, placing the center of the ellipse at 100 units from the left side of the SVG container.
- The cy attribute is set to 100, positioning the center of the ellipse at 100 units from the top of the SVG container.
- The rx attribute is set to 80, defining the horizontal radius of the ellipse as 80 pixels.
- The ry attribute is set to 40, defining the vertical radius of the ellipse as 40 pixels.
- The fill attribute is set to “green”, specifying the fill color of the ellipse.
- The stroke attribute is set to “black”, defining the color of the ellipse’s outline.
- The stroke-width attribute is set to 2, specifying the thickness of the ellipse’s outline.
Save the above code into an HTML file (e.g., ellipse.html) and open it in a web browser. You should see a green ellipse centered within the SVG container, outlined in black with a thickness of 2 pixels.
Try to modify the attribute values or add additional attributes to further customize the ellipse’s position, size, and appearance.
Ensure that you maintain the HTML structure, including the DOCTYPE declaration, opening and closing <html>, <head>, and <body> tags, as well as the <svg> and <ellipse> elements, for the code to work correctly.
SVG <line>:
The <line> element in SVG is used to create straight line segments within an SVG image.
It represents a line connecting two points.
Here’s an explanation of the key attributes:
- x1, y1: The starting point of the line. x1 specifies the x-coordinate, and y1 specifies the y-coordinate.
- x2, y2: The ending point of the line. x2 specifies the x-coordinate, and y2 specifies the y-coordinate.
- stroke (optional): Specifies the color of the line.
- stroke-width (optional): Defines the thickness of the line.
Here’s a complete HTML code example that demonstrates the usage of the <line> element with various attributes to create and style a line within an SVG image:
<!DOCTYPE html> <html> <head> <title>SVG Line Example</title> </head> <body> <svg width="200" height="200"> <line x1="50" y1="50" x2="150" y2="150" stroke="blue" stroke-width="2"/> </svg> </body> </html>
Explanation:
1-In the above example, we set the width and height of the SVG container to 200 pixels.
2-Within the <svg> element, we use the <line> element to create a line:
- The x1 attribute is set to 50, specifying the x-coordinate of the starting point of the line.
- The y1 attribute is set to 50, specifying the y-coordinate of the starting point of the line.
- The x2 attribute is set to 150, specifying the x-coordinate of the ending point of the line.
- The y2 attribute is set to 150, specifying the y-coordinate of the ending point of the line.
- The stroke attribute is set to “blue”, defining the color of the line.
- The stroke-width attribute is set to 2, specifying the thickness of the line.
Save the above code into an HTML file (e.g., line.html) and open it in a web browser. You should see a line connecting the starting point (50, 50) to the ending point (150, 150), colored in blue with a thickness of 2 pixels.

Try to modify the attribute values or add additional attributes to further customize the line’s position, size, and appearance.
Ensure that you maintain the HTML structure, including the DOCTYPE declaration, opening and closing <html>, <head>, and <body> tags, as well as the <svg> and <line> elements, for the code to work correctly.
Quiz with answers
Here’s a multiple-choice quiz to test your understanding of SVG shapes.
Each question will have four options, and the correct answer will be indicated with an asterisk (*). Good luck!
1-Which SVG element is used to create rectangles or squares?
a) <circle>
b) <rect> *
c) <ellipse>
d) <line>
2-The <rect> element has attributes that define the position, size, and appearance of the rectangle. Which attribute is used to specify the width of the rectangle?
a) x
b) y
c) width *
d) height
3-How can you create rounded corners for a rectangle using the <rect> element?
a) By setting the rx attribute to the desired radius value *
b) By setting the fill attribute to “rounded”
c) By using the <rounded> element instead of <rect>
d) By setting the corner-radius attribute to the desired value
4-Which SVG element is used to create circles?
a) <circle> *
b) <rect>
c) <line>
d) <ellipse>
5-What attribute is used to specify the fill color of an ellipse or circle in SVG?
a) fill *
b) color
c) background-color
d) stroke
6-Which attribute is used to define the thickness of the outline of an SVG shape?
a) fill
b) stroke-width *
c) outline-width
d) border-width
7-The <line> element is used to create straight line segments in SVG. Which attributes are used to specify the starting and ending points of the line?
a) x1 and y1 for the starting point, x2 and y2 for the ending point *
b) start-x and start-y, end-x and end-y
c) start-point and end-point
d) from-x and from-y, to-x and to-y
8-What is the purpose of the <ellipse> element in SVG?
a) To create curved lines
b) To create rectangles with rounded corners
c) To create circular shapes *
d) To create 3D shapes
Remember to review your answers and check them against the correct answers below:
- b) <rect>
- c) width
- a) By setting the rx attribute to the desired radius value
- a) <circle>
- a) fill
- b) stroke-width
- a) x1 and y1 for the starting point, x2 and y2 for the ending point
- c) To create circular shapes
9-Which attribute is used to define the center point of an ellipse in SVG?
a) cx
b) cy
c) rx
d) ry
10-How can you set the fill color of a rectangle in SVG to be transparent?
a) By setting the fill attribute to “transparent”
b) By omitting the fill attribute
c) By setting the fill attribute to “none”
d) By setting the fill-opacity attribute to 0
11-What is the purpose of the rx attribute in the <rect> element?
a) To define the width of the rectangle
b) To specify the x-coordinate of the rectangle’s top-left corner
c) To define the horizontal radius of the rectangle’s rounded corners
d) To specify the color of the rectangle’s outline
12-Which SVG shape allows you to create curved lines and shapes?
a) <circle>
b) <path>
c) <line>
d) <ellipse>
13-What is the default value for the stroke-width attribute in SVG?
a) 1
b) 2
c) 3
d) 0
14-Which attribute is used to control the transparency of an SVG shape’s fill color or stroke color?
a) opacity
b) transparency
c) alpha
d) fill-opacity or stroke-opacity
Remember to review your answers and check them against the correct answers below:
- a) cx
- c) By setting the fill attribute to “none”
- c) To define the horizontal radius of the rectangle’s rounded corners
- b) <path>
- a) 1
- d) fill-opacity or stroke-opacity