
How to Display Data in JavaScript: Methods and Examples
Displaying Data in JavaScript
Learn various methods to display data in JavaScript, including console output, alert boxes, and modifying HTML elements. Explore code examples and best practices.
JavaScript Output
JavaScript is a programming language that is primarily used for creating interactive web pages and web applications. One of the ways to interact with JavaScript is through its output capabilities, which allow you to display information or results to the user.
There are multiple ways to generate output in JavaScript:
1)Console Output:
JavaScript has a built-in object called console that provides methods for logging information to the browser’s console.
The most commonly used method is console.log(), which allows you to display messages, variables, or any other data in the console.
For example:
console.log("Hello, world!");
// Output: Hello, world!
2) Alert Boxes:
JavaScript provides the alert() function, which displays a small dialog box with a message to the user. This is often used to provide simple notifications or display information.
For example:
alert("Welcome to our website!");
// Output: A dialog box with the message "Welcome to our website!"
3) Writing to the Document:
JavaScript can also write content directly to the HTML document.
This is commonly done using the document.write() method, which appends the specified content to the document.
For example:
document.write("This is some text."); // Output: This is some text.
4) Modifying HTML Elements:
Another common way to display output is by modifying HTML elements on the page.
JavaScript provides several methods to interact with HTML elements, such as getElementById(), innerHTML, or textContent, which allow you to change the content of specific elements.
For example:
document.getElementById("myElement").innerHTML = "New content";
// Output: Changes the content of the element with id="myElement" to "New content".
These are some of the main ways to generate output in JavaScript. Depending on your specific use case, you may choose one method over another to display information or interact with the user.
ways to display data in js :
Here are some examples of how to display data in JavaScript using different methods:
1)Console Output (console.log()):
var name = "Gogo";
var age = 15;
console.log("Name: " + name); // Output: Name: Gogo
console.log("Age: " + age); // Output: Age: 15

2)Alert Box (alert()):
var message = "Hello, world!"; alert(message); // Output: A dialog box with the message "Hello, world!"

3)Writing to the Document (document.write()):
var result = 10 + 5;
document.write("The result is: " + result); // Output: The result is: 15
4)Modifying HTML Elements (innerHTML or textContent):
HTML:
<p id="output"></p>
JavaScript:
var data = "This is some data";
document.getElementById("output").innerHTML = data; // Output: Sets the content of the <p> element to "This is some data"
5)Using Template Literals:
var name = "Gogo";
var age =15;
var message = `Name: ${name}, Age: ${age}`;
console.log(message); // Output: Name: Gogo, Age: 15

6)Creating a New HTML Element:
HTML:
<div id="container"></div>
JavaScript:
var data = "New element content";
var newElement = document.createElement("p");
newElement.textContent = data;
document.getElementById("container").appendChild(newElement);
// Output: Creates a new <p> element with the content "New element content" and appends it to the <div> with id="container"
These examples demonstrate different ways to display data in JavaScript.
You can choose the method that best suits your needs based on the context of your application.
How to use some methods to display data in JavaScript
How to use innerHTML to display data in JavaScript ?
Here’s a complete code example that demonstrates the usage of innerHTML to display data in JavaScript:
HTM
<!DOCTYPE html> <html> <head> <title>Display Data Example</title> </head> <body> <h1>Display Data Example</h1> <p id="output"></p> <script src="script.js"></script> </body> </html>

JavaScript (script.js):
// Retrieve the output element
var outputElement = document.getElementById("output");
// Define the data
var data = "<strong>Hello, world!</strong>";
// Set the data as the inner HTML of the output element
outputElement.innerHTML = data;

In this example:
1- we have an HTML file with a <p> element that has the id “output.”
2-The JavaScript code, placed in the script.js file, retrieves the output element using getElementById(). 3-Then, it defines a variable data that contains the HTML content we want to display, in this case, “<strong>Hello, world!</strong>”.
3-Finally, it sets the innerHTML property of the output element to the data variable, effectively replacing the content of the <p> element with the provided HTML.
When you open the HTML file in a web browser, the output will be rendered as “Hello, world!” in bold because we used <strong> tags within the data variable. The innerHTML property interprets the content as HTML, allowing you to include tags for formatting or other purposes.

Make sure to place the JavaScript code within the <script> tag or link it using the src attribute. By doing so, the script will be executed when the page loads, updating the content of the output element.
How to use document.write() to display data in JavaScript ?
Here’s a complete code example that demonstrates the usage of document.write() to display data in JavaScript:
1)Create:HTML file:
<!DOCTYPE html> <html> <head> <title>Display Data Example</title> </head> <body> <h1>Display Data Example</h1> <script src="Externalscript.js"></script> </body> </html>

2)create :JavaScript (script.js) file:
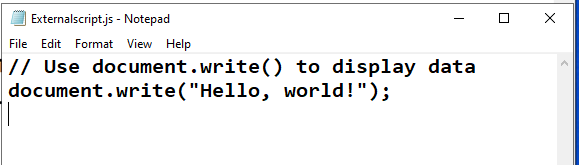
// Use document.write() to display data
document.write("Hello, world!");

It’s important to note that document.write() is typically used for testing or specific scenarios where you want to directly write content to the document.
However, it’s not commonly used for regular content updates or dynamic web pages, as calling document.write() after the document has finished loading can overwrite the entire document’s content.
How to use window.alert() to display data in JavaScript?
Here’s a complete code example that demonstrates the usage of window.alert() to display a message using JavaScript:
1)Create:HTML file :
<!DOCTYPE html> <html> <head> <title>Display Alert Example</title> </head> <body> <h1>Display Alert Example</h1> <script src="script.js"></script> </body> </html>
2) create :-JavaScript (script.js) file:
// Use window.alert() to display a message
window.alert("Hello, world!");
In this example:
1- we have an HTML file with a basic structure and a <script> tag that references an external JavaScript file called script.js.
2-Inside the JavaScript file, we use window.alert() to display the message “Hello, world!”.
3-When you open the HTML file in a web browser, an alert dialog box will appear with the message “Hello, world!”.
4-The dialog box will typically pause the execution of the JavaScript until the user interacts with it by clicking “OK” or closing the dialog.
5-window.alert() is commonly used for displaying simple notifications or messages to the user.
However, it can be interruptive and may not be suitable for all scenarios, especially if you need to display longer or more complex content. In those cases, you might consider using other methods like modifying HTML elements or logging to the console.
How to use console.log() to display data in JavaScript?
Here’s a complete code example that demonstrates the usage of console.log() to display output in JavaScript:
1) Create: HTML file:
<!DOCTYPE html> <html> <head> <title>Console Log Example</title> </head> <body> <h1>Console Log Example</h1> <script src="script.js"></script> </body> </html>
2) creae JavaScript file : (script.js):
// Use console.log() to display output
console.log("Hello, world!");
var name = "Gogo";
var age = 15;
console.log("Name: " + name);
console.log("Age: " + age);

The output:

In this example:
1- we have an HTML file with a basic structure and a <script> tag that references an external JavaScript file called script.js.
2-Inside the JavaScript file, we use console.log() to display various outputs.
3-When you open the HTML file in a web browser and inspect the browser’s console, you will see the following output:
Hello, world!
Name: Gogo
Age: 15
The console.log() method is commonly used for debugging and displaying information during development. It allows you to log messages, variables, or any other data to the browser’s console. This is especially useful for checking the values of variables, tracking the flow of your code, or identifying errors.
Note that the output will be visible in the browser’s console, which can be accessed through the developer tools of the browser. You can usually open the console by right-clicking on the webpage and selecting “Inspect” or “Inspect Element” and then navigating to the “Console” tab.
Remember to check the console for output when using console.log(), as it won’t be directly visible on the webpage itself.
How to use JavaScript Print ?
In JavaScript, you can use the window.print() method to trigger the printing functionality of the browser. It allows you to print the current web page or a specific portion of it.
Here’s an example of how to use window.print():
1-Create:HTML file:
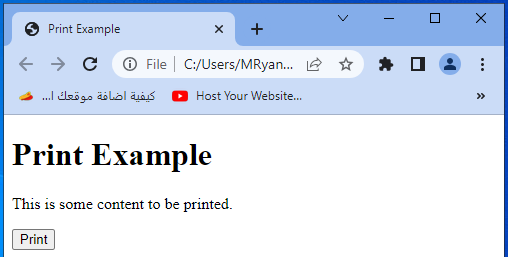
<!DOCTYPE html> <html> <head> <title>Print Example</title> </head> <body> <h1>Print Example</h1> <p>This is some content to be printed.</p> <button id="printButton">Print</button> <script src="script.js"></script> </body> </html>

2) create javaScript file such as :name (script.js):
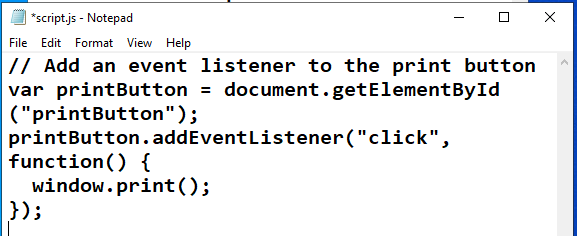
// Add an event listener to the print button
var printButton = document.getElementById("printButton");
printButton.addEventListener("click", function() {
window.print();
});
In this example:
1- we have an HTML file with a <button> element and a script file called script.js.
2-The JavaScript code retrieves the print button element using getElementById(). It adds an event listener to the button, so when it is clicked, the window.print() method is invoked.
3-When you open the HTML file in a web browser, you will see a “Print” button. Clicking the button will trigger the print functionality of the browser.
The print preview or print dialog box will appear, allowing the user to select a printer and adjust print settings before printing the page.
It’s important to note that the print behavior and appearance can vary across different browsers and operating systems. The final output may depend on the user’s print settings and the styling of the web page.
Remember to inform your users about the printing functionality and ensure that your web page is appropriately formatted for printing if that is a specific requirement.
Quiz about Displaying Data in JavaScript
Here’s a multiple-choice quiz about the lesson content. Each question is followed by four possible answer options (A, B, C, and D), and the correct answer is indicated with an asterisk (*) next to the option.
1-How can you display information in the browser’s console using JavaScript?
A) window.alert()
B) document.write()
C) console.log()*
D) innerHTML
2-Which method is commonly used for displaying simple notifications or messages to the user?
A) console.log()
B) window.print()
C) document.write()
D) window.alert()*
3-What is the purpose of window.print() in JavaScript?
A) It displays output in the console.
B) It modifies HTML elements.
C) It triggers the printing functionality of the browser.*
D) It writes content to the document.
4-Which method allows you to modify the content of specific HTML elements in JavaScript?
A) console.log()
B) window.alert()
C) document.write()
D) innerHTML*
5-How can you write content directly to the HTML document in JavaScript?
A) console.log()
B) window.print()
C) document.write()*
D) innerHTML
6-Which method is used to generate output in the browser’s console in JavaScript?
A) window.alert()
B) document.write()
C) console.log()*
D) innerHTML
7-What is the purpose of document.write() in JavaScript?
A) It displays output in the console.
B) It modifies HTML elements.
C) It triggers the printing functionality of the browser.
D) It writes content directly to the HTML document.*
8-How can you display a message in an alert dialog box in JavaScript?
A) console.log()
B) window.print()
C) document.write()
D) window.alert()*
9-Which method is commonly used for debugging and displaying information during development in JavaScript?
A) console.log()*
B) window.print()
C) document.write()
D) window.alert()
10-How can you modify the content of an HTML element using JavaScript?
A) console.log()
B) window.print()
C) document.write()
D) innerHTML*
References
Mozilla Developer Network (MDN) JavaScript Guide:
W3Schools JavaScript Tutorial: