
Java-script if … Else statements
JavaScript If-Else Statement
Conditional Execution in JavaScript
Learn how to use the JavaScript if-else statement for conditional execution. Understand the syntax, usage, and examples of if-else statements in JavaScript
In JavaScript, an if statement is a conditional statement used to execute a block of code if a specified condition is true. The basic syntax of an if statement looks like this:
Syntax:
if (condition) {
// Code to be executed if the condition is true
}
Here’s a breakdown of how the if statement works:
The if keyword is followed by a pair of parentheses ( ). Inside these parentheses, you place the condition that you want to evaluate. This condition must result in either true or false.
If the condition inside the parentheses is true, the code block enclosed in curly braces { } following the if statement is executed. If the condition is false, the code block is skipped.
Here’s a simple example:
let age = 25;
if (age >= 18) {
console.log("You are an adult.");
} else {
console.log("You are not yet an adult.");
}
In this example, if the age variable is greater than or equal to 18, the message “You are an adult.” will be printed to the console. Otherwise, the message “You are not yet an adult.” will be printed.
You can also use else if and else statements to handle multiple conditions:
let score = 75;
if (score >= 90) {
console.log("You got an A.");
} else if (score >= 80) {
console.log("You got a B.");
} else if (score >= 70) {
console.log("You got a C.");
} else {
console.log("You need to improve your score.");
}
In this example, the code checks the value of the score variable and prints a corresponding message based on the score.
You can also nest if statements within each other to create more complex conditional logic.
complete code example in html
here’s a complete HTML example that includes JavaScript to demonstrate the use of an if statement:
<!DOCTYPE html>
<html>
<head>
<title>Conditional Statement Example</title>
</head>
<body>
<h1>Age Checker</h1>
<p>Enter your age:</p>
<input type="number" id="ageInput">
<button onclick="checkAge()">Check Age</button>
<p id="result"></p>
<script>
function checkAge() {
// Get the value of the input field with id "ageInput"
let age = document.getElementById("ageInput").value;
// Convert the input value to a number
age = parseInt(age);
// Check if the age is valid and display a message
if (!isNaN(age)) {
if (age >= 18) {
document.getElementById("result").innerHTML = "You are an adult.";
} else {
document.getElementById("result").innerHTML = "You are not yet an adult.";
}
} else {
document.getElementById("result").innerHTML = "Please enter a valid age.";
}
}
</script>
</body>
</html>
In this HTML example:
- We have an input field where the can enter their age, a “Check Age” button to trigger the age check, and a paragraph element with the id “result” where the result message will be displayed.
- In the <script> section, we define a JavaScript function called checkAge(). This function retrieves the age entered by the , converts it to a number using parseInt(), and then uses an if statement to check if it’s a valid age.
- If the age is valid, it uses another if statement to check whether the age is greater than or equal to 18 and displays the appropriate message in the “result” paragraph element.
- If the age is not valid (e.g., if the enters a non-numeric value), it displays a message asking the to enter a valid age.
When you open this HTML file in a web browser, you can enter an age, click the “Check Age” button, and it will display the corresponding message based on the age you entered.

complete code example
Here’s a more complete HTML example that includes JavaScript and CSS for a simple webpage that allows s to enter their age and see a message displayed with some styling:
<!DOCTYPE html>
<html>
<head>
<title>Age Checker</title>
<style>
body {
font-family: Arial, sans-serif;
text-align: center;
}
h1 {
color: #333;
}
#ageInput {
padding: 5px;
font-size: 18px;
}
#result {
font-size: 24px;
margin-top: 20px;
}
</style>
</head>
<body>
<h1>Age Checker</h1>
<p>Enter your age:</p>
<input type="number" id="ageInput">
<button onclick="checkAge()">Check Age</button>
<p id="result"></p>
<script>
function checkAge() {
// Get the value of the input field with id "ageInput"
let age = document.getElementById("ageInput").value;
// Convert the input value to a number
age = parseInt(age);
// Check if the age is valid and display a message
if (!isNaN(age)) {
if (age >= 18) {
document.getElementById("result").innerHTML = "You are an adult.";
document.getElementById("result").style.color = "green";
} else {
document.getElementById("result").innerHTML = "You are not yet an adult.";
document.getElementById("result").style.color = "red";
}
} else {
document.getElementById("result").innerHTML = "Please enter a valid age.";
document.getElementById("result").style.color = "black";
}
}
</script>
</body>
</html>
In this enhanced example:
- We’ve added some CSS styles to give the webpage a more polished look. It includes styling for the heading, input field, and result text.
- The result message now changes color based on whether the is an adult or not. If the is an adult, the message appears in green; otherwise, it appears in red.
- We’ve added comments to the code for better readability.
When you open this HTML file in a web browser, you can enter an age, click the “Check Age” button, and it will display the corresponding message with styling.
java-script else Statement
In JavaScript, the else statement is used in conjunction with an if statement to specify a block of code that should be executed if the condition in the if statement is false.
The basic syntax of an if…else statement looks like this:
if (condition) {
// Code to be executed if the condition is true
} else {
// Code to be executed if the condition is false
}
Here’s how it works:
- The if keyword is followed by a pair of parentheses ( ), inside which you place the condition you want to evaluate.
- If the condition inside the parentheses is true, the code block immediately following the if statement is executed.
- If the condition is false, the code block following the else statement is executed instead.
Here’s an example:
let temperature = 28;
if (temperature >= 30) {
console.log("It's a hot day!");
} else {
console.log("It's not very hot today.");
}
In this example, if the temperature is greater than or equal to 30, the message “It’s a hot day!” will be displayed. Otherwise, the message “It’s not very hot today.” will be displayed because the else block is executed when the condition in the if statement is false.
You can also use else if statements to handle multiple conditions in a more granular way:
let score = 75;
if (score >= 90) {
console.log("You got an A.");
} else if (score >= 80) {
console.log("You got a B.");
} else if (score >= 70) {
console.log("You got a C.");
} else {
console.log("You need to improve your score.");
}
In this example, the code checks the value of the score variable and prints a corresponding message based on different score ranges. If none of the conditions in the if and else if statements is met, the code inside the else block is executed.
Complete code example in html
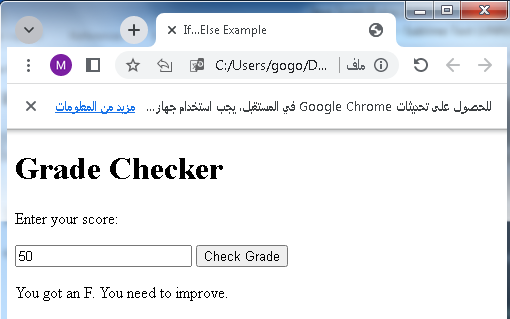
Here’s a complete HTML example that demonstrates the use of the if…else statement in JavaScript within a web page:
<!DOCTYPE html>
<html>
<head>
<title>If...Else Example</title>
</head>
<body>
<h1>Grade Checker</h1>
<p>Enter your score:</p>
<input type="number" id="scoreInput">
<button onclick="checkGrade()">Check Grade</button>
<p id="result"></p>
<script>
function checkGrade() {
// Get the value of the input field with id "scoreInput"
let score = document.getElementById("scoreInput").value;
// Convert the input value to a number
score = parseInt(score);
// Check if the score is valid and determine the grade
if (!isNaN(score)) {
if (score >= 90) {
document.getElementById("result").innerHTML = "You got an A.";
} else if (score >= 80) {
document.getElementById("result").innerHTML = "You got a B.";
} else if (score >= 70) {
document.getElementById("result").innerHTML = "You got a C.";
} else if (score >= 60) {
document.getElementById("result").innerHTML = "You got a D.";
} else {
document.getElementById("result").innerHTML = "You got an F. You need to improve.";
}
} else {
document.getElementById("result").innerHTML = "Please enter a valid score.";
}
}
</script>
</body>
</html>
In this HTML example:
- We have an input field where the can enter their score, a “Check Grade” button to trigger the grade check, and a paragraph element with the id “result” where the result message will be displayed.
- In the <script> section, we define a JavaScript function called checkGrade(). This function retrieves the score entered by the , converts it to a number using parseInt(), and then uses an if…else if…else statement to determine the grade based on the score.
- The code also includes error handling to check if the input is a valid number. If it’s not a valid number, it displays a message asking the to enter a valid score.
When you open this HTML file in a web browser, you can enter a score, click the “Check Grade” button, and it will display the corresponding grade or an error message.
Another complete code example
Of course! Here’s another complete HTML example that uses the if…else statement in JavaScript to create a simple login form that checks if a ‘s name and password are correct:
<!DOCTYPE html>
<html>
<head>
<title>Login Form</title>
<style>
body {
font-family: Arial, sans-serif;
text-align: center;
}
h1 {
color: #333;
}
#loginForm {
margin: 20px auto;
padding: 20px;
border: 1px solid #ccc;
width: 300px;
text-align: left;
}
label {
display: block;
margin-bottom: 10px;
}
input[type="text"], input[type="password"] {
width: 100%;
padding: 5px;
margin-bottom: 10px;
}
#loginResult {
font-size: 18px;
color: red;
}
</style>
</head>
<body>
<h1>Login Form</h1>
<div id="loginForm">
<label for="name">name:</label>
<input type="text" id="name" placeholder="Enter your name">
<label for="password">Password:</label>
<input type="password" id="password" placeholder="Enter your password">
<button onclick="checkLogin()">Login</button>
<p id="loginResult"></p>
</div>
<script>
function checkLogin() {
// Get the values of the name and password fields
let name = document.getElementById("name").value;
let password = document.getElementById("password").value;
// Check if the name and password are correct
if (name === "admin" && password === "password123") {
document.getElementById("loginResult").innerHTML = "Login successful!";
document.getElementById("loginResult").style.color = "green";
} else {
document.getElementById("loginResult").innerHTML = "Login failed. Please check your credentials.";
document.getElementById("loginResult").style.color = "red";
}
}
</script>
</body>
</html>
In this HTML example:
- We have a simple login form that includes fields for entering a name and password, a “Login” button to trigger the login check, and a paragraph element with the id “loginResult” where the login result message will be displayed.
- In the <script> section, we define a JavaScript function called checkLogin(). This function retrieves the values entered in the name and password fields and uses an if…else statement to check if the provided name and password match a predefined set of credentials (in this case, “admin” and “password123”).
- Depending on whether the login is successful or not, it displays an appropriate message in the “loginResult” paragraph element and changes the message color accordingly.
When you open this HTML file in a web browser, you can enter a name and password, click the “Login” button, and it will display a login result message.

Another example
Here’s another complete HTML example that uses the if…else statement in JavaScript to create a simple temperature converter. s can input a temperature in Celsius, and the application will convert it to Fahrenheit and vice versa.
<!DOCTYPE html>
<html>
<head>
<title>Temperature Converter</title>
<style>
body {
font-family: Arial, sans-serif;
text-align: center;
}
h1 {
color: #333;
}
#converterForm {
margin: 20px auto;
padding: 20px;
border: 1px solid #ccc;
width: 300px;
text-align: left;
}
label {
display: block;
margin-bottom: 10px;
}
input[type="number"] {
width: 100%;
padding: 5px;
margin-bottom: 10px;
}
#conversionResult {
font-size: 18px;
color: green;
}
</style>
</head>
<body>
<h1>Temperature Converter</h1>
<div id="converterForm">
<label for="temperature">Enter Temperature (°C or °F):</label>
<input type="number" id="temperature" placeholder="Enter temperature">
<button onclick="convertTemperature()">Convert</button>
<p id="conversionResult"></p>
</div>
<script>
function convertTemperature() {
// Get the value of the temperature input field
let temperature = parseFloat(document.getElementById("temperature").value);
// Check if the input is a valid number
if (!isNaN(temperature)) {
let result = '';
// Check if the entered Celsius (°C) or Fahrenheit (°F)
if (document.getElementById("temperature").value.includes("°C")) {
// Convert Celsius to Fahrenheit
result = ((temperature * 9/5) + 32).toFixed(2) + " °F";
} else if (document.getElementById("temperature").value.includes("°F")) {
// Convert Fahrenheit to Celsius
result = ((temperature - 32) * 5/9).toFixed(2) + " °C";
} else {
result = "Invalid input. Please use either °C or °F.";
document.getElementById("conversionResult").style.color = "red";
}
document.getElementById("conversionResult").innerHTML = result;
document.getElementById("conversionResult").style.color = "green";
} else {
document.getElementById("conversionResult").innerHTML = "Please enter a valid temperature.";
document.getElementById("conversionResult").style.color = "red";
}
}
</script>
</body>
</html>
In this HTML example:
- We have a temperature converter form that allows s to enter a temperature value along with the unit (either °C for Celsius or °F for Fahrenheit).
- When the “Convert” button is clicked, the JavaScript function convertTemperature() is called.
- The function first retrieves the temperature value entered by the and checks if it’s a valid number using parseFloat() and isNaN().
- Depending on the unit (whether it contains “°C” or “°F”), it converts the temperature accordingly and displays the result in the “conversionResult” paragraph element.
- If the input is not valid or the unit is not recognized, it displays an error message in red.
When you open this HTML file in a web browser, you can enter a temperature value with its unit, click the “Convert” button, and it will display the converted temperature or an error message.

uses of if …… else :complete example in html
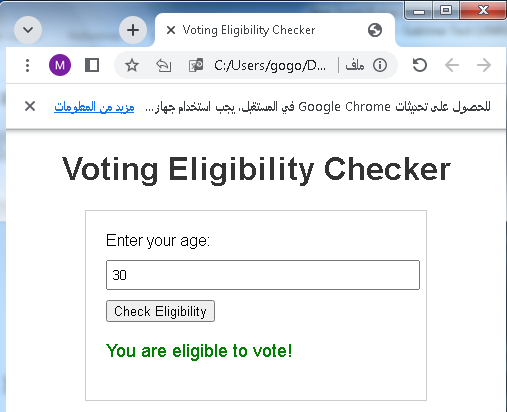
Here’s a complete HTML example that demonstrates the use of the if…else statement in JavaScript for a simple voting eligibility checker. It will determine whether a person is eligible to vote based on their age:
<!DOCTYPE html>
<html>
<head>
<title>Voting Eligibility Checker</title>
<style>
body {
font-family: Arial, sans-serif;
text-align: center;
}
h1 {
color: #333;
}
#ageForm {
margin: 20px auto;
padding: 20px;
border: 1px solid #ccc;
width: 300px;
text-align: left;
}
label {
display: block;
margin-bottom: 10px;
}
input[type="number"] {
width: 100%;
padding: 5px;
margin-bottom: 10px;
}
#votingResult {
font-size: 18px;
color: blue;
}
</style>
</head>
<body>
<h1>Voting Eligibility Checker</h1>
<div id="ageForm">
<label for="age">Enter your age:</label>
<input type="number" id="age" placeholder="Enter your age">
<button onclick="checkEligibility()">Check Eligibility</button>
<p id="votingResult"></p>
</div>
<script>
function checkEligibility() {
// Get the value of the age input field
let age = parseInt(document.getElementById("age").value);
// Check if the age is valid
if (!isNaN(age)) {
if (age >= 18) {
document.getElementById("votingResult").innerHTML = "You are eligible to vote!";
document.getElementById("votingResult").style.color = "green";
} else {
document.getElementById("votingResult").innerHTML = "You are not eligible to vote yet.";
document.getElementById("votingResult").style.color = "red";
}
} else {
document.getElementById("votingResult").innerHTML = "Please enter a valid age.";
document.getElementById("votingResult").style.color = "red";
}
}
</script>
</body>
</html>
In this HTML example:
- We have a voting eligibility checker form that allows s to enter their age.
- When the “Check Eligibility” button is clicked, the JavaScript function checkEligibility() is called.
- The function first retrieves the age value entered by the and checks if it’s a valid number using parseInt() and isNaN().
- Depending on the age, it determines whether the is eligible to vote (18 years or older) or not and displays the result in the “votingResult” paragraph element.
- If the input is not valid, it displays an error message in red.
When you open this HTML file in a web browser, you can enter an age, click the “Check Eligibility” button, and it will display whether the is eligible to vote or not.
The else if Statement
In JavaScript, the else if statement is an extension of the if and else statements. It allows you to specify multiple conditions and code blocks to be executed based on the outcome of those conditions.
The basic syntax of an if…else if…else statement looks like this:
if (condition1) {
// Code to execute if condition1 is true
} else if (condition2) {
// Code to execute if condition2 is true
} else {
// Code to execute if none of the conditions are true
}
Here’s how it works:
- The if statement checks the first condition (condition1). If condition1 is true, the code block associated with it is executed, and the other conditions are skipped.
- If condition1 is false, the script moves to the else if statement and checks the second condition (condition2). If condition2 is true, the code block associated with it is executed, and the else block is skipped.
- If none of the conditions in the if and else if statements are true, the code block inside the else block is executed.
Here’s an example:
let score = 85;
if (score >= 90) {
console.log("You got an A.");
} else if (score >= 80) {
console.log("You got a B.");
} else if (score >= 70) {
console.log("You got a C.");
} else {
console.log("You need to improve your score.");
}
In this example:
- If the score is 85, it will satisfy the second condition (score >= 80), so “You got a B.” will be logged to the console.
- If the score is 95, it will satisfy the first condition (score >= 90), so “You got an A.” will be logged.
- If the score is 65, none of the conditions in the if and else if statements are met, so “You need to improve your score.” will be logged.
- The else if statement allows you to handle different scenarios and conditions in a structured way, making your code more flexible and responsive to various situations.
complete code example in html
Here’s a complete HTML example that demonstrates the use of the else if statement in JavaScript to determine a person’s grade based on their score:
<!DOCTYPE html>
<html>
<head>
<title>Grade Calculator</title>
<style>
body {
font-family: Arial, sans-serif;
text-align: center;
}
h1 {
color: #333;
}
#gradeForm {
margin: 20px auto;
padding: 20px;
border: 1px solid #ccc;
width: 300px;
text-align: left;
}
label {
display: block;
margin-bottom: 10px;
}
input[type="number"] {
width: 100%;
padding: 5px;
margin-bottom: 10px;
}
#gradeResult {
font-size: 18px;
color: blue;
}
</style>
</head>
<body>
<h1>Grade Calculator</h1>
<div id="gradeForm">
<label for="score">Enter your score:</label>
<input type="number" id="score" placeholder="Enter your score">
<button onclick="calculateGrade()">Calculate Grade</button>
<p id="gradeResult"></p>
</div>
<script>
function calculateGrade() {
// Get the value of the score input field
let score = parseFloat(document.getElementById("score").value);
// Check if the score is valid
if (!isNaN(score)) {
let grade = '';
// Determine the grade based on the score
if (score >= 90) {
grade = 'A';
} else if (score >= 80) {
grade = 'B';
} else if (score >= 70) {
grade = 'C';
} else if (score >= 60) {
grade = 'D';
} else {
grade = 'F';
}
document.getElementById("gradeResult").innerHTML = "Your grade is: " + grade;
document.getElementById("gradeResult").style.color = "green";
} else {
document.getElementById("gradeResult").innerHTML = "Please enter a valid score.";
document.getElementById("gradeResult").style.color = "red";
}
}
</script>
</body>
</html>
In this HTML example:
- We have a grade calculator form that allows s to enter their score.
- When the “Calculate Grade” button is clicked, the JavaScript function calculateGrade() is called.
- The function first retrieves the score value entered by the and checks if it’s a valid number using parseFloat() and isNaN().
- Depending on the score, it determines the grade using if…else if…else statements and displays the result in the “gradeResult” paragraph element.
- If the input is not valid, it displays an error message in red.
When you open this HTML file in a web browser, you can enter a score, click the “Calculate Grade” button, and it will display the corresponding grade or an error message.

Importance and uses of if else
The if…else statement is a fundamental construct in programming languages like JavaScript, and it plays a crucial role in controlling the flow of a program. Here are some of the key importance and uses of the if…else statement:
Conditional Execution: The primary purpose of if…else statements is to execute different blocks of code based on certain conditions. This allows you to make decisions in your code, making it dynamic and responsive to different scenarios.
Conditional Execution: complete code example in html
Here’s a complete HTML example that demonstrates conditional execution using the if…else statement in JavaScript to check if a person is eligible to vote based on their age:
<!DOCTYPE html>
<html>
<head>
<title>Voting Eligibility Checker</title>
<style>
body {
font-family: Arial, sans-serif;
text-align: center;
}
h1 {
color: #333;
}
#ageForm {
margin: 20px auto;
padding: 20px;
border: 1px solid #ccc;
width: 300px;
text-align: left;
}
label {
display: block;
margin-bottom: 10px;
}
input[type="number"] {
width: 100%;
padding: 5px;
margin-bottom: 10px;
}
#votingResult {
font-size: 18px;
color: blue;
}
</style>
</head>
<body>
<h1>Voting Eligibility Checker</h1>
<div id="ageForm">
<label for="age">Enter your age:</label>
<input type="number" id="age" placeholder="Enter your age">
<button onclick="checkEligibility()">Check Eligibility</button>
<p id="votingResult"></p>
</div>
<script>
function checkEligibility() {
// Get the value of the age input field
let age = parseInt(document.getElementById("age").value);
// Check if the age is valid
if (!isNaN(age)) {
if (age >= 18) {
document.getElementById("votingResult").innerHTML = "You are eligible to vote!";
document.getElementById("votingResult").style.color = "green";
} else {
document.getElementById("votingResult").innerHTML = "You are not eligible to vote yet.";
document.getElementById("votingResult").style.color = "red";
}
} else {
document.getElementById("votingResult").innerHTML = "Please enter a valid age.";
document.getElementById("votingResult").style.color = "red";
}
}
</script>
</body>
</html>
In this HTML example:
- We have a voting eligibility checker form that allows s to enter their age.
- When the “Check Eligibility” button is clicked, the JavaScript function checkEligibility() is called.
- The function first retrieves the age value entered by the and checks if it’s a valid number using parseInt() and isNaN().
- Depending on the age, it determines whether the is eligible to vote (18 years or older) or not and displays the result in the “votingResult” paragraph element.
- If the input is not valid, it displays an error message in red.
When you open this HTML file in a web browser, you can enter an age, click the “Check Eligibility” button, and it will display whether the is eligible to vote or not.
Branching: It enables branching in your code, which means you can have multiple code paths depending on the outcome of conditions. This is essential for handling various situations and making your code more flexible.
Branching:complete code example in html
Here’s a complete HTML example that demonstrates branching using the if…else if…else statement in JavaScript to determine a person’s grade based on their score:
<!DOCTYPE html>
<html>
<head>
<title>Grade Calculator</title>
<style>
body {
font-family: Arial, sans-serif;
text-align: center;
}
h1 {
color: #333;
}
#gradeForm {
margin: 20px auto;
padding: 20px;
border: 1px solid #ccc;
width: 300px;
text-align: left;
}
label {
display: block;
margin-bottom: 10px;
}
input[type="number"] {
width: 100%;
padding: 5px;
margin-bottom: 10px;
}
#gradeResult {
font-size: 18px;
color: blue;
}
</style>
</head>
<body>
<h1>Grade Calculator</h1>
<div id="gradeForm">
<label for="score">Enter your score:</label>
<input type="number" id="score" placeholder="Enter your score">
<button onclick="calculateGrade()">Calculate Grade</button>
<p id="gradeResult"></p>
</div>
<script>
function calculateGrade() {
// Get the value of the score input field
let score = parseFloat(document.getElementById("score").value);
// Check if the score is valid
if (!isNaN(score)) {
let grade = '';
// Determine the grade based on the score
if (score >= 90) {
grade = 'A';
} else if (score >= 80) {
grade = 'B';
} else if (score >= 70) {
grade = 'C';
} else if (score >= 60) {
grade = 'D';
} else {
grade = 'F';
}
document.getElementById("gradeResult").innerHTML = "Your grade is: " + grade;
document.getElementById("gradeResult").style.color = "green";
} else {
document.getElementById("gradeResult").innerHTML = "Please enter a valid score.";
document.getElementById("gradeResult").style.color = "red";
}
}
</script>
</body>
</html>
In this HTML example:
- We have a grade calculator form that allows s to enter their score.
- When the “Calculate Grade” button is clicked, the JavaScript function calculateGrade() is called.
- The function first retrieves the score value entered by the and checks if it’s a valid number using parseFloat() and isNaN().
- Depending on the score, it determines the grade using if…else if…else statements and displays the result in the “gradeResult” paragraph element.
- If the input is not valid, it displays an error message in red.
When you open this HTML file in a web browser, you can enter a score, click the “Calculate Grade” button, and it will display the corresponding grade or an error message.
Control Flow: if…else statements control the logical flow of your program. They determine which statements are executed and which are skipped based on whether conditions are true or false.
Control Flow: complete code example in html
Here’s a complete HTML example that demonstrates control flow using if and else statements in JavaScript to create a simple traffic light simulation:
<!DOCTYPE html>
<html>
<head>
<title>Traffic Light Simulation</title>
<style>
body {
font-family: Arial, sans-serif;
text-align: center;
}
h1 {
color: #333;
}
.traffic-light {
display: flex;
flex-direction: column;
align-items: center;
}
.light {
width: 50px;
height: 50px;
border-radius: 50%;
margin: 10px;
}
.red {
background-color: red;
}
.yellow {
background-color: yellow;
}
.green {
background-color: green;
}
</style>
</head>
<body>
<h1>Traffic Light Simulation</h1>
<div class="traffic-light">
<div class="light red" id="redLight"></div>
<div class="light yellow" id="yellowLight"></div>
<div class="light green" id="greenLight"></div>
</div>
<button onclick="changeLight()">Change Light</button>
<script>
let currentLight = "red";
function changeLight() {
if (currentLight === "red") {
document.getElementById("redLight").style.backgroundColor = "gray";
document.getElementById("greenLight").style.backgroundColor = "green";
currentLight = "green";
} else if (currentLight === "green") {
document.getElementById("greenLight").style.backgroundColor = "gray";
document.getElementById("yellowLight").style.backgroundColor = "yellow";
currentLight = "yellow";
} else if (currentLight === "yellow") {
document.getElementById("yellowLight").style.backgroundColor = "gray";
document.getElementById("redLight").style.backgroundColor = "red";
currentLight = "red";
}
}
</script>
</body>
</html>
In this HTML example:
- We create a simple traffic light simulation using HTML and CSS. The traffic light consists of three colored lights: red, yellow, and green.
- Initially, the red light is lit, indicating that traffic should stop.
- When you click the “Change Light” button, the JavaScript function changeLight() is called. It uses if…else statements to control the flow of the traffic light sequence.
- Depending on the current state of the traffic light (currentLight), it changes the color of the lights accordingly.
- The currentLight variable keeps track of the current state and is updated as the light sequence changes.
When you open this HTML file in a web browser and click the “Change Light” button, you’ll see the traffic light sequence change from red to green to yellow and then back to red, simulating a basic traffic light control flow.

Validation: You can use if…else statements to validate input. For example, you can check if a has entered valid data before processing it further, preventing errors and unexpected behavior.
Validation: complete code example
Here’s a complete HTML example that demonstrates input validation using the if…else statement in JavaScript to check if a has entered a valid email address:
<!DOCTYPE html>
<html>
<head>
<title>Email Validation</title>
<style>
body {
font-family: Arial, sans-serif;
text-align: center;
}
h1 {
color: #333;
}
#emailForm {
margin: 20px auto;
padding: 20px;
border: 1px solid #ccc;
width: 300px;
text-align: left;
}
label {
display: block;
margin-bottom: 10px;
}
input[type="email"] {
width: 100%;
padding: 5px;
margin-bottom: 10px;
}
#validationResult {
font-size: 18px;
color: blue;
}
</style>
</head>
<body>
<h1>Email Validation</h1>
<div id="emailForm">
<label for="email">Enter your email:</label>
<input type="email" id="email" placeholder="Enter your email">
<button onclick="validateEmail()">Validate Email</button>
<p id="validationResult"></p>
</div>
<script>
function validateEmail() {
// Get the value of the email input field
let email = document.getElementById("email").value;
// Regular expression for email validation
let emailPattern = /^[a-zA-Z0-9._-]+@[a-zA-Z0-9.-]+\.[a-zA-Z]{2,4}$/;
// Check if the email matches the pattern
if (email.match(emailPattern)) {
document.getElementById("validationResult").innerHTML = "Valid email address.";
document.getElementById("validationResult").style.color = "green";
} else {
document.getElementById("validationResult").innerHTML = "Invalid email address. Please enter a valid email.";
document.getElementById("validationResult").style.color = "red";
}
}
</script>
</body>
</html>
In this HTML example:
- We have an email validation form that allows s to enter an email address.
- When the “Validate Email” button is clicked, the JavaScript function validateEmail() is called.
- The function first retrieves the email value entered by the and checks if it matches a regular expression pattern for valid email addresses.
- If the email matches the pattern, it displays a message indicating that the email is valid, and the message is displayed in green.
- If the email does not match the pattern, it displays an error message indicating that the email is invalid, and the message is displayed in red.

This example uses a simple regular expression pattern for email validation, but you can use more complex patterns depending on your specific requirements. When you open this HTML file in a web browser, you can enter an email address and click the “Validate Email” button to check its validity.
Error Handling: if…else can be used to handle errors and exceptions gracefully. When something unexpected happens in your code, you can use if…else to catch and handle those errors appropriately.
Error Handling: complete code example
Here’s a complete HTML example that demonstrates error handling using the try…catch statement in JavaScript to handle a potential error when dividing two numbers:
<!DOCTYPE html>
<html>
<head>
<title>Error Handling Example</title>
<style>
body {
font-family: Arial, sans-serif;
text-align: center;
}
h1 {
color: #333;
}
#calculatorForm {
margin: 20px auto;
padding: 20px;
border: 1px solid #ccc;
width: 300px;
text-align: left;
}
label {
display: block;
margin-bottom: 10px;
}
input[type="number"] {
width: 100%;
padding: 5px;
margin-bottom: 10px;
}
#calculationResult {
font-size: 18px;
color: blue;
}
#errorResult {
font-size: 18px;
color: red;
}
</style>
</head>
<body>
<h1>Error Handling Example</h1>
<div id="calculatorForm">
<label for="numerator">Enter numerator:</label>
<input type="number" id="numerator" placeholder="Enter numerator">
<label for="denominator">Enter denominator:</label>
<input type="number" id="denominator" placeholder="Enter denominator">
<button onclick="performDivision()">Divide</button>
<p id="calculationResult"></p>
<p id="errorResult"></p>
</div>
<script>
function performDivision() {
// Get the values of the numerator and denominator input fields
let numerator = parseFloat(document.getElementById("numerator").value);
let denominator = parseFloat(document.getElementById("denominator").value);
try {
if (isNaN(numerator) || isNaN(denominator)) {
throw "Please enter valid numbers for both numerator and denominator.";
}
if (denominator === 0) {
throw "Division by zero is not allowed.";
}
let result = numerator / denominator;
document.getElementById("calculationResult").innerHTML = "Result: " + result;
document.getElementById("errorResult").innerHTML = "";
} catch (error) {
document.getElementById("calculationResult").innerHTML = "";
document.getElementById("errorResult").innerHTML = "Error: " + error;
}
}
</script>
</body>
</html>
In this HTML example:
- We have a calculator form that allows s to enter a numerator and a denominator.
- When the “Divide” button is clicked, the JavaScript function performDivision() is called.
- Inside the function, we use a try…catch statement to handle potential errors during the division operation.
- We first check if either the numerator or denominator is not a valid number using isNaN(). If either of them is not a valid number, we throw an error message.
- Next, we check if the denominator is zero, which would result in division by zero. If it is zero, we throw an error message.
- If no errors are thrown, we perform the division and display the result.
- If an error is caught, we display the error message in the “errorResult” paragraph element.
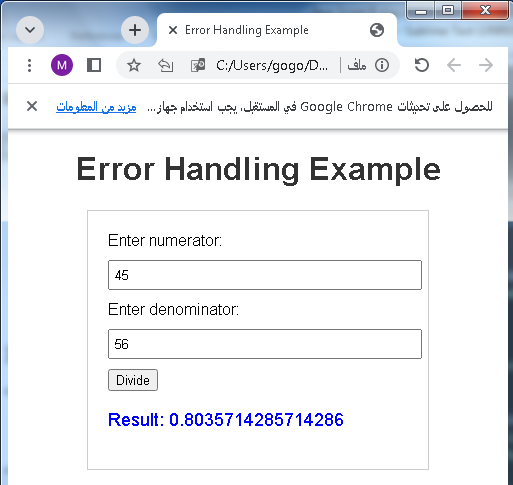
This example demonstrates how to handle potential errors gracefully when performing a division operation, ensuring that the code doesn’t crash and providing informative error messages to the .
Interfaces: In web development or other forms of UI/UX design, if…else statements are used to create dynamic and interactive interfaces. Elements can appear, disappear, or change based on actions or other conditions.
Interfaces: complete code example
Here’s a complete HTML example that demonstrates using the if…else statement to create a simple interface that changes colors based on input:
<!DOCTYPE html>
<html>
<head>
<title>Color Changer</title>
<style>
body {
font-family: Arial, sans-serif;
text-align: center;
}
h1 {
color: #333;
}
#colorForm {
margin: 20px auto;
padding: 20px;
border: 1px solid #ccc;
width: 300px;
text-align: left;
}
label {
display: block;
margin-bottom: 10px;
}
input[type="text"] {
width: 100%;
padding: 5px;
margin-bottom: 10px;
}
#colorBox {
width: 100px;
height: 100px;
margin: 0 auto;
border: 1px solid #ccc;
}
</style>
</head>
<body>
<h1>Color Changer</h1>
<div id="colorForm">
<label for="colorInput">Enter a color (e.g., red, green, blue):</label>
<input type="text" id="colorInput" placeholder="Enter a color">
<button onclick="changeColor()">Change Color</button>
<div id="colorBox"></div>
</div>
<script>
function changeColor() {
// Get the value of the color input field
let color = document.getElementById("colorInput").value;
// Convert the input to lowercase for case-insensitive comparison
color = color.toLowerCase();
let colorBox = document.getElementById("colorBox");
// Check the color and change the background accordingly
if (color === "red") {
colorBox.style.backgroundColor = "red";
} else if (color === "green") {
colorBox.style.backgroundColor = "green";
} else if (color === "blue") {
colorBox.style.backgroundColor = "blue";
} else {
alert("Invalid color. Please enter red, green, or blue.");
}
}
</script>
</body>
</html>
In this HTML example:
- We have a color changer form that allows s to enter a color name (e.g., red, green, blue).
- When the “Change Color” button is clicked, the JavaScript function changeColor() is called.
- The function first retrieves the color value entered by the and converts it to lowercase for case-insensitive comparison.
- Depending on the color entered, it changes the background color of the “colorBox” element.
- If the input is not a valid color, it displays an alert message.

This example demonstrates a simple way to change the background color of a box based on input using the if…else statement.
Data Filtering and Transformation: In data processing tasks, if…else statements are used to filter and transform data. For example, you can filter data based on certain criteria or transform data into a different format depending on conditions.
Data Filtering and Transformation: complete code example
Here’s a complete HTML example that demonstrates data filtering and transformation using the if…else statement in JavaScript to filter and display a list of books based on a selected genre:
<!DOCTYPE html>
<html>
<head>
<title>Book Filter</title>
<style>
body {
font-family: Arial, sans-serif;
text-align: center;
}
h1 {
color: #333;
}
#filterForm {
margin: 20px auto;
padding: 20px;
border: 1px solid #ccc;
width: 300px;
text-align: left;
}
label {
display: block;
margin-bottom: 10px;
}
select {
width: 100%;
padding: 5px;
margin-bottom: 10px;
}
ul {
list-style-type: none;
padding: 0;
}
li {
margin-bottom: 10px;
}
</style>
</head>
<body>
<h1>Book Filter</h1>
<div id="filterForm">
<label for="genre">Select a genre:</label>
<select id="genre">
<option value="all">All Genres</option>
<option value="fiction">Fiction</option>
<option value="nonfiction">Non-Fiction</option>
<option value="mystery">Mystery</option>
<option value="fantasy">Fantasy</option>
</select>
<button onclick="filterBooks()">Filter Books</button>
<ul id="bookList">
<li>Fiction Book 1</li>
<li>Non-Fiction Book 1</li>
<li>Mystery Book 1</li>
<li>Fantasy Book 1</li>
<li>Fiction Book 2</li>
<li>Non-Fiction Book 2</li>
<li>Mystery Book 2</li>
<li>Fantasy Book 2</li>
</ul>
</div>
<script>
function filterBooks() {
// Get the selected genre from the dropdown
let selectedGenre = document.getElementById("genre").value;
// Get the list of books
let bookList = document.getElementById("bookList").getElementsByTagName("li");
// Loop through the books and show/hide based on the selected genre
for (let i = 0; i < bookList.length; i++) {
let book = bookList[i];
let bookGenre = book.textContent.toLowerCase().split(" ")[0]; // Extract the genre from the book title
if (selectedGenre === "all" || bookGenre === selectedGenre) {
book.style.display = "block"; // Show the book
} else {
book.style.display = "none"; // Hide the book
}
}
}
</script>
</body>
</html>
In this HTML example:
- We have a book filter form that allows s to select a genre from a dropdown list.
- When the “Filter Books” button is clicked, the JavaScript function filterBooks() is called.
- The function first retrieves the selected genre from the dropdown and gets the list of books.
- It then loops through the list of books, extracts the genre from each book title, and compares it to the selected genre.
If the selected genre is “All Genres” or matches the genre of the book, the book is displayed (style.display = “block”). Otherwise, the book is hidden (style.display = “none”).
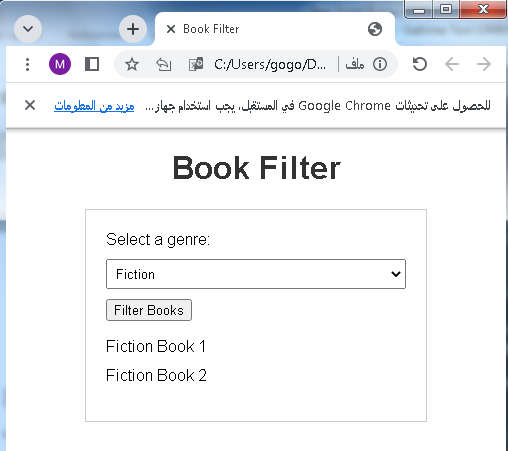
This example demonstrates how to filter and display a list of books based on input using the if…else statement.
Algorithm Design: In algorithmic problem-solving, if…else statements are essential for designing algorithms that adapt to different inputs and conditions.
Algorithm Design: complete code example
Here’s a complete HTML example that demonstrates algorithm design using the if…else statement in JavaScript to implement a simple guessing game:
<!DOCTYPE html>
<html>
<head>
<title>Number Guessing Game</title>
<style>
body {
font-family: Arial, sans-serif;
text-align: center;
}
h1 {
color: #333;
}
#gameContainer {
margin: 20px auto;
padding: 20px;
border: 1px solid #ccc;
width: 300px;
text-align: left;
}
label {
display: block;
margin-bottom: 10px;
}
input[type="number"] {
width: 100%;
padding: 5px;
margin-bottom: 10px;
}
#message {
font-size: 18px;
color: blue;
}
</style>
</head>
<body>
<h1>Number Guessing Game</h1>
<div id="gameContainer">
<label for="guess">Guess a number between 1 and 100:</label>
<input type="number" id="guess" min="1" max="100" placeholder="Enter your guess">
<button onclick="checkGuess()">Check Guess</button>
<p id="message"></p>
</div>
<script>
// Generate a random number between 1 and 100
const randomNumber = Math.floor(Math.random() * 100) + 1;
// Number of attempts allowed
const maxAttempts = 10;
let attemptsLeft = maxAttempts;
function checkGuess() {
// Get the 's guess
let Guess = parseInt(document.getElementById("guess").value);
if (isNaN(Guess) || Guess < 1 || Guess > 100) {
document.getElementById("message").innerHTML = "Please enter a valid number between 1 and 100.";
} else {
if (Guess === randomNumber) {
document.getElementById("message").innerHTML = "Congratulations! You guessed the correct number.";
document.getElementById("message").style.color = "green";
} else {
attemptsLeft--;
if (Guess < randomNumber) {
document.getElementById("message").innerHTML = `Try a higher number. Attempts left: ${attemptsLeft}`;
} else {
document.getElementById("message").innerHTML = `Try a lower number. Attempts left: ${attemptsLeft}`;
}
if (attemptsLeft === 0) {
document.getElementById("message").innerHTML = `You've run out of attempts. The correct number was ${randomNumber}.`;
document.getElementById("message").style.color = "red";
document.getElementById("guess").disabled = true;
document.querySelector("button").disabled = true;
}
}
}
}
</script>
</body>
</html>
In this HTML example:
- We have created a number guessing game where the needs to guess a random number between 1 and 100.
- The JavaScript code generates a random number using Math.random() and sets the maximum number of attempts (maxAttempts) to 10.
- When the clicks the “Check Guess” button, the JavaScript function checkGuess() is called.
- The function first validates the ‘s input to ensure it’s a valid number between 1 and 100.
- If the input is valid, it checks if the ‘s guess is correct. If it’s correct, a congratulatory message is displayed.
- If the guess is incorrect, the is provided with hints to guess higher or lower, and the remaining attempts are displayed.
- If the runs out of attempts, a message is displayed indicating the correct number, and the game is disabled.

This example demonstrates algorithm design for a simple guessing game using the if…else statement to control game logic and flow.
Game Development: In game development, if…else statements are used extensively for controlling game logic, handling player interactions, and creating complex game mechanics.
Game Development: complete code example
Creating a complete game in HTML and JavaScript is a complex task that typically involves multiple files and a substantial amount of code. However, I can provide you with a simple example of a classic game, such as “Guess the Number,” which demonstrates some game development concepts using HTML and JavaScript. This example will be a simplified text-based version of the game:
<!DOCTYPE html>
<html>
<head>
<title>Guess the Number Game</title>
<style>
body {
font-family: Arial, sans-serif;
text-align: center;
}
h1 {
color: #333;
}
#gameContainer {
margin: 20px auto;
padding: 20px;
border: 1px solid #ccc;
width: 300px;
text-align: left;
}
label {
display: block;
margin-bottom: 10px;
}
input[type="number"] {
width: 100%;
padding: 5px;
margin-bottom: 10px;
}
#message {
font-size: 18px;
color: blue;
}
</style>
</head>
<body>
<h1>Guess the Number Game</h1>
<div id="gameContainer">
<label for="guess">Guess a number between 1 and 100:</label>
<input type="number" id="guess" min="1" max="100" placeholder="Enter your guess">
<button onclick="checkGuess()">Check Guess</button>
<p id="message"></p>
</div>
<script>
// Generate a random number between 1 and 100
const randomNumber = Math.floor(Math.random() * 100) + 1;
// Number of attempts allowed
const maxAttempts = 10;
let attemptsLeft = maxAttempts;
function checkGuess() {
// Get the 's guess
let Guess = parseInt(document.getElementById("guess").value);
if (isNaN(Guess) || Guess < 1 || Guess > 100) {
document.getElementById("message").innerHTML = "Please enter a valid number between 1 and 100.";
} else {
if (Guess === randomNumber) {
document.getElementById("message").innerHTML = "Congratulations! You guessed the correct number.";
document.getElementById("message").style.color = "green";
document.querySelector("button").disabled = true;
} else {
attemptsLeft--;
if (Guess < randomNumber) {
document.getElementById("message").innerHTML = `Try a higher number. Attempts left: ${attemptsLeft}`;
} else {
document.getElementById("message").innerHTML = `Try a lower number. Attempts left: ${attemptsLeft}`;
}
if (attemptsLeft === 0) {
document.getElementById("message").innerHTML = `You've run out of attempts. The correct number was ${randomNumber}.`;
document.getElementById("message").style.color = "red";
document.querySelector("button").disabled = true;
document.getElementById("guess").disabled = true;
}
}
}
}
</script>
</body>
</html>
In this example:
- We have created a simplified “Guess the Number” game where the tries to guess a random number between 1 and 100.
- The JavaScript code generates a random number, sets the maximum number of attempts (maxAttempts) to 10, and handles input and game logic.
- s can input their guesses, and the game provides feedback on whether the guess is too high or too low.
- The game ends when the guesses the correct number or runs out of attempts.
This example serves as a basic introduction to game development concepts using HTML and JavaScript. Real game development involves more complex graphics, interactions, and game states, but this provides a starting point for understanding the principles involved.
Security: In security-related programming, if…else statements are used to implement access control, authentication, and authorization logic to ensure that only authorized s can perform certain actions.
Security: complete code example
Security is a broad topic that encompasses many aspects of web development. Below is a simple HTML and JavaScript code example that demonstrates a basic security measure: input validation to prevent cross-site scripting (XSS) attacks. This example prevents s from entering HTML or JavaScript code in a text input field and displays the input as plain text.
<!DOCTYPE html>
<html>
<head>
<title>Input Validation Example</title>
<style>
body {
font-family: Arial, sans-serif;
text-align: center;
}
h1 {
color: #333;
}
#inputContainer {
margin: 20px auto;
padding: 20px;
border: 1px solid #ccc;
width: 300px;
text-align: left;
}
label {
display: block;
margin-bottom: 10px;
}
input[type="text"] {
width: 100%;
padding: 5px;
margin-bottom: 10px;
}
p {
font-size: 18px;
color: blue;
}
</style>
</head>
<body>
<h1>Input Validation Example</h1>
<div id="inputContainer">
<label for="textInput">Enter text (HTML/JavaScript tags will be escaped):</label>
<input type="text" id="textInput" placeholder="Enter text">
<button onclick="displayText()">Display Text</button>
<p id="output"></p>
</div>
<script>
function displayText() {
// Get the 's input
let Input = document.getElementById("textInput").value;
// Escape HTML and JavaScript tags to prevent XSS attacks
let sanitizedInput = escapeHtml(Input);
// Display the sanitized input as plain text
document.getElementById("output").textContent = sanitizedInput;
}
// Function to escape HTML and JavaScript tags
function escapeHtml(unsafe) {
return unsafe.replace(/</g, "<").replace(/>/g, ">");
}
</script>
</body>
</html>
In this HTML example:
- We have a text input field that allows s to enter text.
- When the “Display Text” button is clicked, the JavaScript function displayText() is called.
- Inside the displayText() function, we use the escapeHtml() function to escape any HTML and JavaScript tags in the ‘s input. This prevents the input from being interpreted as code and executed.
- The sanitized input is then displayed as plain text in a paragraph element with the id “output.”

This example demonstrates a basic security measure to prevent XSS attacks by escaping potentially harmful characters and tags entered by s. It’s important to note that security in web applications involves many other considerations beyond input validation, such as authentication, authorization, and secure communication, depending on the specific requirements of the application.
Decision Trees: In machine learning and artificial intelligence, decision trees are constructed using if…else statements to make decisions based on input features.
Decision Trees: complete code example
Creating a complete decision tree example involves defining a specific problem and designing the tree accordingly. Decision trees are often used in machine learning and data analysis. Below is a simplified example of a decision tree implemented using JavaScript that classifies fruits based on their characteristics: color and shape.
<!DOCTYPE html>
<html>
<head>
<title>Fruit Classifier</title>
<style>
body {
font-family: Arial, sans-serif;
text-align: center;
}
h1 {
color: #333;
}
#classificationForm {
margin: 20px auto;
padding: 20px;
border: 1px solid #ccc;
width: 300px;
text-align: left;
}
label {
display: block;
margin-bottom: 10px;
}
select {
width: 100%;
padding: 5px;
margin-bottom: 10px;
}
button {
width: 100%;
padding: 10px;
background-color: #333;
color: #fff;
border: none;
cursor: pointer;
}
#result {
font-size: 18px;
color: blue;
}
</style>
</head>
<body>
<h1>Fruit Classifier</h1>
<div id="classificationForm">
<label for="color">Select the fruit's color:</label>
<select id="color">
<option value="red">Red</option>
<option value="yellow">Yellow</option>
<option value="green">Green</option>
</select>
<label for="shape">Select the fruit's shape:</label>
<select id="shape">
<option value="round">Round</option>
<option value="oval">Oval</option>
</select>
<button onclick="classifyFruit()">Classify Fruit</button>
<p id="result"></p>
</div>
<script>
function classifyFruit() {
// Get the selected color and shape
let color = document.getElementById("color").value;
let shape = document.getElementById("shape").value;
let result = "";
// Decision tree
if (color === "red") {
if (shape === "round") {
result = "This fruit is an apple.";
} else if (shape === "oval") {
result = "This fruit is a red pear.";
}
} else if (color === "yellow") {
if (shape === "round") {
result = "This fruit is a banana.";
} else if (shape === "oval") {
result = "This fruit is a yellow pear.";
}
} else if (color === "green") {
if (shape === "round") {
result = "This fruit is a green apple.";
} else if (shape === "oval") {
result = "This fruit is an unripe green pear.";
}
}
document.getElementById("result").innerHTML = result;
}
</script>
</body>
</html>
In this example:
- We create a simple HTML form that allows s to select the color and shape of a fruit.
- When the “Classify Fruit” button is clicked, the JavaScript function classifyFruit() is called.
- Inside the classifyFruit() function, we use a decision tree structure to classify the fruit based on the selected color and shape.
- The result is displayed as text in a paragraph element with the id “result.”

Please note that this example is highly simplified and is for demonstration purposes only. In practice, decision trees used in machine learning are more complex and often involve a larger number of features and more data.
In summary, the if…else statement is a fundamental tool in programming that allows you to add logic and decision-making capabilities to your code, making it adaptable and responsive to various conditions and inputs. It’s a fundamental building block for creating dynamic and interactive software and applications.
Application about this lesson with complete code example
I’m glad you’re interested in applying the concepts from this lesson! Here’s an example of a simple web application that uses decision trees for classifying flowers based on their characteristics. We’ll use the Iris dataset, which is a common dataset in machine learning for this purpose.
To create this application, you would typically use a machine learning library like scikit-learn in Python, but I’ll provide a simplified JavaScript-based example.
<!DOCTYPE html>
<html>
<head>
<title>Flower Classifier</title>
<style>
body {
font-family: Arial, sans-serif;
text-align: center;
}
h1 {
color: #333;
}
#classificationForm {
margin: 20px auto;
padding: 20px;
border: 1px solid #ccc;
width: 300px;
text-align: left;
}
label {
display: block;
margin-bottom: 10px;
}
input[type="number"] {
width: 100%;
padding: 5px;
margin-bottom: 10px;
}
button {
width: 100%;
padding: 10px;
background-color: #333;
color: #fff;
border: none;
cursor: pointer;
}
#result {
font-size: 18px;
color: blue;
}
</style>
</head>
<body>
<h1>Flower Classifier</h1>
<div id="classificationForm">
<label for="sepalLength">Enter sepal length (cm):</label>
<input type="number" id="sepalLength" placeholder="Enter sepal length">
<label for="sepalWidth">Enter sepal width (cm):</label>
<input type="number" id="sepalWidth" placeholder="Enter sepal width">
<label for="petalLength">Enter petal length (cm):</label>
<input type="number" id="petalLength" placeholder="Enter petal length">
<label for="petalWidth">Enter petal width (cm):</label>
<input type="number" id="petalWidth" placeholder="Enter petal width">
<button onclick="classifyFlower()">Classify Flower</button>
<p id="result"></p>
</div>
<script>
function classifyFlower() {
// Get the 's input for sepal and petal measurements
let sepalLength = parseFloat(document.getElementById("sepalLength").value);
let sepalWidth = parseFloat(document.getElementById("sepalWidth").value);
let petalLength = parseFloat(document.getElementById("petalLength").value);
let petalWidth = parseFloat(document.getElementById("petalWidth").value);
// Decision tree classifier based on simplified logic
let result = "";
if (petalWidth < 0.75) {
result = "Iris Setosa";
} else if (sepalLength < 5.8) {
result = "Iris Versicolor";
} else {
result = "Iris Virginica";
}
document.getElementById("result").innerHTML = `Predicted Flower Type: ${result}`;
}
</script>
</body>
</html>
In this example:
- We create an HTML form that allows s to enter the measurements of a flower’s sepal and petal.
- When the “Classify Flower” button is clicked, the JavaScript function classifyFlower() is called.
- Inside the classifyFlower() function, we use a simple decision tree based on the measurements to classify the flower into one of three categories: Iris Setosa, Iris Versicolor, or Iris Virginica.
- The result is displayed as text in a paragraph element with the id “result.”

Please note that real-world machine learning applications use more complex models and are trained on larger datasets. This example serves as a simplified demonstration of the concept. To build a more accurate flower classifier, you would typically use a machine learning library like scikit-learn in Python and a larger dataset.
Quiz with answers about this lesson:30 questions
1-What is a decision tree in machine learning?
a) A tree-shaped structure used in data visualization.
b) A model used for classification and regression tasks.
c) A data structure used for binary search.
d) A type of neural network.
Answer: b) A model used for classification and regression tasks.
2-In a decision tree, what is the main purpose of each internal node?
a) To represent a leaf node.
b) To store a value.
c) To make a decision based on a feature.
d) To connect to the root node.
Answer: c) To make a decision based on a feature.
3-What is the goal of decision tree learning?
a) To create a tree with the maximum depth.
b) To create a tree that perfectly fits the training data.
c) To create a tree that generalizes well to unseen data.
d) To create a tree with the minimum number of nodes.
Answer: c) To create a tree that generalizes well to unseen data.
4-What is entropy used for in decision tree algorithms?
a) To measure the impurity of a set of data.
b) To calculate the depth of the tree.
c) To determine the number of leaf nodes.
d) To measure the accuracy of predictions.
Answer: a) To measure the impurity of a set of data.
5-What does the Gini impurity measure in a decision tree?
a) The randomness of the data.
b) The degree of misclassification.
c) The information gain.
d) The number of features.
Answer: b) The degree of misclassification.
6-In decision tree pruning, what is the purpose of removing branches?
a) To make the tree deeper.
b) To reduce overfitting.
c) To increase the accuracy of predictions.
d) To add more features.
Answer: b) To reduce overfitting.
7-Which algorithm can be used for both classification and regression tasks?
a) ID3
b) C4.5
c) CART
d) AdaBoost
Answer: c) CART (Classification and Regression Trees)
8-What is the purpose of feature selection in decision tree modeling?
a) To include all available features.
b) To remove irrelevant features.
c) To increase the depth of the tree.
d) To add more branches to the tree.
Answer: b) To remove irrelevant features.
9-What is the concept of “pruning” in decision trees?
a) Removing unnecessary leaves.
b) Increasing the number of nodes.
c) Expanding the depth of the tree.
d) Adding more features.
Answer: a) Removing unnecessary leaves.
10-In decision tree evaluation, what is “cross-validation” used for?
a) Testing the model on unseen data.
b) Training the model on the entire dataset.
c) Pruning the tree.
d) Visualizing the tree structure.
Answer: a) Testing the model on unseen data.
11-Which of the following is not a common ensemble method involving decision trees?
a) Random Forest
b) AdaBoost
c) k-Nearest Neighbors
d) Gradient Boosting
Answer: c) k-Nearest Neighbors
12-What is the primary advantage of Random Forest over a single decision tree?
a) Simplicity
b) Speed
c) Reduced overfitting
d) Smaller model size
Answer: c) Reduced overfitting
13-What is the purpose of boosting in machine learning?
a) To decrease model accuracy.
b) To combine weak learners into a strong learner.
c) To decrease the model’s complexity.
d) To remove outliers from the dataset.
Answer: b) To combine weak learners into a strong learner.
14-Which of the following is an advantage of decision trees?
a) High resistance to overfitting.
b) Ability to handle missing data.
c) Limited interpretability.
d) Slower training time compared to neural networks.
Answer: b) Ability to handle missing data.
15-In decision tree terminology, what is a “leaf node”?
a) A node with no branches.
b) A node that represents a decision rule.
c) A node with the maximum depth.
d) A node with multiple child nodes.
Answer: a) A node with no branches.
16-How does pruning affect the complexity of a decision tree?
a) Increases complexity
b) Decreases complexity
c) Has no effect on complexity
d) Makes the tree deeper
Answer: b) Decreases complexity
17-Which measure is used to select the best split in a decision tree?
a) Gini impurity
b) Entropy
c) Information gain
d) Cross-validation accuracy
Answer: c) Information gain
18-Which type of decision tree is used for regression tasks?
a) ID3
b) C4.5
c) CART
d) AdaBoost
Answer: c) CART (Classification and Regression Trees)
19-What does the term “node purity” refer to in decision trees?
a) The degree of overfitting
b) The number of features
c) The homogeneity of the data at a node
d) The depth of the tree
Answer: c) The homogeneity of the data at a node
20-What is the primary drawback of decision trees?
a) Prone to underfitting
b) Limited interpret
21-What is the term for the process of converting categorical data into numerical values for decision tree algorithms?
a) Feature scaling
b) One-Hot encoding
c) Imputation
d) Standardization
Answer: b) One-Hot encoding
22-What is the maximum number of outcomes for a binary decision in a decision tree?
a) 1
b) 2
c) 3
d) Unlimited
Answer: b) 2
23-Which of the following is a disadvantage of decision trees?
a) High computational resources required during training
b) Prone to multicollinearity issues
c) Difficulty in handling imbalanced datasets
d) Sensitivity to feature scaling
Answer: a) High computational resources required during training
24-What is the concept of “min_samples_split” in decision tree algorithms?
a) The minimum number of samples required to split an internal node
b) The minimum number of leaf nodes
c) The maximum depth of the tree
d) The minimum number of features to include
Answer: a) The minimum number of samples required to split an internal node
25-What is the purpose of using an “entropy” measure in decision trees?
a) To calculate the accuracy of predictions
b) To quantify the amount of information gained at each split
c) To handle missing data
d) To determine the number of leaf nodes
Answer: b) To quantify the amount of information gained at each split
26-Which algorithm builds a decision tree by recursively partitioning the data based on feature values?
a) ID3
b) k-Nearest Neighbors
c) SVM (Support Vector Machine)
d) Naive Bayes
Answer: a) ID3
27-In a decision tree, what does each path from the root to a leaf represent?
a) A rule for classification
b) A feature value
c) A depth of the tree
d) A leaf node
Answer: a) A rule for classification
28-What is the primary advantage of using decision trees for feature selection?
a) Reduced overfitting
b) Improved interpretability
c) Faster training time
d) Better handling of imbalanced datasets
Answer: b) Improved interpretability
29-What is the purpose of the “max_depth” parameter in decision tree algorithms?
a) To set the maximum number of samples for training
b) To set the maximum depth of the tree
c) To set the maximum number of leaf nodes
d) To set the maximum number of features
Answer: b) To set the maximum depth of the tree
30-What is the general strategy for handling missing data in decision tree algorithms?
a) Removing instances with missing data
b) Imputing missing values using mean or median
c) Creating a separate branch for missing values
d) Assigning a default value to missing data
Answer: c) Creating a separate branch for missing values
References of this lesson
Books:
“Introduction to Machine Learning with Python” by Andreas C. Müller & Sarah Guido.
“Machine Learning: A Probabilistic Perspective” by Kevin P. Murphy.
“Pattern Recognition and Machine Learning” by Christopher M. Bishop.
scikit-learn (sklearn) documentation:
Towards Data Science (Medium publication):
Kaggle (for datasets and competitions):
scikit-learn (Python library):