
JavaScript Data Types: A Comprehensive Guide
JavaScript Data Types
Learn about the different data types in JavaScript, including numbers, strings, booleans, objects, arrays, and more.
Understand their characteristics, usage, and how to work with them in your JavaScript code.
JavaScript has several built-in data types that are used to represent different kinds of values.
JavaScript Primary Data types
The following are the JavaScript primary data types in JavaScript:
These are the main data types in JavaScript.
Additionally, there are some other types like BigInt (used to represent arbitrarily large integers) and Map/Set (used for key-value mappings and unique collections, respectively), which were introduced in later versions of JavaScript.
JavaScript Number Data Type:
Used to represent numeric values, both integers and floating-point numbers.
For example: JavaSCript code
<script> // create varable of integer number: studNo let studNo=1234; // // create varable of decimal number: studNo let salary =2345.5; // output the value of studNo document.write(studNo); // output the value of salary alert(salary); </script>
complete example :
<HTML>
<head>
</head>
<body>
<script>
// create varable of integer number: studNo
let studNo=1234;
//
// create varable of decimal number: studNo
let salary =2345.5;
// output the value of studNo
document.write(studNo);
// output the value of salary
alert(salary);
</script>
</body>
</HTML>
Example
JavaScript Number Data Type
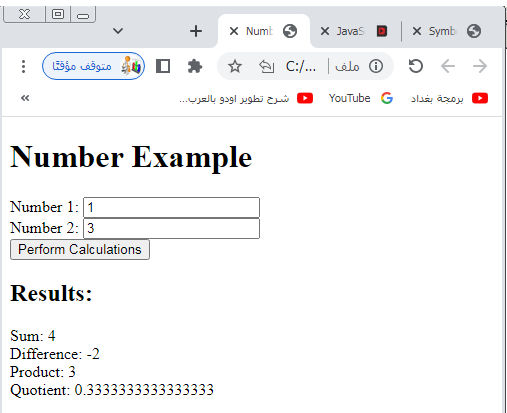
In this example Here’s an example of a complete HTML code that utilizes JavaScript to work with numbers:
<!DOCTYPE html>
<html>
<head>
<title>Number Example</title>
<script>
function performCalculations() {
// Retrieve input values
var num1 = parseFloat(document.getElementById("num1").value);
var num2 = parseFloat(document.getElementById("num2").value);
// Perform calculations
var sum = num1 + num2;
var difference = num1 - num2;
var product = num1 * num2;
var quotient = num1 / num2;
// Display results
document.getElementById("sum").innerHTML = "Sum: " + sum;
document.getElementById("difference").innerHTML = "Difference: " + difference;
document.getElementById("product").innerHTML = "Product: " + product;
document.getElementById("quotient").innerHTML = "Quotient: " + quotient;
}
</script>
</head>
<body>
<h1>Number Example</h1>
<label for="num1">Number 1:</label>
<input type="number" id="num1" step="any"><br>
<label for="num2">Number 2:</label>
<input type="number" id="num2" step="any"><br>
<button onclick="performCalculations()">Perform Calculations</button>
<h2>Results:</h2>
<div id="sum"></div>
<div id="difference"></div>
<div id="product"></div>
<div id="quotient"></div>
</body>
</html>
Explanation:
1-In this example, we have an HTML form where can enter two numbers.
2-When the “Perform Calculations” button is clicked, the performCalculations() function is executed.
3-It retrieves the input values, performs basic arithmetic calculations (addition, subtraction, multiplication, and division), and then displays the results on the webpage.
4-Note that the JavaScript code is embedded within the <script> tags in the <head> section of the HTML document.
5-The parseFloat() function is used to convert the input values from strings to floating-point numbers for accurate calculations.
6-The results are displayed using the innerHTML property of the respective <div> elements.
JavaScript String Data Type
Used to represent sequences of characters enclosed in single quotes (‘) or double quotes (“).
For example: JavaScript code
<script> // create varable of string data type: studentName let studentName="Omar"; // create varable of string data type: name let name ='Gogo'; // output the value of studentName document.write(studentName); // output the value of name alert(name); </script>
JavaScript String Data Type:complete code example
<HTML>
<head>
</head>
<body>
<script>
// create varable of string data type: studentName
let studentName="Omar";
// create varable of string data type: name
let name ='Gogo';
// output the value of studentName
document.write(studentName);
// output the value of name
alert(name);
</script>
</body>
</HTML>
Here’s an example of a complete HTML code that utilizes JavaScript to work with strings:
<!DOCTYPE html>
<html>
<head>
<title>String Example</title>
<script>
function manipulateString() {
// Retrieve input value
var inputString = document.getElementById("inputString").value;
// Perform string manipulation
var length = inputString.length;
var uppercase = inputString.toUpperCase();
var lowercase = inputString.toLowerCase();
var reversed = inputString.split("").reverse().join("");
// Display results
document.getElementById("length").innerHTML = "Length: " + length;
document.getElementById("uppercase").innerHTML = "Uppercase: " + uppercase;
document.getElementById("lowercase").innerHTML = "Lowercase: " + lowercase;
document.getElementById("reversed").innerHTML = "Reversed: " + reversed;
}
</script>
</head>
<body>
<h1>String Example</h1>
<label for="inputString">Enter a string:</label>
<input type="text" id="inputString"><br>
<button onclick="manipulateString()">Manipulate String</button>
<h2>Results:</h2>
<div id="length"></div>
<div id="uppercase"></div>
<div id="lowercase"></div>
<div id="reversed"></div>
</body>
</html>
Explanation:
1-In this example, we have an HTML form where the Explanation: In this example can enter a string. 2-When the “Manipulate String” button is clicked, the manipulateString() function is executed.
3-It retrieves the input value, performs string manipulations (calculating the length, converting to uppercase and lowercase, and reversing the string), and then displays the results on the webpage.
4-The JavaScript code is embedded within the <script> tags in the <head> section of the HTML document.
5-The getElementById() function is used to retrieve the input value from the <input> element with the specified id.
6-String manipulation operations such as length, toUpperCase(), toLowerCase(), and reversing the string using split(), reverse(), and join() are performed.
7-The results are displayed using the innerHTML property of the respective <div> elements.

JavaScript Boolean Data type:
Used to represent logical values, either true or false, representing the truth or falsity of an expression.
Example: Javascript code
<script> // create varable of boolean data type: x let x=true; // create varable of boolean data type: y let y =false; // output the value of studentName document.write(x); // output the value of name alert(y); </script>
complete code:
<HTML>
<head>
</head>
<body>
<script>
// create varable of boolean data type: x
let x=true;
// create varable of boolean data type: y
let y =false;
// output the value of studentName
document.write(x);
// output the value of name
alert(y);
</script>
</body>
</HTML>
Here’s an example of a complete HTML code that utilizes JavaScript to work with booleans:
<!DOCTYPE html>
<html>
<head>
<title>Boolean Example</title>
<script>
function checkConditions() {
// Retrieve input values
var condition1 = document.getElementById("condition1").checked;
var condition2 = document.getElementById("condition2").checked;
// Perform condition checks
var bothTrue = condition1 && condition2;
var eitherTrue = condition1 || condition2;
var notCondition1 = !condition1;
var notCondition2 = !condition2;
// Display results
document.getElementById("bothTrue").innerHTML = "Both true: " + bothTrue;
document.getElementById("eitherTrue").innerHTML = "Either true: " + eitherTrue;
document.getElementById("notCondition1").innerHTML = "Not condition 1: " + notCondition1;
document.getElementById("notCondition2").innerHTML = "Not condition 2: " + notCondition2;
}
</script>
</head>
<body>
<h1>Boolean Example</h1>
<label for="condition1">Condition 1:</label>
<input type="checkbox" id="condition1"><br>
<label for="condition2">Condition 2:</label>
<input type="checkbox" id="condition2"><br>
<button onclick="checkConditions()">Check Conditions</button>
<h2>Results:</h2>
<div id="bothTrue"></div>
<div id="eitherTrue"></div>
<div id="notCondition1"></div>
<div id="notCondition2"></div>
</body>
</html>
Explanation:
1-In this example, we have an HTML form with two checkboxes representing two boolean conditions.
2-When the “Check Conditions” button is clicked, the checkConditions() function is executed.
3-It retrieves the values of the checkboxes (checked or false), performs boolean operations (logical AND, logical OR, and logical NOT) on the conditions, and then displays the results on the webpage.
4-The JavaScript code is embedded within the <script> tags in the <head> section of the HTML document.
5-The getElementById() function is used to retrieve the boolean values of the checkboxes.
6-Boolean operations such as && (AND), || (OR), and ! (NOT) are performed.
7-The results are displayed using the innerHTML property of the respective <div> elements.

JavaScript Undefined Data Type:
Represents a variable that has been declared but has not been assigned a value.
It is also the default value for function parameters that are not provided.
In JavaScript, the value undefined typically represents a variable that has been declared but has not been assigned a value.
<script> // create varable of Undefined data type: x let x; alert(x); </script>
JavaScript Undefined Data Type:Complete code example:
<HTML>
<head>
</head>
<body>
<script>
// create varable of Undefined data type: x
let x;
alert(x);
</script>
</body>
</HTML>
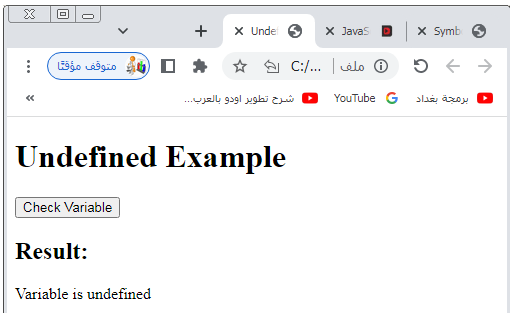
Here’s an example of a complete HTML code that demonstrates the usage of undefined:
<!DOCTYPE html>
<html>
<head>
<title>Undefined Example</title>
<script>
function checkVariable() {
// Check if variable is undefined
var myVariable;
if (typeof myVariable === 'undefined') {
document.getElementById("result").innerHTML = "Variable is undefined";
} else {
document.getElementById("result").innerHTML = "Variable is defined";
}
}
</script>
</head>
<body>
<h1>Undefined Example</h1>
<button onclick="checkVariable()">Check Variable</button>
<h2>Result:</h2>
<div id="result"></div>
</body>
</html>
Explanation:
1-In this example, we have an HTML page with a button labeled “Check Variable”.
2-When the button is clicked, the checkVariable() function is executed.
3-Inside the function, a variable myVariable is declared but not assigned a value.
4-The function checks if myVariable is undefined using the typeof operator. 5-Depending on the result, the function updates the content of the <div> element with the appropriate message.
6-The JavaScript code is embedded within the <script> tags in the <head> section of the HTML document.
7-The typeof operator is used to determine the type of the variable and perform the comparison.
8-The result is displayed using the innerHTML property of the <div> element.
JavaScript Null Data type:
Represents the intentional absence of any object value.
It is often assigned to a variable to indicate that it has no value.
Example: javaScript code
<script> // create varable of Undefined data type: x let myvariable=null; alert(myvariable); </script>
complete example:
<HTML>
<head>
</head>
<body>
<script>
// create varable of Undefined data type: x
let myvariable=null;
alert(myvariable);
</script>
</body>
</HTML>
JavaScript Null Data Type: complete code in html
In JavaScript, the value null is used to represent the intentional absence of any object value.
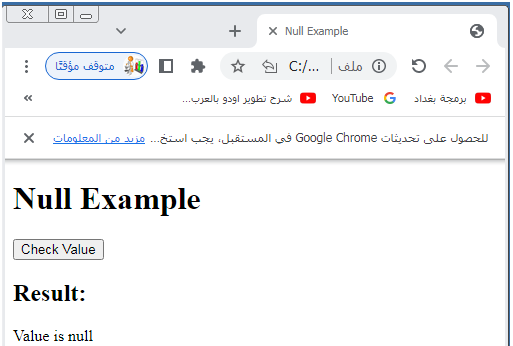
Here’s an example of a complete HTML code that demonstrates the usage of null:
<!DOCTYPE html>
<html>
<head>
<title>Null Example</title>
<script>
function checkValue() {
// Check if value is null
var myValue = null;
if (myValue === null) {
document.getElementById("result").innerHTML = "Value is null";
} else {
document.getElementById("result").innerHTML = "Value is not null";
}
}
</script>
</head>
<body>
<h1>Null Example</h1>
<button onclick="checkValue()">Check Value</button>
<h2>Result:</h2>
<div id="result"></div>
</body>
</html>
Explanation:
1-In this example, we have an HTML page with a button labeled “Check Value”.
2-When the button is clicked, the checkValue() function is executed.
3-Inside the function, a variable myValue is assigned the value null.
4-The function checks if myValue is equal to null.
5-Depending on the result, the function updates the content of the <div> element with the appropriate message.
6-The JavaScript code is embedded within the <script> tags in the <head> section of the HTML document.
7-The value null is compared using the strict equality operator (===).
8-The result is displayed using the innerHTML property of the <div> element.
JavaScript Object Data type:
A collection of key-value pairs, where values can be of any data type. Objects are denoted by curly braces ({}) and can be used to represent complex data structures. For example: { name: ‘John’, age: 25 }.
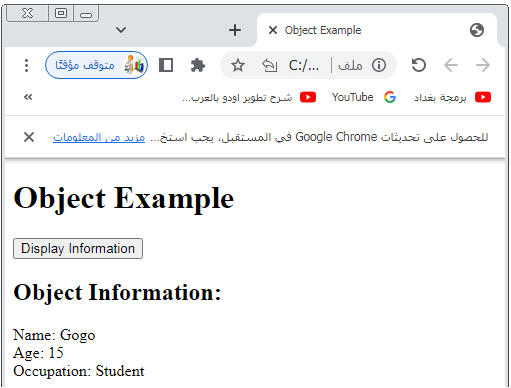
Here’s an example of a complete HTML code that demonstrates the usage of objects in JavaScript:
<!DOCTYPE html>
<html>
<head>
<title>Object Example</title>
<script>
function displayInfo() {
// Create an object
var person = {
name: "Gogo",
age: 15,
occupation: "Student"
};
// Access object properties
var name = person.name;
var age = person.age;
var occupation = person.occupation;
// Display object information
document.getElementById("name").innerHTML = "Name: " + name;
document.getElementById("age").innerHTML = "Age: " + age;
document.getElementById("occupation").innerHTML = "Occupation: " + occupation;
}
</script>
</head>
<body>
<h1>Object Example</h1>
<button onclick="displayInfo()">Display Information</button>
<h2>Object Information:</h2>
<div id="name"></div>
<div id="age"></div>
<div id="occupation"></div>
</body>
</html>
Explanation:
1-In this example, we have an HTML page with a button labeled “Display Information”.
2-When the button is clicked, the displayInfo() function is executed. Inside the function, an object person is created with properties such as name, age, and occupation.
3-The function accesses the object properties using dot notation and assigns them to separate variables.
4-Finally, the function updates the content of the <div> elements with the corresponding object information.
5-The JavaScript code is embedded within the <script> tags in the <head> section of the HTML document.
6-The object person is created using curly braces and properties are defined using key-value pairs.
7-Object properties are accessed using dot notation (person.name, person.age, person.occupation).
8-The object information is displayed using the innerHTML property of the respective <div> elements.
JavaScript Array Data type:
An ordered list of values, denoted by square brackets ([]).
Array elements can be of any data type and are accessed by their index.
For example:
[1, 2, 3, 4].
Here’s an example of a complete HTML code that demonstrates the usage of arrays in JavaScript:
<!DOCTYPE html>
<html>
<head>
<title>Array Example</title>
<script>
function displayArray() {
// Create an array
var fruits = ["Apple", "Banana", "Orange", "Mango"];
// Display the array elements
document.getElementById("fruits").innerHTML = "Fruits: " + fruits.join(", ");
}
</script>
</head>
<body>
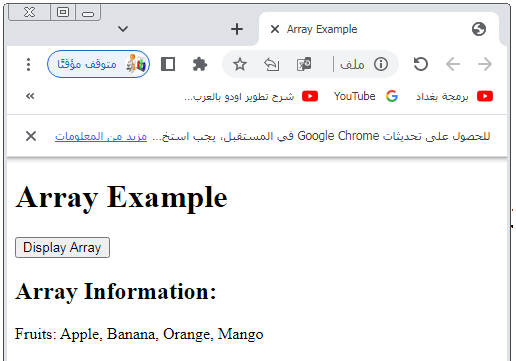
<h1>Array Example</h1>
<button onclick="displayArray()">Display Array</button>
<h2>Array Information:</h2>
<div id="fruits"></div>
</body>
</html>
Explanation:
1-In this example, we have an HTML page with a button labeled “Display Array”.
2-When the button is clicked, the displayArray() function is executed.
3-Inside the function, an array fruits is created with elements such as “Apple”, “Banana”, “Orange”, and “Mango”.
4-The function uses the join() method to concatenate the array elements with a comma separator and updates the content of the <div> element with the resulting string.
5-The JavaScript code is embedded within the <script> tags in the <head> section of the HTML document.
6-The array fruits is created using square brackets and elements are separated by commas.
7-The join() method is used to convert the array elements into a string with a specified separator (“, ” in this case).
8-The array information is displayed using the innerHTML property of the <div> element.
JavaScript Function Data type:
A block of reusable code that performs a specific task. Functions can be assigned to variables, passed as arguments to other functions, and returned from functions.
Here’s an example of a complete HTML code that demonstrates the usage of functions in JavaScript:
<!DOCTYPE html>
<html>
<head>
<title>Function Example</title>
<script>
function greet(name) {
// Display a personalized greeting
document.getElementById("greeting").innerHTML = "Hello, " + name + "!";
}
function sayGoodbye() {
// Display a farewell message
document.getElementById("farewell").innerHTML = "Goodbye! Have a
great day!";
}
</script>
</head>
<body>
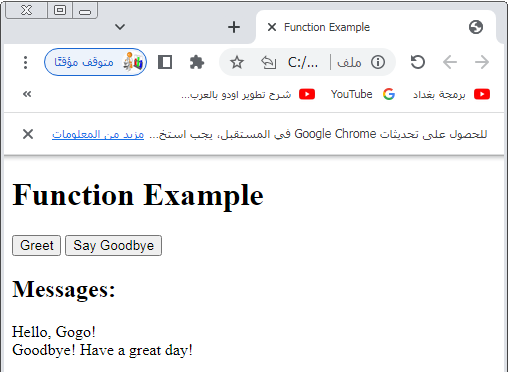
<h1>Function Example</h1>
<button onclick="greet('Gogo')">Greet</button>
<button onclick="sayGoodbye()">Say Goodbye</button>
<h2>Messages:</h2>
<div id="greeting"></div>
<div id="farewell"></div>
</body>
</html>
Explanation:
1-In this example, we have an HTML page with two buttons.
2-The first button is labeled “Greet Explanation: In this example” and the second button is labeled “Say Goodbye”.
3-When the “Greet ” button is clicked, the greet () function is executed with the argument ‘John’. Inside the function, a personalized greeting is generated using the name parameter and updated in the <div> element with the id “greeting”.
4-When the “Say Goodbye” button is clicked, the sayGoodbye() function is executed.
5-Inside the function, a farewell message is updated in the <div> element with the id “farewell”.
6-The JavaScript code is embedded within the <script> tags in the <head> section of the HTML document.
7-The greet () function takes a name parameter and updates the content of the “greeting” <div> element.
8-The sayGoodbye() function does not require any parameters and updates the content of the “farewell” <div> element.
9-The function calls are made using the onclick event handlers of the respective buttons.
JavaScript Symbol Data Type:
Introduced in ECMAScript 6, symbols are unique and immutable data types that can be used as property keys in objects.
They are created using the Symbol() function.
Here’s an example of a complete HTML code that demonstrates the usage of symbols in JavaScript:
<!DOCTYPE html>
<html>
<head>
<title>Symbol Example</title>
<script>
var symbolKey = Symbol("key");
function displaySymbol() {
// Retrieve the symbol key
var key = symbolKey.toString();
// Display the symbol key
document.getElementById("symbol").innerHTML = "Symbol Key: " + key;
}
</script>
</head>
<body>
<h1>Symbol Example</h1>
<button onclick="displaySymbol()">Display Symbol</button>
<h2>Symbol Information:</h2>
<div id="symbol"></div>
</body>
</html>
Explanation:
1-In this example, we have an HTML page with a button labeled “Display Symbol”.
2-When the button is clicked, the displaySymbol() function is executed.
3-Inside the function, a symbol symbolKey is created using the Symbol() function with the description “key”.
4-The toString() method is used to convert the symbol into a string representation, which is then assigned to the key variable.
5-The function updates the content of the <div> element with the id “symbol” with the string representation of the symbol.
6-The JavaScript code is embedded within the <script> tags in the <head> section of the HTML document.
7-The symbol symbolKey is created using the Symbol() function with the description “key”.
8-The toString() method is used to convert the symbol into a string.
9-The symbol information is displayed using the innerHTML property of the <div> element.
Application:Quiz with answers
Here’s an example of a multiple-choice quiz with answers based on the JavaScript data types lesson:
<!DOCTYPE html>
<html>
<head>
<title>JavaScript Data Types Quiz</title>
<script>
function submitQuiz() {
// Retrieve selected answers
var answer1 = document.querySelector('input[name="q1"]:checked').value;
var answer2 = document.querySelector('input[name="q2"]:checked').value;
var answer3 = document.querySelector('input[name="q3"]:checked').value;
var answer4 = document.querySelector('input[name="q4"]:checked').value;
// Calculate the score
var score = 0;
if (answer1 === "c") { score++; }
if (answer2 === "a") { score++; }
if (answer3 === "d") { score++; }
if (answer4 === "b") { score++; }
// Display the score
document.getElementById("result").innerHTML = "Your Score: " + score + "/4";
}
</script>
</head>
<body>
<h1>JavaScript Data Types Quiz</h1>
<form>
<h3>Question 1:</h3>
<p>Which of the following is not a JavaScript data type?</p>
<input type="radio" name="q1" value="a"> a) Number<br>
<input type="radio" name="q1" value="b"> b) String<br>
<input type="radio" name="q1" value="c"> c) Integer<br>
<input type="radio" name="q1" value="d"> d) Boolean<br>
<h3>Question 2:</h3>
<p>Which data type is used to represent sequences of characters?</p>
<input type="radio" name="q2" value="a"> a) String<br>
<input type="radio" name="q2" value="b"> b) Object<br>
<input type="radio" name="q2" value="c"> c) Number<br>
<input type="radio" name="q2" value="d"> d) Null<br>
<h3>Question 3:</h3>
<p>What value is assigned to an uninitialized variable in JavaScript?</p>
<input type="radio" name="q3" value="a"> a) 0<br>
<input type="radio" name="q3" value="b"> b) false<br>
<input type="radio" name="q3" value="c"> c) undefined<br>
<input type="radio" name="q3" value="d"> d) null<br>
<h3>Question 4:</h3>
<p>Which data type is used to represent a collection of key-value pairs?</p>
<input type="radio" name="q4" value="a"> a) Array<br>
<input type="radio" name="q4" value="b"> b) Object<br>
<input type="radio" name="q4" value="c"> c) Function<br>
<input type="radio" name="q4" value="d"> d) Symbol<br>
<br>
<button type="button" onclick="submitQuiz()">Submit Quiz</button>
</form>
<h2>Result:</h2>
<div id="result"></div>
</body>
</html>
Explanation:
1-In this example, we have an HTML page that represents a multiple-choice quiz about JavaScript data types.
2-Each question has four options, and the Explanation: In this example can select one option for each question.
3-When the “Submit Quiz” button is clicked, the submitQuiz() function is executed.
4-Inside the function, the selected answers are retrieved using querySelector() and checked property.
5-The function then compares the selected answers with the correct answers and calculates the score.
6-The score is displayed in the “Result” section.
7-The JavaScript code is embedded within the <script> tags in the <head> section of the HTML document.
8-The function compares the selected answers with the correct answers and increments the score for each correct answer.
9-The score is displayed using the innerHTML property of the <div> element.
Note: In a production environment, you may want to add further validation, error handling, and customize the feedback for correct and incorrect answers.

References
Here are some references that you can explore to learn more about JavaScript data types:
MDN Web Docs – JavaScript Data Types:
W3Schools – JavaScript Data Types:
Eloquent JavaScript – Chapter 1: Values, Types, and Operators: