
JavaScript Objects
JavaScript Objects Demystified: Unlocking the Power of Data Structures
Introduction:
Explore the fundamental building blocks of JavaScript programming with our in-depth guide on JavaScript Objects. From creating and manipulating objects to understanding properties, methods, and advanced concepts, this guide is your key to mastering one of the most crucial aspects of JavaScript development. Enhance your skills, write more efficient code, and unleash the full potential of objects in JavaScript.
In JavaScript, objects are a fundamental data type that allows you to store and organize data using key-value pairs. Objects are a way to represent real-world entities, and they can have properties and methods associated with them. Here’s a basic overview of JavaScript objects:
How to create Javascript Objects ?
There are several ways to create objects in JavaScript:
By Object Literal:
let person = {
name: 'John',
age: 30,
isStudent: false
};
By Constructor Function:
function Person(name, age, isStudent) {
this.name = name;
this.age = age;
this.isStudent = isStudent;
}
let person = new Person('John', 30, false);
By Class (ES6 and later):
class Person {
constructor(name, age, isStudent) {
this.name = name;
this.age = age;
this.isStudent = isStudent;
}
}
let person = new Person('John', 30, false);
Accessing Object Properties:
You can access object properties using dot notation or square bracket notation:
console.log(person.name); // John
console.log(person['age']); // 30
Modifying Object Properties:
javascript
person.age = 31;
person['isStudent'] = true;
Adding Methods to Objects:
javascript
let person = {
name: 'John',
age: 30,
greet: function() {
console.log('Hello, my name is ' + this.name + ' and I am ' + this.age + ' years old.');
}
};
person.greet(); // Hello, my name is John and I am 30 years old.
JavaScript Object Methods:
JavaScript provides built-in methods for objects, such as Object.keys(), Object.values(), and Object.entries():
let keys = Object.keys(person); // ['name', 'age', 'isStudent'] let values = Object.values(person); // ['John', 30, false] let entries = Object.entries(person); // [['name', 'John'], ['age', 30], ['isStudent', false]]
Object Destructuring:
let { name, age } = person;
console.log(name); // John
console.log(age); // 30
These are just some basic concepts related to JavaScript objects. Objects are a versatile and powerful feature in JavaScript, used extensively in web development for representing and managing complex data structures.
create JavaScript object by Object Literal:step by ste in complete example in html
Let’s create a simple HTML file that includes JavaScript code to define and use an object using Object Literal notation. In this example, I’ll create a person object with properties like name, age, and a method greet.
<!DOCTYPE html>
<html lang="en">
<head>
<meta charset="UTF-8">
<meta name="viewport" content="width=device-width, initial-scale=1.0">
<title>JavaScript Object Literal Example</title>
</head>
<body>
<script>
// Step 1: Create an object using Object Literal notation
let person = {
// Step 2: Add properties
name: 'John',
age: 30,
// Step 3: Add a method
greet: function() {
console.log('Hello, my name is ' + this.name + ' and I am ' + this.age + ' years old.');
}
};
// Step 4: Access object properties and call the method
console.log(person.name); // Output: John
console.log(person['age']); // Output: 30
person.greet(); // Output: Hello, my name is John and I am 30 years old.
</script>
</body>
</html>
In this example:
Step 1: We create an object called person using Object Literal notation.
Step 2: We add properties (name and age) to the object.
Step 3: We add a method (greet) to the object.
Step 4: We access object properties using both dot notation and square bracket notation, and we call the greet method.
Save this code in an HTML file and open it in a web browser. You should see the output in the browser’s console (you can access the console by right-clicking on the page, selecting “Inspect,” and navigating to the “Console” tab).
create JavaScript object by Constructor Function :step by ste in complete example in html
- Let’s create an example using a constructor function to define a JavaScript object.
- In this example, we’ll use a Person constructor to create a person object with properties like name, age, and a method greet.
<!DOCTYPE html>
<html lang="en">
<head>
<meta charset="UTF-8">
<meta name="viewport" content="width=device-width, initial-scale=1.0">
<title>JavaScript Constructor Function Example</title>
</head>
<body>
<script>
// Step 1: Define a constructor function
function Person(name, age) {
// Step 2: Inside the constructor, use "this" to refer to the instance being created
this.name = name;
this.age = age;
// Step 3: Add a method to the constructor function
this.greet = function() {
console.log('Hello, my name is ' + this.name + ' and I am ' + this.age + ' years old.');
};
}
// Step 4: Create an instance of the object using the "new" keyword
let person = new Person('John', 30);
// Step 5: Access object properties and call the method
console.log(person.name); // Output: John
console.log(person['age']); // Output: 30
person.greet(); // Output: Hello, my name is John and I am 30 years old.
</script>
</body>
</html>
In this example:
Step 1: We define a constructor function named Person.
Step 2: Inside the constructor, we use this to refer to the instance being created and add properties (name and age) to it.
Step 3: We add a method (greet) to the constructor function.
Step 4: We create an instance of the Person object using the new keyword.
Step 5: We access object properties and call the greet method.
Save this code in an HTML file and open it in a web browser. You should see the output in the browser’s console.
create JavaScript object by Class (ES6 and later)::step by ste in complete example in html
- Here’s an example of creating a JavaScript object using a class in ES6.
- In this example, we’ll use a Person class to create a person object with properties like name, age, and a method greet.
<!DOCTYPE html>
<html lang="en">
<head>
<meta charset="UTF-8">
<meta name="viewport" content="width=device-width, initial-scale=1.0">
<title>JavaScript Class Example</title>
</head>
<body>
<script>
// Step 1: Define a class
class Person {
// Step 2: Use the constructor to initialize object properties
constructor(name, age) {
this.name = name;
this.age = age;
}
// Step 3: Add a method to the class
greet() {
console.log(`Hello, my name is ${this.name} and I am ${this.age} years old.`);
}
}
// Step 4: Create an instance of the class
let person = new Person('John', 30);
// Step 5: Access object properties and call the method
console.log(person.name); // Output: John
console.log(person['age']); // Output: 30
person.greet(); // Output: Hello, my name is John and I am 30 years old.
</script>
</body>
</html>
In this example:
Step 1: We define a class named Person.
Step 2: We use the constructor method to initialize object properties (name and age).
Step 3: We add a method (greet) directly within the class.
Step 4: We create an instance of the Person class using the new keyword.
Step 5: We access object properties and call the greet method.
Save this code in an HTML file and open it in a web browser. You should see the output in the browser’s console.
create a new JavaScript object using new Object()
You can create a new JavaScript object using the new Object() syntax. Here’s an example:
<!DOCTYPE html> <html lang="en"> <head> <meta charset="UTF-8"> <meta name="viewport" content="width=device-width, initial-scale=1.0"> <title>New JavaScript Object Example</title> </head> <body> <script> // Create a new JavaScript object using new Object() let person = new Object(); // Add properties to the object person.name = 'John'; person.age = 30; person.isStudent = false; // Display the object in the console console.log(person); </script> </body> </html>
In this example:
We create a new JavaScript object named person using new Object().
We add properties (name, age, and isStudent) to the object using dot notation.
We display the object in the console using console.log().
While using object literal notation ({}) is more concise and commonly used, the new Object() syntax is another way to create an empty object and add properties to it.
Create an object using Object.create()
Object.create() is a method in JavaScript that creates a new object with the specified prototype object and properties.
Here’s an example:
<!DOCTYPE html>
<html lang="en">
<head>
<meta charset="UTF-8">
<meta name="viewport" content="width=device-width, initial-scale=1.0">
<title>Create Object using Object.create() Example</title>
</head>
<body>
<script>
// Create a prototype object
let personPrototype = {
greet: function() {
console.log('Hello!');
}
};
// Create a new object using Object.create() with personPrototype as the prototype
let person = Object.create(personPrototype);
// Add properties to the object
person.name = 'John';
person.age = 30;
person.isStudent = false;
// Display the object and call the method in the console
console.log(person);
person.greet();
</script>
</body>
</html>
In this example:
We create a prototype object named personPrototype with a greet method.
We create a new object named person using Object.create(personPrototype), where personPrototype is set as the prototype of person.
We add properties (name, age, and isStudent) to the object using dot notation.
We display the object and call the greet method in the console.
Using Object.create() allows you to establish a prototype chain and inherit properties and methods from the specified prototype object.
How to Access Object Properties ?
Accessing Object Properties by dot notation :step by step in complete example in html
Here’s an example of accessing object properties using dot notation step by step in a complete HTML file:
<!DOCTYPE html>
<html lang="en">
<head>
<meta charset="UTF-8">
<meta name="viewport" content="width=device-width, initial-scale=1.0">
<title>Accessing Object Properties Example</title>
</head>
<body>
<script>
// Step 1: Create an object using Object Literal notation
let person = {
// Step 2: Add properties
name: 'John',
age: 30,
isStudent: false
};
// Step 3: Access object properties using dot notation
let personName = person.name; // Accessing 'name' property
let personAge = person.age; // Accessing 'age' property
let isStudent = person.isStudent; // Accessing 'isStudent' property
// Step 4: Display the values in the console
console.log('Name:', personName); // Output: Name: John
console.log('Age:', personAge); // Output: Age: 30
console.log('Is Student:', isStudent); // Output: Is Student: false
</script>
</body>
</html>
In this example:
Step 1: We create an object named person using Object Literal notation.
Step 2: We add properties (name, age, and isStudent) to the object.
Step 3: We access object properties using dot notation and store them in variables.
Step 4: We display the values of the properties in the console.
Save this code in an HTML file and open it in a web browser. You should see the output in the browser’s console.
Accessing Object Properties using square bracket notation:step by step in hml
Here’s an example of accessing object properties using square bracket notation step by step in a complete HTML file:
<!DOCTYPE html>
<html lang="en">
<head>
<meta charset="UTF-8">
<meta name="viewport" content="width=device-width, initial-scale=1.0">
<title>Accessing Object Properties Example</title>
</head>
<body>
<script>
// Step 1: Create an object using Object Literal notation
let person = {
// Step 2: Add properties
name: 'John',
age: 30,
isStudent: false
};
// Step 3: Access object properties using square bracket notation
let propertyName = 'name';
let propertyAge = 'age';
let propertyIsStudent = 'isStudent';
let personName = person[propertyName]; // Accessing 'name' property
let personAge = person[propertyAge]; // Accessing 'age' property
let isStudent = person[propertyIsStudent]; // Accessing 'isStudent' property
// Step 4: Display the values in the console
console.log('Name:', personName); // Output: Name: John
console.log('Age:', personAge); // Output: Age: 30
console.log('Is Student:', isStudent); // Output: Is Student: false
</script>
</body>
</html>
In this example:
Step 1: We create an object named person using Object Literal notation.
Step 2: We add properties (name, age, and isStudent) to the object.
Step 3: We use variables (propertyName, propertyAge, propertyIsStudent) to store property names, and then access object properties using square bracket notation.
Step 4: We display the values of the properties in the console.
Save this code in an HTML file and open it in a web browser. You should see the output in the browser’s console.
How to Modifying Object Properties ?
To modify object properties in JavaScript, you can use either dot notation or square bracket notation to access the property you want to modify and then assign a new value to it.
Here’s an example:
<!DOCTYPE html>
<html lang="en">
<head>
<meta charset="UTF-8">
<meta name="viewport" content="width=device-width, initial-scale=1.0">
<title>Modifying Object Properties Example</title>
</head>
<body>
<script>
// Step 1: Create an object using Object Literal notation
let person = {
// Step 2: Add properties
name: 'John',
age: 30,
isStudent: false
};
// Step 3: Display the original values in the console
console.log('Original Name:', person.name); // Output: Original Name: John
console.log('Original Age:', person.age); // Output: Original Age: 30
console.log('Original Is Student:', person.isStudent); // Output: Original Is Student: false
// Step 4: Modify object properties
person.name = 'Jane'; // Modifying 'name' property using dot notation
person['age'] = 31; // Modifying 'age' property using square bracket notation
person.isStudent = true; // Modifying 'isStudent' property using dot notation
// Step 5: Display the modified values in the console
console.log('Modified Name:', person.name); // Output: Modified Name: Jane
console.log('Modified Age:', person.age); // Output: Modified Age: 31
console.log('Modified Is Student:', person.isStudent); // Output: Modified Is Student: true
</script>
</body>
</html>
In this example:
Step 1: We create an object named person using Object Literal notation.
Step 2: We add properties (name, age, and isStudent) to the object.
Step 3: We display the original values of the properties in the console.
Step 4: We modify the object properties using both dot notation and square bracket notation.
Step 5: We display the modified values of the properties in the console.
Save this code in an HTML file and open it in a web browser. You should see the output in the browser’s console.
How to add Methods to Objects?
You can add methods to objects in JavaScript by assigning a function to a property of the object.
Here’s an example demonstrating how to add methods to objects:
<!DOCTYPE html>
<html lang="en">
<head>
<meta charset="UTF-8">
<meta name="viewport" content="width=device-width, initial-scale=1.0">
<title>Adding Methods to Objects Example</title>
</head>
<body>
<script>
// Step 1: Create an object using Object Literal notation
let person = {
// Step 2: Add properties
name: 'John',
age: 30,
// Step 3: Add a method
greet: function() {
console.log('Hello, my name is ' + this.name + ' and I am ' + this.age + ' years old.');
}
};
// Step 4: Call the method
person.greet(); // Output: Hello, my name is John and I am 30 years old.
// Step 5: Add another method
person.sayGoodbye = function() {
console.log('Goodbye, everyone!');
};
// Step 6: Call the new method
person.sayGoodbye(); // Output: Goodbye, everyone!
</script>
</body>
</html>
In this example:
Step 1: We create an object named person using Object Literal notation.
Step 2: We add properties (name and age) to the object.
Step 3: We add a method named greet to the object. The method is a function that logs a greeting to the console.
Step 4: We call the greet method.
Step 5: We add another method named sayGoodbye to the object.
Step 6: We call the new method sayGoodbye.
Save this code in an HTML file and open it in a web browser. You should see the output in the browser’s console. Adding methods to objects is a common practice in JavaScript, especially when you want to encapsulate behavior related to an object.
Object Destructuring:
Object destructuring is a feature in JavaScript that allows you to extract values from objects and assign them to variables in a more concise and readable way.
Here’s an example illustrating object destructuring:
<!DOCTYPE html>
<html lang="en">
<head>
<meta charset="UTF-8">
<meta name="viewport" content="width=device-width, initial-scale=1.0">
<title>Object Destructuring Example</title>
</head>
<body>
<script>
// Step 1: Create an object using Object Literal notation
let person = {
name: 'John',
age: 30,
isStudent: false
};
// Step 2: Object Destructuring
let { name, age, isStudent } = person;
// Step 3: Display the extracted values in the console
console.log('Name:', name); // Output: Name: John
console.log('Age:', age); // Output: Age: 30
console.log('Is Student:', isStudent); // Output: Is Student: false
</script>
</body>
</html>
In this example:
Step 1: We create an object named person using Object Literal notation.
Step 2: We use object destructuring to extract values from the person object and assign them to variables (name, age, and isStudent) with the same names as the object properties.
Step 3: We display the extracted values in the console.
Object destructuring can also be useful when working with function parameters or in scenarios where you need to extract specific values from an object.
Here’s an example of using object destructuring with function parameters:
<!DOCTYPE html>
<html lang="en">
<head>
<meta charset="UTF-8">
<meta name="viewport" content="width=device-width, initial-scale=1.0">
<title>Object Destructuring with Function Parameters</title>
</head>
<body>
<script>
// Step 1: Create a function that takes an object as a parameter
function displayPersonDetails({ name, age, isStudent }) {
console.log('Name:', name);
console.log('Age:', age);
console.log('Is Student:', isStudent);
}
// Step 2: Create an object
let person = {
name: 'John',
age: 30,
isStudent: false
};
// Step 3: Call the function with object destructuring
displayPersonDetails(person);
</script>
</body>
</html>
In this second example, the displayPersonDetails function takes an object parameter and uses object destructuring in the function signature to directly extract properties from the passed object. This can make the code more readable and avoids the need to access object properties within the function body.
Save these examples in HTML files and open them in a web browser.
You should see the output in the browser’s console.
An application about Javascript object with explanation
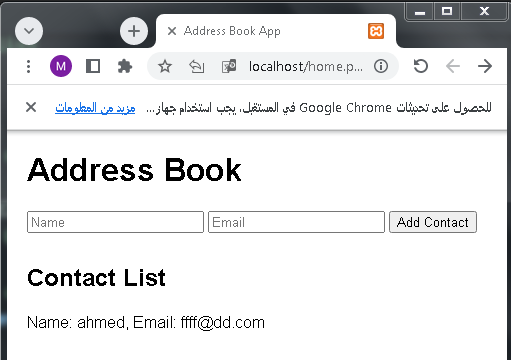
- let’s create a simple web application using HTML and JavaScript that demonstrates the concept of JavaScript objects.
- In this example, we’ll build a basic address book application where you can add and display contacts.
<!DOCTYPE html>
<html lang="en">
<head>
<meta charset="UTF-8">
<meta name="viewport" content="width=device-width, initial-scale=1.0">
<title>Address Book App</title>
<style>
body {
font-family: Arial, sans-serif;
margin: 20px;
}
input, button {
margin-bottom: 10px;
}
ul {
list-style-type: none;
padding: 0;
}
li {
margin-bottom: 5px;
}
</style>
</head>
<body>
<h1>Address Book</h1>
<!-- Input fields for adding a new contact -->
<input type="text" id="nameInput" placeholder="Name">
<input type="text" id="emailInput" placeholder="Email">
<button onclick="addContact()">Add Contact</button>
<!-- Display the list of contacts -->
<h2>Contact List</h2>
<ul id="contactList"></ul>
<script>
// Step 1: Define an array to store contacts
let contacts = [];
// Step 2: Function to add a new contact
function addContact() {
// Step 3: Get input values
let name = document.getElementById('nameInput').value;
let email = document.getElementById('emailInput').value;
// Step 4: Create a contact object using Object Literal notation
let contact = {
name: name,
email: email
};
// Step 5: Add the contact to the array
contacts.push(contact);
// Step 6: Clear input fields
document.getElementById('nameInput').value = '';
document.getElementById('emailInput').value = '';
// Step 7: Update the contact list
displayContacts();
}
// Step 8: Function to display contacts
function displayContacts() {
let contactList = document.getElementById('contactList');
contactList.innerHTML = ''; // Clear the previous list
// Step 9: Iterate through the contacts array and display each contact
for (let i = 0; i < contacts.length; i++) {
let contact = contacts[i];
let listItem = document.createElement('li');
listItem.textContent = `Name: ${contact.name}, Email: ${contact.email}`;
contactList.appendChild(listItem);
}
}
</script>
</body>
</html>
Explanation:
Step 1: We define an array called contacts to store contact objects.
Step 2: The addContact function is called when the “Add Contact” button is clicked. It retrieves the values from the input fields, creates a new contact object using Object Literal notation, adds it to the contacts array, clears the input fields, and then calls the displayContacts function.
Step 3: The displayContacts function updates the HTML to display the list of contacts. It clears the previous list and then iterates through the contacts array, creating list items for each contact and appending them to the unordered list.
Save this code in an HTML file and open it in a web browser. You can add contacts using the input fields, and the application will display the list of contacts. This is a simple example, and in a real-world application, you might want to consider additional features and validations.
Quiz about Object Destructuring:15 questions with explanation
Here’s a set of 15 questions about Object Destructuring, each followed by a brief explanation:
Question 1:
What is Object Destructuring in JavaScript?
a) A method to destroy objects
b) A way to create objects
c) A syntax for extracting values from objects
Correct Answer: c) A syntax for extracting values from objects
Explanation: Object Destructuring is a JavaScript feature that allows you to extract values from objects and assign them to variables in a concise way.
Question 2:
Which of the following is the correct syntax for Object Destructuring?
a) let [a, b] = object;
b) let {a, b} = object;
c) let {a: b} = object;
Correct Answer: b) let {a, b} = object;
Explanation: The correct syntax for Object Destructuring involves using curly braces {} to match the structure of the object.
Question 3:
What happens if you try to destructure a non-existent property?
a) It results in an error
b) It assigns undefined to the variable
c) It assigns null to the variable
Correct Answer: b) It assigns undefined to the variable
Explanation: If the property does not exist in the object, the variable will be assigned the value undefined.
Question 4:
In object destructuring, can you change the variable name while extracting?
a) Yes
b) No
Correct Answer: a) Yes
Explanation: You can change the variable name while extracting by using the : notation.
Question 5:
Which of the following is a valid use case for Object Destructuring?
a) Swapping variable values
b) Combining two objects
c) Performing arithmetic operations
Correct Answer: a) Swapping variable values
Explanation: Object Destructuring can be used to easily swap values between variables.
Question 6:
How do you provide default values for destructured variables?
a) let {a = 10} = object;
b) let {a: 10} = object;
c) let {a || 10} = object;
Correct Answer: a) let {a = 10} = object;
Explanation: Default values can be assigned using the = notation.
Question 7:
Which of the following is the opposite of Object Destructuring?
a) Object Structuring
b) Object Construction
c) Object Assignment
Correct Answer: a) Object Structuring
Explanation: While Object Destructuring extracts values, Object Structuring is about creating objects.
Question 8:
In object destructuring, can you destructure nested objects?
a) No
b) Yes, but only one level
c) Yes, multiple levels
Correct Answer: c) Yes, multiple levels
Explanation: Object Destructuring can be used to destructure nested objects to multiple levels.
Question 9:
What happens if you try to destructure a non-object value?
a) It results in an error
b) It assigns undefined to the variable
c) It creates an empty object
Correct Answer: a) It results in an error
Explanation: Object Destructuring can only be performed on actual objects.
Question 10:
Which of the following is the correct syntax to destructure an object parameter in a function?
a) function myFunction({a, b}) {}
b) function myFunction(a, b) {}
c) function myFunction([a, b]) {}
Correct Answer: a) function myFunction({a, b}) {}
Explanation: When using object parameters in functions, you can destructure the object directly in the function signature.
Question 11:
Can you destructure an array using Object Destructuring?
a) Yes
b) No
Correct Answer: b) No
Explanation: Object Destructuring is specifically for objects; array destructuring uses a different syntax.
Question 12:
Which operator is used to provide an alias for a destructured variable?
a) :
b) =
c) =>
Correct Answer: a) :
Explanation: You can use the : notation to provide an alias for a destructured variable.
Question 13:
What is the purpose of Object Destructuring?
a) Creating objects
b) Extracting values from objects
c) Combining multiple objects
Correct Answer: b) Extracting values from objects
Explanation: Object Destructuring is primarily used for extracting values from objects.
Question 14:
In object destructuring, can you ignore certain properties?
a) No
b) Yes, using null
c) Yes, using commas
Correct Answer: c) Yes, using commas
Explanation: You can use commas to skip properties during object destructuring.
Question 15:
Which of the following is the result of destructuring an object with no properties?
a) An empty object
b) undefined
c) An error
Correct Answer: a) An empty object
Explanation: Destructuring an empty object results in an empty object.