
JavaScript Window Events – Complete Guide with Examples
JavaScript Window Events
Learn about JavaScript window events and how to use them effectively in your web applications.
We will learn:JavaScript window events, handling window events in JavaScript, window event examples, JavaScript event-driven programming, window load event, resize event in JavaScript, scroll event handling, focus and blur events, keydown and keyup events, click and dblclick events, mouseenter and mouseleave events, contextmenu event usage, handling errors with the error event, messaging between windows with message event.
This comprehensive guide provides examples and explanations for various window events such as load, resize, scroll, focus, and more.
Here are some commonly used window events:
load: This event is triggered when the page finishes loading.
unload: This event is triggered when the leaves the page or closes the window.
beforeunload: This event is triggered just before the leaves the page or closes the window. It can be used to show a confirmation dialog asking the if they really want to leave the page.
resize: This event is triggered when the browser window is resized.
scroll: This event is triggered when the scrolls the page.
focus: This event is triggered when the window gains focus (e.g., when the clicks inside the window).
blur: This event is triggered when the window loses focus (e.g., when the clicks outside the window).
keydown: This event is triggered when a key is pressed down.
keyup: This event is triggered when a key is released.
keypress: This event is triggered when a key is pressed and released.
click: This event is triggered when the clicks the mouse button.
dblclick: This event is triggered when the double-clicks the mouse button.
mouseenter: This event is triggered when the mouse pointer enters the window.
mouseleave: This event is triggered when the mouse pointer leaves the window.
mousemove: This event is triggered when the mouse pointer moves within the window.
contextmenu: This event is triggered when the right-clicks the window, opening the context menu.
error: This event is triggered when an error occurs during the loading of external resources, such as images or scripts.
message: This event is triggered when the window receives a message from another window or iframe.
These are just some of the commonly used window events in JavaScript. There are additional events available for specific use cases and browser compatibility, so it’s always a good idea to refer to the official documentation or browser-specific resources for a comprehensive list and detailed information on each event.
Window Events: complete code in html
Here’s an example of an HTML code snippet that demonstrates the usage of some window events:
<!DOCTYPE html>
<html>
<head>
<title>Window Events Example</title>
</head>
<body>
<script>
// Function to handle the 'load' event
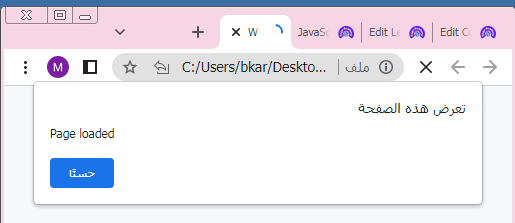
function handleLoad() {
alert("Page loaded");
// Add your code here
}
// Function to handle the 'resize' event
function handleResize() {
alert("Window resized");
// Add your code here
}
// Function to handle the 'scroll' event
function handleScroll() {
alert("Window scrolled");
// Add your code here
}
// Add event listeners to the window object
window.addEventListener('load', handleLoad);
window.addEventListener('resize', handleResize);
window.addEventListener('scroll', handleScroll);
</script>
</body>
</html>
Explanation:
1-In this example, we define three event handler functions: handleLoad(), handleResize(), and handleScroll().
2-Each function logs a message to the console indicating the respective event has occurred.
3-You can add your own code within these functions to perform specific actions when the events are triggered.
4-The window.addEventListener() method is used to attach the event listeners to the window object. In this case, we attach the event listeners for the load, resize, and scroll events. Whenever these events occur, the corresponding event handler functions will be called.
You can add or remove event listeners based on your specific requirements by modifying the code accordingly.
Javascript window unload event
Here’s an example of an HTML code snippet that demonstrates the usage of the unload event:
<!DOCTYPE html>
<html>
<head>
<title>Unload Event Example</title>
</head>
<body>
<script>
// Function to handle the 'unload' event
function handleUnload() {
console.log("Page unloaded");
// Add your code here
}
// Add event listener to the window object
window.addEventListener('unload', handleUnload);
</script>
</body>
</html>
Explanation:
1-In this example, we define the handleUnload() function, which logs a message to the console indicating that the page has been unloaded.
2-You can add your own code within this function to perform any necessary cleanup or actions before the leaves the page.
3-The window.addEventListener() method is used to attach the event listener to the window object.
4-In this case, we attach the event listener for the unload event.
5-When the leaves the page or closes the window, the handleUnload() function will be called.
6-Please note that the unload event is not supported in all browsers and its behavior may vary.
7-Additionally, due to security restrictions, some actions may not be possible to perform during the unload event.
8-It’s always a good idea to test and handle edge cases accordingly.
Javascript window beforeunload event
Here’s an example of an HTML code snippet that demonstrates the usage of the beforeunload event:
<!DOCTYPE html>
<html>
<head>
<title>beforeunload Event Example</title>
</head>
<body>
<script>
// Function to handle the 'beforeunload' event
function handleBeforeUnload(event) {
// Cancel the event (modern browsers require a non-empty return value)
event.preventDefault();
// Chrome requires the event.returnValue to be set
event.returnValue = '';
// Prompt the with a confirmation dialog
const confirmationMessage = 'Are you sure you want to leave this page?';
event.returnValue = confirmationMessage;
return confirmationMessage;
}
// Add event listener to the window object
window.addEventListener('beforeunload', handleBeforeUnload);
</script>
</body>
</html>
Explanation:
1-In this example, we define the handleBeforeUnload() function, which handles the beforeunload event.
2-The function cancels the default behavior of the event using event.preventDefault() and sets the event.returnValue property to an empty string (required by Chrome).
3-To prompt the with a confirmation dialog, we set the event.returnValue to a custom confirmation message.
4-The browser will display this message to the in a dialog box, asking for confirmation before leaving the page.
5-Please note that the exact behavior of the beforeunload event may vary between browsers, and some browsers may not display the custom message.
Also, keep in mind that some browsers restrict the actions that can be performed during the beforeunload event to ensure a smooth experience and prevent abuse.
Javascript window resize event
Here’s an example of an HTML code snippet that demonstrates the usage of the resize event:
<!DOCTYPE html>
<html>
<head>
<title>Resize Event Example</title>
</head>
<body>
<script>
// Function to handle the 'resize' event
function handleResize() {
console.log("Window resized");
document.write("Window resized");
// Add your code here
Alert("welcome");
}
// Add event listener to the window object
window.addEventListener('resize', handleResize);
</script>
</body>
</html>
Explanation:
1-In this example, we define the handleResize() function, which logs a message to the console indicating that the window has been resized.
2-You can add your own code within this function to perform any necessary actions or adjustments based on the new window dimensions.
3-The window.addEventListener() method is used to attach the event listener to the window object.
4-In this case, we attach the event listener for the resize event. Whenever the window is resized, the handleResize() function will be called.
5-Please note that the resize event can be triggered frequently during window resizing, so it’s important to handle this event efficiently and avoid resource-intensive operations within the event handler.

Javascript window scroll event
Here’s an example of an HTML code snippet that demonstrates the usage of the scroll event:
<!DOCTYPE html>
<html>
<head>
<title>Scroll Event Example</title>
<style>
#scrollIndicator {
position: fixed;
top: 0;
left: 0;
width: 100%;
height: 10px;
background-color: #f0f0f0;
}
#scrollProgress {
height: 100%;
background-color: #2196f3;
}
</style>
</head>
<body>
<div id="scrollIndicator">
<div id="scrollProgress"></div>
</div>
<script>
// Function to handle the 'scroll' event
function handleScroll() {
const windowHeight = window.innerHeight || document.documentElement.clientHeight;
const documentHeight = document.documentElement.scrollHeight;
const scrollTop = window.pageYOffset || document.documentElement.scrollTop;
const scrollProgress = (scrollTop / (documentHeight - windowHeight)) * 100;
// Update the scroll progress indicator
document.getElementById('scrollProgress').style.width = scrollProgress + '%';
// Add your code here
}
// Add event listener to the window object
window.addEventListener('scroll', handleScroll);
</script>
<p>welecome</p>
<p>welecome</p>
<p>welecome</p>
<p>welecome</p>
<p>welecome</p>
<p>welecome</p>
<p>welecome</p>
<p>welecome</p>
<p>welecome</p>
<p>welecome</p>
<p>welecome</p>
<p>welecome</p>
<p>welecome</p>
<p>welecome</p>
<p>welecome</p>
<p>welecome</p>
<p>welecome</p>
<p>welecome</p>
<p>welecome</p>
<p>welecome</p>
<p>welecome</p>
<p>welecome</p>
<p>welecome</p>
<p>welecome</p>
<p>welecome</p>
<p>welecome</p>
<p>welecome</p>
<p>welecome</p>
</body>
</html>
Explanation:
1-In this example, we create a scroll progress indicator at the top of the page using CSS.
2-The handleScroll() function is defined to handle the scroll event.
3-Inside this function, we calculate the scroll progress percentage by measuring the current scroll position (scrollTop) and the height of the document (documentHeight) and window (windowHeight).
4-We update the width of the scrollProgress element to represent the scroll progress visually. You can add your own code within this function to perform actions or apply changes based on the scroll position.
5-The window.addEventListener() method is used to attach the event listener to the window object.
6-In this case, we attach the event listener for the scroll event.
7-Whenever the scrolls the page, the handleScroll() function will be called.

Try to modify the code according to your specific requirements and styling preferences.
Javascript window focus event
Here’s an example of an HTML code snippet that demonstrates the usage of the focus event:
<!DOCTYPE html>
<html>
<head>
<title>Focus Event Example</title>
</head>
<body>
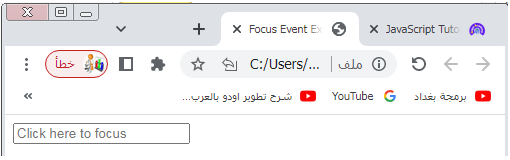
<input type="text" id="myInput" placeholder="Click here to focus" />
<script>
// Function to handle the 'focus' event
function handleFocus() {
console.log("Input field focused");
// Add your code here
}
// Get the input element
var inputElement = document.getElementById('myInput');
// Add event listener to the input element
inputElement.addEventListener('focus', handleFocus);
</script>
</body>
</html>
Explanation:
1-In this example, we have an input field with an id attribute of myInput.
2-We define the handleFocus() function, which logs a message to the console indicating that the input field has been focused.
3-You can add your own code within this function to perform any necessary actions when the input field is focused.
4-We use document.getElementById() to get a reference to the input element, and then we attach the event listener to the input element using addEventListener().
5-In this case, we attach the event listener for the focus event.
6-When the input field is focused (e.g., when the clicks inside the input field), the handleFocus() function will be called.
Try to modify the code according to your specific requirements and styling preferences.
Javascript window blur event
Here’s an example of an HTML code snippet that demonstrates the usage of the blur event:
<!DOCTYPE html>
<html>
<head>
<title>Blur Event Example</title>
</head>
<body>
<input type="text" id="myInput" placeholder="Click here and then click outside to trigger blur" />
<script>
// Function to handle the 'blur' event
function handleBlur() {
alert("Input field blurred");
// Add your code here
}
// Get the input element
var inputElement = document.getElementById('myInput');
// Add event listener to the input element
inputElement.addEventListener('blur', handleBlur);
</script>
</body>
</html>
Explanation:
1- In this example, we have an input field with an id attribute of myInput.
2-We define the handleBlur() function, which logs a message to the console indicating that the input field has been blurred (i.e., lost focus).
3-You can add your own code within this function to perform any necessary actions when the input field is blurred.
4-We use document.getElementById() to get a reference to the input element, and then we attach the event listener to the input element using addEventListener().
5-In this case, we attach the event listener for the blur event.
6-When the input field loses focus (e.g., when the clicks outside the input field), the handleBlur() function will be called.

Try to modify the code according to your specific requirements and styling preferences.
Javascript window keydown event
Here’s an example of an HTML code snippet that demonstrates the usage of the keydown event:
<!DOCTYPE html>
<html>
<head>
<title>Keydown Event Example</title>
</head>
<body>
<input type="text" id="myInput" placeholder="Type something..." />
<script>
// Function to handle the 'keydown' event
function handleKeydown(event) {
document.write("Key pressed: " + event.key);
// Add your code here
}
// Get the input element
var inputElement = document.getElementById('myInput');
// Add event listener to the input element
inputElement.addEventListener('keydown', handleKeydown);
</script>
</body>
</html>
Explanation:
1-In this example, we have an input field with an id attribute of myInput.
2-We define the handleKeydown() function, which logs a message to the console indicating the key that has been pressed.
3-You can add your own code within this function to perform any necessary actions based on the pressed key.
4-We use document.getElementById() to get a reference to the input element, and then we attach the event listener to the input element using addEventListener().
5-In this case, we attach the event listener for the keydown event. Whenever a key is pressed while the input field is focused, the handleKeydown() function will be called.

Try to modify the code according to your specific requirements and styling preferences.
Javascript window keyup event :
Here’s an example of an HTML code snippet that demonstrates the usage of the keyup event:
<!DOCTYPE html>
<html>
<head>
<title>Keyup Event Example</title>
</head>
<body>
<input type="text" id="myInput" placeholder="Type something..." />
<script>
// Function to handle the 'keyup' event
function handleKeyup(event) {
document.write("Key released: " + event.key);
// Add your code here
}
// Get the input element
var inputElement = document.getElementById('myInput');
// Add event listener to the input element
inputElement.addEventListener('keyup', handleKeyup);
</script>
</body>
</html>
Explanation:
1-In this example, we have an input field with an id attribute of myInput.
2-We define the handleKeyup() function, which logs a message to the console indicating the key that has been released.
3-You can add your own code within this function to perform any necessary actions based on the released key.
4-We use document.getElementById() to get a reference to the input element, and then we attach the event listener to the input element using addEventListener().
5-In this case, we attach the event listener for the keyup event.
6-Whenever a key is released while the input field is focused, the handleKeyup() function will be called.

Try to modify the code according to your specific requirements and styling preferences.
Javascript window keypress event:
Here’s an example of an HTML code snippet that demonstrates the usage of the keypress event:
<!DOCTYPE html>
<html>
<head>
<title>Keypress Event Example</title>
</head>
<body>
<input type="text" id="myInput" placeholder="Type something..." />
<script>
// Function to handle the 'keypress' event
function handleKeypress(event) {
document.write("Key pressed: " + event.key);
// Add your code here
}
// Get the input element
var inputElement = document.getElementById('myInput');
// Add event listener to the input element
inputElement.addEventListener('keypress', handleKeypress);
</script>
</body>
</html>
Explanation:
1-In this example, we have an input field with an id attribute of myInput.
2-We define the handleKeypress() function, which logs a message to the console indicating the key that has been pressed.
3-You can add your own code within this function to perform any necessary actions based on the pressed key.
4-We use document.getElementById() to get a reference to the input element, and then we attach the event listener to the input element using addEventListener().
5-In this case, we attach the event listener for the keypress event.
6-Whenever a key is pressed while the input field is focused, the handleKeypress() function will be called.
Please note that the keypress event is not triggered for all keys, such as modifier keys (e.g., Shift, Ctrl, Alt) or non-character keys (e.g., arrow keys). If you need to capture those keys as well, you may need to use other events, such as keydown or keyup.

Try to modify the code according to your specific requirements and styling preferences.
Javascript window click event :
Here’s an example of an HTML code snippet that demonstrates the usage of the click event:
<!DOCTYPE html>
<html>
<head>
<title>Click Event Example</title>
</head>
<body>
<button id="red-button">Change to red</button>
<script>
// JavaScript
document.getElementById("red-button").addEventListener("click", function() {
document.body.style.backgroundColor = "red";
});
</script>
</body>
</html>
Explanation:
1-In this example, we have a button element with an id attribute of red-button.
2-We define the handleClick() function.
3-We use document.getElementById() to get a reference to the button element, and then we attach the event listener to the button element using addEventListener().
4-In this case, we attach the event listener for the click event.
5-Whenever the button is clicked, the handleClick() function will be called.

Try to modify the code according to your specific requirements and styling preferences.
Javascript window dblclick event:
Here’s an example of an HTML code snippet that demonstrates the usage of the dblclick event:
<!DOCTYPE html>
<html>
<head>
<title>Double Click Event Example</title>
</head>
<body>
<button id="myButton">Double Click Me</button>
<script>
// Function to handle the 'dblclick' event
function handleDoubleClick() {
document.write("Button double-clicked");
// Add your code here
}
// Get the button element
var buttonElement = document.getElementById('myButton');
// Add event listener to the button element
buttonElement.addEventListener('dblclick', handleDoubleClick);
</script>
</body>
</html>
Explanation:
1-In this example, we have a button element with an id attribute of myButton.
2-We define the handleDoubleClick() function, which write a message on the page indicating that the button has been double-clicked.
3-You can add your own code within this function to perform any necessary actions or trigger specific behaviors when the button is double-clicked.
4-We use document.getElementById() to get a reference to the button element, and then we attach the event listener to the button element using addEventListener().
5-In this case, we attach the event listener for the dblclick event. Whenever the button is double-clicked, the handleDoubleClick() function will be called.

Try to modify the code according to your specific requirements and styling preferences.
Javascript window mouseenter event :
Here’s an example of an HTML code snippet that demonstrates the usage of the mouseenter event:
<!DOCTYPE html>
<html>
<head>
<title>Mouse Enter Event Example</title>
<style>
#myElement {
width: 200px;
height: 200px;
background-color: yellow;
}
</style>
</head>
<body>
<div id="myElement">Hover over me</div>
<script>
// Function to handle the 'mouseenter' event
function handleMouseEnter() {
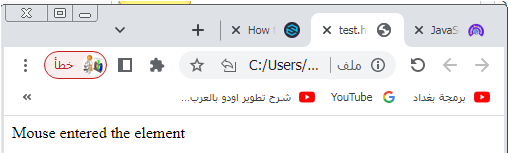
document.write("Mouse entered the element");
// Add your code here
}
// Get the element
var element = document.getElementById('myElement');
// Add event listener to the element
element.addEventListener('mouseenter', handleMouseEnter);
</script>
</body>
</html>
Explanation:
1-In this example, we have a <div> element with an id attribute of myElement.
2-We define the handleMouseEnter() function, which display message indicating that the mouse has entered the element.
3-You can add your own code within this function to perform any necessary actions or trigger specific behaviors when the mouse enters the element.
4-We use document.getElementById() to get a reference to the element, and then we attach the event listener to the element using addEventListener().
5-In this case, we attach the event listener for the mouseenter event.
6-Whenever the mouse enters the element, the handleMouseEnter() function will be called.
Try to modify the code according to your specific requirements and styling preferences.
Javascript window mouseleave event
Here’s an example of an HTML code snippet that demonstrates the usage of the mouseleave event:
<!DOCTYPE html>
<html>
<head>
<title>Mouse Leave Event Example</title>
<style>
#myElement {
width: 200px;
height: 200px;
background-color: yellow;
}
</style>
</head>
<body>
<div id="myElement">Hover over me</div>
<script>
// Function to handle the 'mouseleave' event
function handleMouseLeave() {
console.log("Mouse left the element");
// Add your code here
}
// Get the element
var element = document.getElementById('myElement');
// Add event listener to the element
element.addEventListener('mouseleave', handleMouseLeave);
</script>
</body>
</html>
Explanation:
1-In this example, we have a <div> element with an id attribute of myElement.
2-We define the handleMouseLeave() function, which write a message on the page indicating that the mouse has left the element.
3-You can add your own code within this function to perform any necessary actions or trigger specific behaviors when the mouse leaves the element.
4-We use document.getElementById() to get a reference to the element, and then we attach the event listener to the element using addEventListener().
5-In this case, we attach the event listener for the mouseleave event.
6-Whenever the mouse leaves the element, the handleMouseLeave() function will be called.

Try to modify the code according to your specific requirements and styling preferences.
Javascript window mousemove evenmt :
Here’s an example of an HTML code snippet that demonstrates the usage of the mousemove event:
<!DOCTYPE html>
<html>
<head>
<title>Mouse Move Event Example</title>
<style>
#myElement {
width: 200px;
height: 200px;
background-color: yellow;
}
</style>
</head>
<body>
<div id="myElement">Move the mouse here</div>
<script>
// Function to handle the 'mousemove' event
function handleMouseMove(event) {
console.log("Mouse coordinates: X=" + event.clientX + ", Y=" + event.clientY);
// Add your code here
}
// Get the element
var element = document.getElementById('myElement');
// Add event listener to the element
element.addEventListener('mousemove', handleMouseMove);
</script>
</body>
</html>
Explanation:
1-In this example, we have a <div> element with an id attribute of myElement.
2-We define the handleMouseMove() function, which logs the mouse coordinates (X and Y) to the console whenever the mouse moves within the element.
3-You can add your own code within this function to perform any necessary actions or trigger specific behaviors based on the mouse movement.
4-We use document.getElementById() to get a reference to the element, and then we attach the event listener to the element using addEventListener().
5-In this case, we attach the event listener for the mousemove event.
6-Whenever the mouse moves within the element, the handleMouseMove() function will be called.

Try to modify the code according to your specific requirements and styling preferences.
contextmenu event:
Here’s an example of an HTML code snippet that demonstrates the usage of the contextmenu event:
<!DOCTYPE html>
<html>
<head>
<title>Context Menu Event Example</title>
</head>
<body>
<div id="myElement">Right-click here to open context menu</div>
<script>
// Function to handle the 'contextmenu' event
function handleContextMenu(event) {
console.log("Context menu opened");
// Add your code here
}
// Get the element
var element = document.getElementById('myElement');
// Add event listener to the element
element.addEventListener('contextmenu', handleContextMenu);
</script>
</body>
</html>
Explanation:
1- In this example, we have a <div> element with an id attribute of myElement. 2-We define the handleContextMenu() function, which a message on page indicating that the context menu has been opened.
3-You can add your own code within this function to perform any necessary actions or trigger specific behaviors when the context menu is opened.
4-We use document.getElementById() to get a reference to the element, and then we attach the event listener to the element using addEventListener().
5-In this case, we attach the event listener for the contextmenu event.
6-Whenever the right-clicks within the element, the handleContextMenu() function will be called.

Try to modify the code according to your specific requirements and styling preferences.
error: complete code in html
Here’s an example of an HTML code snippet that demonstrates the usage of the error event:
<!DOCTYPE html>
<html>
<head>
<title>Error Event Example</title>
</head>
<body>
<img src="nonexistent-image.png" alt="Nonexistent Image" />
<script>
// Function to handle the 'error' event
function handleError(event) {
console.log("Error occurred: " + event.target.src);
// Add your code here
}
// Get the image element
var imageElement = document.querySelector('img');
// Add event listener to the image element
imageElement.addEventListener('error', handleError);
</script>
</body>
</html>
Explanation:
1-In this example, we have an <img> element with a src attribute that points to a nonexistent image file (nonexistent-image.png).
2-We define the handleError() function, which logs a message to the console indicating that an error has occurred while loading the image.
3-You can add your own code within this function to perform any necessary actions or handle the error accordingly.
4-We use document.querySelector() to get a reference to the image element, and then we attach the event listener to the image element using addEventListener(). 5-In this case, we attach the event listener for the error event.
6-If the image fails to load, the handleError() function will be called.

Try to modify the code according to your specific requirements and replace the src attribute of the <img> element with an appropriate image URL to observe the error event in action.
JavaScript window message event :
Here’s an example of an HTML code snippet that demonstrates the usage of the message event:
<!DOCTYPE html>
<html>
<head>
<title>Message Event Example</title>
</head>
<body>
<h1>Parent Window</h1>
<button onclick="sendMessageToIframe()">Send Message to Iframe</button>
<iframe id="myIframe" src="child.html"></iframe>
<script>
// Function to send a message to the iframe
function sendMessageToIframe() {
var iframe = document.getElementById('myIframe');
iframe.contentWindow.postMessage('Hello from parent window!', '*');
}
// Function to handle the 'message' event
function handleMessage(event) {
console.log("Message received: " + event.data);
// Add your code here
}
// Add event listener to listen for messages
window.addEventListener('message', handleMessage);
</script>
</body>
</html>
Explanation:
1-In this example, we have a parent window containing an <iframe> element.
2-The parent window has a button that, when clicked, sends a message to the iframe.
3-The iframe has a separate HTML file called child.html.
4-The sendMessageToIframe() function is called when the button is clicked.
5-It retrieves the reference to the iframe using document.getElementById() and sends a message to the iframe using the postMessage() method.
6-The handleMessage() function is defined to handle the message event.
7-It logs the received message to the console. You can add your own code within this function to perform any necessary actions based on the received message.
8-We attach the event listener for the message event to the window object using addEventListener().
9-Whenever a message is received from the iframe, the handleMessage() function will be called.
Please note that the example assumes the existence of a separate HTML file called child.html for the iframe.
You may need to adjust the src attribute of the iframe element to match the actual path and filename of your child HTML file.
Try to modify the code according to your specific requirements and extend the functionality as needed.
Application: complete code
Here’s an example of a simple application that demonstrates the usage of window events in JavaScript. This application displays a message whenever the resizes the window or closes the window/tab.
<!DOCTYPE html>
<html>
<head>
<title>Window Events Application</title>
</head>
<body>
<h1>Window Events Application</h1>
<script>
// Function to handle the 'resize' event
function handleResize() {
var message = 'Window resized!';
showMessage(message);
}
// Function to handle the 'beforeunload' event
function handleBeforeUnload(event) {
event.preventDefault(); // Prompt before leaving the page
var message = 'Are you sure you want to leave this page?';
event.returnValue = message;
}
// Function to display a message in the page
function showMessage(message) {
var messageElement = document.createElement('p');
messageElement.textContent = message;
document.body.appendChild(messageElement);
}
// Add event listeners to the window object
window.addEventListener('resize', handleResize);
window.addEventListener('beforeunload', handleBeforeUnload);
</script>
</body>
</html>
Explanation:
1-In this example, we define two event handlers: handleResize() for the resize event and handleBeforeUnload() for the beforeunload event.
2-The handleResize() function displays a message “Window resized!” using the showMessage() function whenever the resizes the window.
3-The handleBeforeUnload() function prompts the with a confirmation message “Are you sure you want to leave this page?” when they attempt to close the window or navigate away from the page.
4-It prevents the default behavior of the beforeunload event using event.preventDefault(), and sets the return value to the confirmation message using event.returnValue.
5-The showMessage() function creates a new <p> element and appends it to the <body> of the page to display the provided message.
6-We attach the event listeners to the window object using addEventListener() to listen for the resize and beforeunload events.
7-Whenever the window is resized, the handleResize() function is called, and when the attempts to close the window or navigate away, the handleBeforeUnload() function is called.
Try to modify the code according to your specific requirements and add more functionality or customize the messages and actions based on different window events.
Quiz with answers
Here’s a multiple-choice quiz with 30 questions related to the lesson on JavaScript window events. The answers are provided at the end.
1-Which event is triggered when the page finishes loading?
a) load
b) unload
c) beforeunload
2-Which event is triggered just before the leaves the page or closes the window?
a) load
b) unload
c) beforeunload
3-Which event is triggered when the browser window is resized?
a) resize
b) scroll
c) focus
4-Which event is triggered when the scrolls the page?
a) resize
b) scroll
c) focus
5-Which event is triggered when the window gains focus?
a) focus
b) blur
c) keydown
6-Which event is triggered when the window loses focus?
a) focus
b) blur
c) keydown
7-Which event is triggered when a key is pressed down?
a) keydown
b) keyup
c) keypress
8-Which event is triggered when a key is released?
a) keydown
b) keyup
c) keypress
9-Which event is triggered when a key is pressed and released?
a) keydown
b) keyup
c) keypress
10-Which event is triggered when the clicks the mouse button?
a) click
b) dblclick
c) mouseenter
11-Which event is triggered when the double-clicks the mouse button?
a) click
b) dblclick
c) mouseenter
12-Which event is triggered when the mouse pointer enters the window?
a) mouseenter
b) mouseleave
c) mousemove
13-Which event is triggered when the mouse pointer leaves the window?
a) mouseenter
b) mouseleave
c) mousemove
14-Which event is triggered when the mouse pointer moves within the window?
a) mouseenter
b) mouseleave
c) mousemove
15-Which event is triggered when the right-clicks the window?
a) contextmenu
b) click
c) dblclick
16-Which event is triggered when an error occurs during the loading of external resources?
a) error
b) load
c) unload
17-Which event is triggered when the window receives a message from another window or iframe?
a) message
b) click
c) load
18-The beforeunload event can be used to:
a) Trigger an action when the page finishes loading.
b) Show a confirmation dialog before the leaves the page.
c) Handle errors during the loading of external resources.
19-Which event is triggered when the presses and holds a key?
a) keydown
b) keyup
c) keypress
20-The keydown event is triggered when a key is:
a) Pressed down.
b) Released.
c) Pressed and released.
21-The scroll event is triggered when the :
a) Scrolls the page.
b) Resizes the window.
c) Clicks the mouse button.
22-The resize event is triggered when the :
a) Scrolls the page.
b) Resizes the window.
c) Clicks the mouse button.
23-The focus event is triggered when the window:
a) Gains focus.
b) Loses focus.
c) Is resized.
24-The blur event is triggered when the window:
a) Gains focus.
b) Loses focus.
c) Is resized.
25-The click event is triggered when the :
a) Presses and holds a key.
b) Clicks the mouse button.
c) Moves the mouse pointer.
26-The dblclick event is triggered when the :
a) Presses and holds a key.
b) Clicks the mouse button.
c) Double-clicks the mouse button.
27-The mouseenter event is triggered when the mouse pointer:
a) Enters the window.
b) Leaves the window.
c) Moves within the window.
28-The mouseleave event is triggered when the mouse pointer:
a) Enters the window.
b) Leaves the window.
c) Moves within the window.
29-The mousemove event is triggered when the mouse pointer:
a) Enters the window.
b) Leaves the window.
c) Moves within the window.
30-The contextmenu event is triggered when the :
a) Right-clicks the window.
b) Clicks the mouse button.
c) Double-clicks the mouse button.
Answers:
- a) load
- c) beforeunload
- a) resize
- b) scroll
- a) focus
- b) blur
- a) keydown
- b) keyup
- c) keypress
- a) click
- b) dblclick
- a) mouseenter
- b) mouseleave
- c) mousemove
- a) contextmenu
- a) error
- a) message
- b) Show a confirmation dialog before the leaves the page.
- a) keydown
- a) Pressed down.
- a) Scrolls the page.
- b) Resizes the window.
- a) Gains focus.
- b) Loses focus.
- b) Clicks the mouse button.
- c) Double-clicks the mouse button.
- a) Enters the window.
- b) Leaves the window.
- c) Moves within the window.
- a) Right-clicks the window.