
How to create Blog System step by step
How to create Blog System using XAMPP and PHP
Develop a simple blogging platform where users can create, edit, and delete blog posts.
Use MySQL to store blog posts and their associated metadata (e.g., title, content, publication date).
Creating a simple blogging platform using XAMPP involves several steps, including setting up a database, creating a user interface, implementing user authentication, and handling CRUD (Create, Read, Update, Delete) operations for blog posts.
Here’s a step-by-step guide with explanations:
Please note that this is a basic example, and in a real-world scenario, you would need to enhance security, error handling, and add additional features based on your requirements.
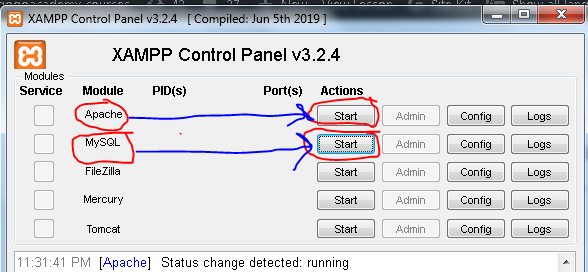
Step 1: Set Up the Environment
Install XAMPP from https://www.apachefriends.org/index.html.
Start Apache and MySQL services in the XAMPP Control Panel.
Step 2: Create a Database
Open phpMyAdmin:
In your browser navigate to:
http://localhost/phpmyadmin/).
to Create a new database named blog_system.

Step 3: Create Database Tables
-- Create users table CREATE TABLE users ( id INT AUTO_INCREMENT PRIMARY KEY, username VARCHAR(255) NOT NULL, password VARCHAR(255) NOT NULL ); -- Create posts table CREATE TABLE posts ( id INT AUTO_INCREMENT PRIMARY KEY, title VARCHAR(255) NOT NULL, content TEXT NOT NULL, publication_date TIMESTAMP DEFAULT CURRENT_TIMESTAMP, user_id INT, FOREIGN KEY (user_id) REFERENCES users(id) );

The Project Structure:
we will Create the following files and folders inside the htdocs directory:
Copy code
blog_system/
|– css/
| |– styles.css
|– includes/
| |– db_connection.php
|– index.php
|– register.php
|– login.php
|– dashboard.php
|– create_post.php
|– logout.php
|– header.php
|– footer.php
Step 4:we must create 3 folders inside the htdocs folder :
The first folder is called: blogsystem inside htdocs folder
The second folder inside blogsystem is called : includes
The third folder is called: css to put styles.css file inside it
Step 5:create database connection :db_connection.php
db_connection.php:
<!-- includes/db_connection.php -->
<?php
$servername = "localhost";
$username = "root";
$password = "";
$dbname = "blog_system";
$conn = mysqli_connect($servername, $username, $password, $dbname);
if (!$conn) {
die("Connection failed: " . mysqli_connect_error());
}
?>
Step 5: create index.php , Header and Footer Templates (header.php, footer.php) inside the blogsystem folder
Create index.php
<!-- index.php -->
<?php
session_start();
include_once("includes/db_connection.php");
$query = "SELECT * FROM posts ORDER BY publication_date DESC";
$result = mysqli_query($conn, $query);
include('header.php'); // You can create a header file for common elements
while ($row = mysqli_fetch_assoc($result)) {
echo "<div class='post'>";
echo "<h2>{$row['title']}</h2>";
echo "<p>{$row['content']}</p>";
echo "<p>Published on: {$row['publication_date']}</p>";
// Add edit and delete links if the user is the author
// ...
echo "</div>";
}
include('footer.php'); // You can create a footer file for common elements
?>
Create header.php file
<!-- header.php --> <!DOCTYPE html> <html lang="en"> <head> <meta charset="UTF-8"> <meta name="viewport" content="width=device-width, initial-scale=1.0"> <link rel="stylesheet" href="css/styles.css"> <title>Simple Blog System</title> </head> <body> <header> <h1>Simple Blog System</h1> <?php if (isset($_SESSION['user_id'])): ?> <a href="dashboard.php">Dashboard</a> | <a href="create_post.php">Create Post</a> | <a href="logout.php">Logout</a> <?php else: ?> <a href="login.php">Login</a> | <a href="register.php">Register</a> <?php endif; ?> </header>
Create Footer file : footer.php
<!-- footer.php -->
<footer>
<p>© <?php echo date("Y"); ?> www.gogoacademy.net :Simple Blog System</p>
</footer>
</body>
</html>
Open your browser then navigate to:
localhost/blogsystem
to see the following

Create css file :styles.css and place it inside the css folder
Here’s a simple styles.css file that you can use as a starting point for your blogging platform:
/* css/styles.css */
body {
font-family: 'Arial', sans-serif;
margin: 0;
padding: 0;
background-color: #f4f4f4;
}
.container {
width: 80%;
margin: 0 auto;
}
header {
background-color:#fff ;
color: #333;
padding: 10px;
text-align: center;
}
header h1 {
margin: 0;
}
nav {
margin-top: 10px;
}
nav a {
margin-right: 15px;
color: #333;
text-decoration: none;
font-weight: bold;
}
nav a:hover {
color: #fff;
}
form {
width: 50%;
margin: 20px auto;
}
form label {
display: block;
margin-bottom: 5px;
}
form input,
form textarea {
width: 100%;
padding: 8px;
margin-bottom: 10px;
}
form button {
background-color: #333;
color: #fff;
padding: 10px 15px;
border: none;
cursor: pointer;
}
form button:hover {
background-color: #555;
}
.post {
background-color: #fff;
padding: 20px;
margin-bottom: 20px;
border: 1px solid #ddd;
}
footer {
background-color: #333;
color: #fff;
text-align: center;
padding: 10px;
position: fixed;
bottom: 0;
width: 100%;
}
This stylesheet includes basic styling for the body, header, navigation, forms, posts, and footer of your blogging platform. Feel free to modify and extend this stylesheet according to your design preferences.
open your browser then navigate to:

Step 6: Implement User Registration (register.php)
<!-- register.php -->
<?php
session_start();
include_once("includes/db_connection.php");
if (isset($_POST['register'])) {
$username = $_POST['username'];
$password = password_hash($_POST['password'], PASSWORD_DEFAULT);
$query = "INSERT INTO users (username, password) VALUES ('$username', '$password')";
mysqli_query($conn, $query);
header("Location: login.php");
exit();
}
include('header.php');
?>
<div class="container">
<h2>Register</h2>
<form method="post" action="register.php">
<label for="username">Username:</label>
<input type="text" name="username" required>
<label for="password">Password:</label>
<input type="password" name="password" required>
<button type="submit" name="register">Register</button>
</form>
</div>
<?php include('footer.php'); ?>

Step 7: Implement User Login (login.php)
<!-- login.php -->
<?php
session_start();
include_once("includes/db_connection.php");
if (isset($_POST['login'])) {
$username = $_POST['username'];
$password = $_POST['password'];
$query = "SELECT * FROM users WHERE username='$username'";
$result = mysqli_query($conn, $query);
if ($row = mysqli_fetch_assoc($result)) {
if (password_verify($password, $row['password'])) {
$_SESSION['user_id'] = $row['id'];
header("Location: dashboard.php");
exit();
} else {
$error = "Invalid username or password.";
}
} else {
$error = "Invalid username or password.";
}
}
include('header.php');
?>
<div class="container">
<h2>Login</h2>
<?php if (isset($error)): ?>
<p style="color: red;"><?php echo $error; ?></p>
<?php endif; ?>
<form method="post" action="login.php">
<label for="username">Username:</label>
<input type="text" name="username" required>
<label for="password">Password:</label>
<input type="password" name="password" required>
<button type="submit" name="login">Login</button>
</form>
</div>
<?php include('footer.php'); ?>
Step 8: Implement User Logout (logout.php)
<!-- logout.php -->
<?php
session_start();
session_destroy();
header("Location: login.php");
exit();
?>
Step 9: Create the User Dashboard (dashboard.php)
<!-- dashboard.php -->
<?php
session_start();
include_once("includes/db_connection.php");
if (!isset($_SESSION['user_id'])) {
header("Location: login.php");
exit();
}
include('header.php');
?>
<div class="container">
<h2>Welcome to Your Dashboard</h2>
<a href="create_post.php">Create a New Post</a>
<!-- Display user's posts here -->
</div>
<?php include('footer.php'); ?>
Step 10: Create a New Post (create_post.php)
<!-- create_post.php -->
<?php
session_start();
include_once("includes/db_connection.php");
if (!isset($_SESSION['user_id'])) {
header("Location: login.php");
exit();
}
if (isset($_POST['create_post'])) {
$title = $_POST['title'];
$content = $_POST['content'];
$user_id = $_SESSION['user_id'];
$query = "INSERT INTO posts (title, content, user_id) VALUES ('$title', '$content', $user_id)";
mysqli_query($conn, $query);
header("Location: dashboard.php");
exit();
}
include('header.php');
?>
<div class="container">
<h2>Create a New Post</h2>
<form method="post" action="create_post.php">
<label for="title">Title:</label>
<input type="text" name="title" required>
<label for="content">Content:</label>
<textarea name="content" required></textarea>
<button type="submit" name="create_post">Create Post</button>
</form>
</div>
<?php include('footer.php'); ?>
Navigate to:
http://localhost/blogsystem/dashboard.php to see

This example provides you with a basic structure for a simple blogging platform with user authentication. Remember to enhance the security of your application and add additional features based on your specific requirements.
How to run this project ?
To run the project, follow these steps:
Place Project Files:
Place all the project files in the htdocs directory of your XAMPP installation.
This directory is typically located at C:\xampp\htdocs on Windows
or /opt/lampp/htdocs on Linux.
Start XAMPP:
Open the XAMPP Control Panel and start the Apache and MySQL services.
Import Database:
Open your web browser and go to:
http://localhost/phpmyadmin.
Create a new database named blog_system. Inside the database, execute the SQL commands from Step 3 to create the necessary tables (users and posts).
Access the Project:
Open your web browser and go to :
http://localhost/blogsystem
(replace blog_system with the name of your project folder).
If you placed the project files directly in the htdocs directory, go to:
http://localhost.
If you placed the project files in a subdirectory (e.g., blog_system), go to http://localhost/blog_system.
Use the Application:
Register a new user by clicking on the “Register” link and filling out the registration form.
Log in with the registered user credentials on the “Login” page.
Explore the dashboard, create new posts, and navigate through the application.
Remember that this is a basic example, and for a production environment, you would need to enhance security measures, error handling, and add additional features as per your requirements.