
How to setup react development environment?
How to setup react development environment?
Complete Guide to Creating and Modifying React Applications .
Learn how to create, set up, and modify React applications step by step. Explore the React ecosystem, use Create React App, and develop interactive user interfaces.”
Setting up a React development environment involves several steps, from installing the necessary tools to creating a new React application.
Here’s a step-by-step guide to help you get started:
2)Install Node.js and npm:
React applications are built using Node.js and npm (Node Package Manager). Download and install Node.js from the official website:
https://nodejs.org/

To check if Node.js and npm are installed, open your terminal and run:
In search box write :cmd to open the terminal
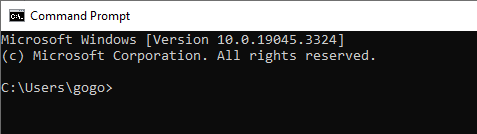
Then write the following commands:
node -v
npm –v

From the previous screen you have node v18.17.1 and npm v9.6.7 on your system
2)Install a Code Editor:
Choose a code editor for your development. Popular options include Visual Studio Code, Sublime Text, and Atom.
On chrome browsers write : vscode the enter to get

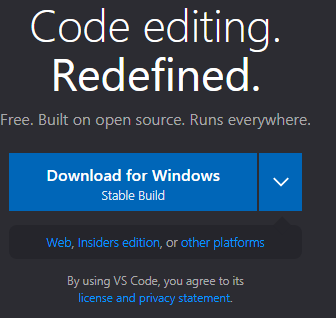
Click download to get the VsCode editor

Click the VSCodeSetup to setup it


3-Install Create React App:
Create React App is a tool that sets up a new React project with a predefined folder structure and configuration.
Install Create React App globally using npm:
In prompt window write the command:
npm install -g create-react-app
4-Create a New React App:
Navigate to the directory where you want to create your project and run the following command to create a new React app:
npx create-react-app my-react-app

You can replace my-react-app with your preferred project name as you like.

5) Navigate to the Project Directory:
Move into the newly created project directory:
cd my-react-app
![]()
6)Start the Development Server:
Run the development server with the following command:
npm start
![]()
This will start the development server and open your app in your default web browser.
Any changes you make to your code will automatically update in the browser.

How to Explore the Project Structure?
In prompt window write:
C:\Users\gogo\my-react-app>dir

The main files and folders you’ll interact with include:
src: This is where your application code resides.
public: Contains the HTML file and other static assets.
package.json: Defines your project’s dependencies, scripts, and configuration.
How To run the app in Vscode Editor?
From View menu >> terminal >> write:
![]()
npm start


How Edit the App Component:
Open the src/App.js file and start editing the App component. You’ll see JSX code that represents your app’s user interface.
Open the app.js in VScodeditor by doing the following :
In prompt window write the following commands
C:\Users\gogo\my-react-app\src>
Then
C:\Users\gogo\my-react-app\src>app.js

You will see the options to open the app.js
Choose the VScode editor to see:
You can make change in the App.js code
The save the change to see the result in the browser

Save and Observe Changes:
As you save changes in your code editor, the development server will automatically update the app in your browser.
Learn and Build:
Now that you have your React development environment set up, you can start building your app.
Learn about React components, state, props, hooks, and other concepts to develop robust and interactive applications.
Remember that this is a basic setup guide. Depending on your project’s requirements, you might need to install additional packages or configure various settings.
Also, keep in mind that the React ecosystem evolves, so it’s a good idea to refer to the official documentation for the latest information.
How to create React Application in VSCode : step by step
1)open the VSCODE
2)create folder on desktop
3)drag the folder into VSCODE

4)Install Create React App:
Create React App is a tool that sets up a new React project with a predefined folder structure and configuration.
Open your terminal and install Create React App globally using npm:
npm install -g create-react-app


5-Create a New React App:
In your terminal, navigate to the directory where you want to create your new React app.
Then, run the following command:
npx create-react-app my-react-app


6- start the development server
To Run the App: start the development server
![]()
This will start the development server and open your app in your default web browser.
Any changes you make to your code will automatically update in the browser.
This will compile your React code and start the development server.
It will also open your app in your default web browser at http://localhost:3000 (unless port 3000 is already in use).
Your app should now be running in your browser.
If it doesn’t open automatically, you can manually go to http://localhost:3000 in your browser to view your React application.
The output:

Navigate to the Project Directory:
In left side of VSC move into the newly created project directory:PROJ1

Explore the Project Structure:
Open the project in your code editor to explore the structure. The main files and folders you’ll interact with include:
src: This is where your application code resides.
public: Contains the HTML file and other static assets.
package.json: Defines your project’s dependencies, scripts, and configuration.
Stop the Development Server:
To stop the development server, go back to your terminal and press Ctrl + C.
Remember that the development server provides a convenient way to view your app during development. When you’re ready to deploy your app for production, you’ll need to build a production-ready version using the following command:
npm run build
This will create an optimized build of your app in the build directory, which you can then host on a web server.
Keep in mind that this is a basic overview of running a React application. Depending on your project’s setup and requirements, there might be additional steps or considerations. Always refer to the official documentation for the latest information.
How to create and modify the React Application?
Edit the App Component:
1-Open the src/App.js file in your code editor. This is where your main app component is defined. Modify the component’s JSX to change the displayed content.
For example: jsx
import React from 'react';
import './App.css';
function App() {
return (
<div className="App">
<header className="App-header">
<h1>Hello, React App!</h1>
<p>Welcome to my app.</p>
</header>
</div>
);
}
export default App;
2- make a changes then
Save and Observe Changes:
After editing the code, save the file. The development server will automatically detect changes and update your app in the browser.
Add Styles:
Open the src/App.css file to add custom styling to your app. You can also use CSS frameworks like Bootstrap or Material-UI if desired.
Create Additional Components:
In the src folder, you can create additional components in separate files.
For instance, you can create a new file named MyComponent.js:
jsx
import React from 'react';
function MyComponent() {
return <p>This is my custom component.</p>;
}
export default MyComponent;
Then, import and use this component in src/App.js:
jsx
Copy code
import React from 'react';
import './App.css';
import MyComponent from './MyComponent';
function App() {
return (
<div className="App">
<header className="App-header">
<h1>Hello, React App!</h1>
<p>Welcome to my app.</p>
<MyComponent />
</header>
</div>
);
}
export default App;
How to Upgrade React
Upgrading React involves updating both the React library itself and any other related packages your application depends on. Here’s a step-by-step guide on how to upgrade React:
- Check React’s Official Documentation:
Before upgrading, visit the official React documentation to see if there are any specific instructions or recommendations for the version you’re upgrading from and to.
- Backup Your Code:
Before making any major changes, it’s a good idea to back up your code and configuration files. This ensures that you can revert to the previous version if something goes wrong during the upgrade process.
- Update React and React-DOM:
React and React-DOM are the core libraries that need to be updated. You can do this using npm:
npm install react@latest react-dom@latest
Replace latest with the specific version you want to upgrade to.
- Update Other Dependencies:
If your application uses other packages that are tightly integrated with React, make sure to update them as well. This could include state management libraries (Redux, MobX), routing libraries (React Router), and more. Check your package.json file for a list of dependencies and update them accordingly:
npm update
- Review and Resolve Warnings/Errors:
After upgrading, run your application and carefully review the console for any warnings or errors. Sometimes, upgrading might trigger deprecated features or API changes that require you to make adjustments in your code.
- Update Deprecated or Removed APIs:
If you encounter warnings about deprecated or removed APIs, follow the documentation to update your code accordingly. React often provides guides on how to migrate from older APIs to newer ones.
- Test Thoroughly:
After updating your code, thoroughly test your application to ensure that all features are working as expected. Pay special attention to areas that interact with the updated React components or libraries.
- Optimize and Clean Up:
Take advantage of the opportunity to clean up your codebase. Remove any obsolete code, refactor where necessary, and ensure that you’re following the latest best practices.
- Consider Breaking Changes:
In some cases, major React versions might introduce breaking changes that require more extensive modifications to your code. Make sure to read the official React release notes for each version you’re upgrading through and address any breaking changes.
- Update Build and Deployment Process:
If you’re using tools like Webpack, Babel, or other build tools, make sure to update their configurations to match the updated React version.
- Keep Up to Date:
React continues to evolve, so it’s a good practice to keep up with the latest releases and updates. Regularly review the official documentation and resources to ensure your application stays up-to-date and benefits from the latest features and optimizations.
Remember, upgrading React might involve some challenges, especially if there are significant changes between versions. Take your time, follow the official documentation, and test thoroughly to ensure a smooth transition.
Quiz with answers about this lesson
Here’s a multiple-choice quiz about setting up and working with a React application:
1-What is the recommended tool for setting up a new React application with a predefined configuration and folder structure?
- a) React Builder
- b) React Starter
- c) Create React App
- d) Reactify
Answer: c) Create React App
2-Which command is used to create a new React application using Create React App?
- a) npx react-create-app my-app
- b) npm create-react-app my-app
- c) npx create-react-app my-app
- d) npm new-react-app my-app
Answer: c) npx create-react-app my-app
3-What file contains the main component of a React application?
- a) main.js
- b) index.js
- c) app.js
- d) react.js
Answer: b) index.js
4-After creating a new React app, which command starts the development server?
- a) npm run start
- b) npm start-app
- c) npm start
- d) npm dev
Answer: c) npm start
5-Which of the following is not a folder typically found in a React project’s root directory?
- a) src
- b) public
- c) components
- d) node_modules
Answer: c) components
6-To make changes to your React app appear in the browser, you:
- a) Manually refresh the browser
- b) Close and reopen the browser
- c) The changes appear automatically without doing anything
- d) Stop the development server and restart it
Answer: c) The changes appear automatically without doing anything
7-What is JSX?
- a) A JavaScript extension for cross-platform apps
- b) A library for handling JSON data
- c) A syntax extension for JavaScript used with React
- d) A database query language
Answer: c) A syntax extension for JavaScript used with React
8-How can you add custom CSS styles to your React components?
- a) By directly writing CSS within the component files
- b) React components cannot have custom styles
- c) By linking an external CSS file in the component’s HTML
- d) By using inline styles within the component’s JSX
Answer: d) By using inline styles within the component’s JSX
9-What is the purpose of the npm run build command in a React project?
- a) It starts the development server.
- b) It compiles and optimizes the React code for production.
- c) It installs new packages from npm.
- d) It runs unit tests for the application.
Answer: b) It compiles and optimizes the React code for production.
10-When upgrading React, what should you do before making changes to your code?
- a) Nothing, just start making changes right away.
- b) Back up your code and configuration files.
- c) Delete your existing project and start from scratch.
- d) Upgrade all other dependencies first.
Answer: b) Back up your code and configuration files.
11-What is the purpose of JSX in React?
- a) It’s a build tool for packaging React applications.
- b) It’s a markup language used to create user interfaces.
- c) It’s a backend language used for server-side rendering.
- d) It’s a database management system.
Answer: b) It’s a markup language used to create user interfaces.
12-Which component lifecycle method is used for performing actions when a component is being removed from the DOM?
- a) componentDidMount
- b) componentWillUnmount
- c) componentWillUpdate
- d) componentDidUpdate
Answer: b) componentWillUnmount
13-In React, what is the purpose of props?
- a) To manage the component’s state.
- b) To perform AJAX requests.
- c) To store CSS styles.
- d) To pass data from parent to child components.
Answer: d) To pass data from parent to child components.
14-What is the recommended way to manage component-level state in React?
- a) Using Redux
- b) Using Context API
- c) Using global variables
- d) Using useState hook
Answer: d) Using useState hook
15-Which hook is used to perform side effects in a functional component?
- a) useEffect
- b) useSideEffect
- c) useLifecycle
- d) useAction
Answer: a) useEffect
16-In React Router, how do you define a route that matches the root URL (“/”)?
- a) <Route path=”/” component={Home} />
- b) <Route exact path=”/” component={Home} />
- c) <Route root=”/” component={Home} />
- d) <Route match=”/” component={Home} />
Answer: b) <Route exact path=”/” component={Home} />
17-What is the purpose of the key prop in React when rendering lists of components?
- a) It specifies the component’s position in the list.
- b) It provides a unique identifier for each component in the list.
- c) It defines the styling for the component.
- d) It determines the order of rendering.
Answer: b) It provides a unique identifier for each component in the list.
18-Which of the following is a correct way to conditionally render content in React?
- a) { condition ? <Component /> : null }
- b) { condition && <Component /> }
- c) { condition || <Component /> }
- d) All of the above
Answer: d) All of the above
19-What is the purpose of the map function when working with arrays in React?
- a) It converts an array to a string.
- b) It filters out specific elements from an array.
- c) It applies a function to each element of an array and returns a new array.
- d) It sorts the elements of an array in ascending order.
Answer: c) It applies a function to each element of an array and returns a new array.
20-What is the significance of the index.js file in a React application?
- a) It contains the component’s styles.
- b) It defines the component’s state.
- c) It’s the entry point of the application, rendering the root component.
- d) It’s responsible for handling AJAX requests.
Answer: c) It’s the entry point of the application, rendering the root component.