
HTML Tables: Complete Guide to Creating and Styling Tables
HTML Tables
Learn how to create and style HTML tables with this comprehensive guide. Understand table structure, headers, borders, padding, spacing, colspan, rowspan, and more. Improve your website’s SEO by optimizing your tables for search engines.
HTML tables are used to display data in a tabular format on a web page. They consist of rows and columns, with cells containing the actual data. Tables are created using the <table> element, and the structure of the table is defined using various table-related elements such as <thead>, <tbody>, <tfoot>, <tr>, <th>, and <td>.
Syntax to create table
To create an HTML table, you can use the following syntax:
<table>
<thead>
<!-- Table header content -->
</thead>
<tbody>
<!-- Table body content -->
</tbody>
<tfoot>
<!-- Table footer content -->
</tfoot>
</table>
Let’s break down the syntax:
1-The <table> element is used to define the table.
2-The <thead> element represents the table header section. It is optional but commonly used to group the header cells (<th>) of the table.
3-The <tbody> element represents the table body section. It is used to group the data cells (<td>) of the table.
4-The <tfoot> element represents the table footer section. It is optional and is used to group the footer cells (<td>) of the table.
5-Within the appropriate sections (<thead>, <tbody>, <tfoot>), you can add rows and cells using the <tr>, <th>, and <td> elements:
<tr>
<th>Header 1</th>
<th>Header 2</th>
</tr>
6-In the above example, <tr> represents a table row, and <th> represents a table header cell.
7-Similarly, for table body and footer cells:
<tr>
<td>Data 1</td>
<td>Data 2</td>
</tr>
Here, <td> represents a table data cell.
You can add more rows and cells by simply adding additional <tr>, <th>, and <td> elements within the appropriate sections (<thead>, <tbody>, <tfoot>).
Remember to close all the tags properly to ensure the HTML is valid.
Steps to create Table in HTML
To create an HTML table, you can follow these steps:
1- Start by opening a text editor or an HTML editor of your choice(notepad or notepad++).
2-Begin with the <table> element to define the table structure.
Place it between the opening <body> tag and the closing </body> tag of your HTML document.
3-Inside the <table> element, you can define the table sections:
<thead>, <tbody>, and <tfoot>.
These sections are optional but provide a structured way to organize your table.
Place them in the order that makes sense for your table.
4-Within each section, add table rows using the <tr> element.
Each row represents a horizontal row in the table.
5-Inside each row, you can add table header cells or table data cells using the <th> and <td> elements, respectively.
The <th> element is used for header cells, while the <td> element is used for regular data cells.
6-Customize your table by adding content to the cells.
You can include text, images, links, or any other HTML elements within the cells.
7-Repeat steps 4-6 to add more rows and cells as needed.
8-After adding all the desired content to your table, save the file with an appropriate HTML extension, such as (test.html).
9-Open the HTML file in a web browser to see the table rendered.
(Optional) Apply CSS styles to the table and its elements to enhance the visual appearance and layout. You can use inline styles, internal stylesheets, or external CSS files to apply styles.
Remember to close all HTML tags properly to ensure valid markup.
Example:
Here’s an example of how to create a basic table in HTML:
<table>
<thead>
<tr>
<th>Header 1</th>
<th>Header 2</th>
</tr>
</thead>
<tbody>
<tr>
<td>Data 1</td>
<td>Data 2</td>
</tr>
<tr>
<td>Data 3</td>
<td>Data 4</td>
</tr>
</tbody>
</table>

From File menu >>> Save > test.html
Then open the page via Google chrome browser to see the followin result
Note : the table not has border yet
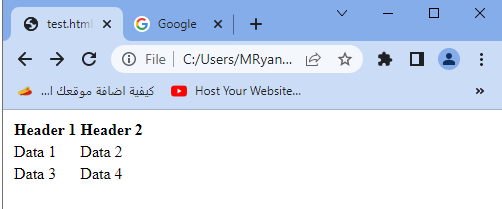
Explaination:
In this example, the <table> element defines the table, <thead> represents the table header section, <tbody> represents the table body section, <tfoot> represents the table footer section (optional), <tr> represents a table row, <th> represents a table header cell, and <td> represents a table data cell.
You can add more rows and columns by simply adding additional <tr>, <th>, and <td> elements within the appropriate sections. CSS can be used to style the table, such as setting borders, colors, and spacing.
Tables can be further customized by using attributes and CSS classes to control their appearance and behavior. Additionally, you can merge cells, specify column widths, and apply various table-related attributes to meet specific design and functional requirements.
HTML Table with complete code example
Here’s an example of an HTML table with complete code:
<!DOCTYPE html>
<html>
<head>
<title>HTML Table Example</title>
<style>
table {
border-collapse: collapse;
width: 100%;
}
th, td {
border: 1px solid black;
padding: 8px;
text-align: left;
}
th {
background-color: #f2f2f2;
}
</style>
</head>
<body>
<table>
<thead>
<tr>
<th>Header 1</th>
<th>Header 2</th>
<th>Header 3</th>
</tr>
</thead>
<tbody>
<tr>
<td>Data 1</td>
<td>Data 2</td>
<td>Data 3</td>
</tr>
<tr>
<td>Data 4</td>
<td>Data 5</td>
<td>Data 6</td>
</tr>
</tbody>
</table>
</body>
</html>

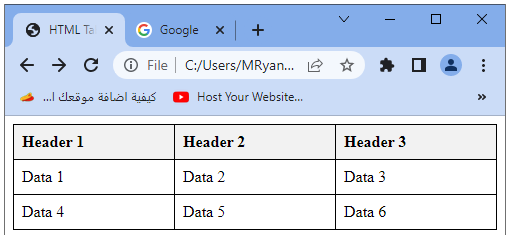
In this example:
The <table> element is used to define the table.
CSS styles are applied using the <style> element within the <head> section. The table is set to have a collapsed border, a width of 100%, and the table cells (<th> and <td>) have some basic styling with border, padding, and text alignment.
The table header section (<thead>) contains a single row (<tr>) with three header cells (<th>).
The table body section (<tbody>) contains two rows, each with three data cells (<td>).
The content of the cells can be customized by replacing the “Data X” placeholders with the desired content.
Save this code in an HTML file (e.g., table-example.html), and open it in a web browser to see the rendered table. The table will have three columns and two rows, with the first row as the table header and the remaining rows as data rows.
How to create Table Cells with complete code example
Here’s an example of an HTML table with cells containing different types of content:
<!DOCTYPE html>
<html>
<head>
<title>HTML Table Cells Example</title>
<style>
table {
border-collapse: collapse;
width: 100%;
}
th, td {
border: 1px solid black;
padding: 8px;
text-align: left;
}
th {
background-color: #f2f2f2;
}
img {
max-width: 100%;
height: auto;
}
.center {
text-align: center;
}
.red {
color: red;
}
</style>
</head>
<body>
<table>
<thead>
<tr>
<th>Text Cell</th>
<th>Image Cell</th>
<th>Styled Cell</th>
</tr>
</thead>
<tbody>
<tr>
<td>This is a regular text cell.</td>
<td><img src="gogoacademy.png" alt="Image"></td>
<td class="center red">Styled cell with centered text and red color.</td>
</tr>
<tr>
<td colspan="3">This cell spans three columns using the colspan attribute.</td>
</tr>
</tbody>
</table>
</body>
</html>

In this example:
The table structure and basic styling are similar to the previous example.
The table header section (<thead>) contains a single row (<tr>) with three header cells (<th>).
The table body section (<tbody>) contains two rows, each with three data cells (<td>).
In the first row, the first cell contains regular text, the second cell contains an image (<img>), and the third cell has a CSS class for styling.
The image source is set to “image.jpg”. Replace it with the path to your desired image file.
The third cell in the first row has two CSS classes, “center” and “red”. The “center” class centers the text, and the “red” class changes the text color to red. You can define your own CSS classes to apply various styles.
The second row contains a single cell that spans three columns using the colspan attribute. This is useful when you want a cell to extend across multiple columns.
Save the code in an HTML file (e.g., table-cells-example.html), and open it in a web browser to see the rendered table with different types of content in the cells.
How to create HTML Table Rows with complete code example
Here’s an example of an HTML table with rows containing different types of content:
<!DOCTYPE html>
<html>
<head>
<title>HTML Table Rows Example</title>
<style>
table {
border-collapse: collapse;
width: 100%;
}
th, td {
border: 1px solid black;
padding: 8px;
text-align: left;
}
th {
background-color: #f2f2f2;
}
.highlight {
background-color: yellow;
}
</style>
</head>
<body>
<table>
<thead>
<tr>
<th>Row 1</th>
<th>Row 2</th>
<th>Row 3</th>
</tr>
</thead>
<tbody>
<tr>
<td>Data 1</td>
<td>Data 2</td>
<td>Data 3</td>
</tr>
<tr class="highlight">
<td colspan="2">This row is highlighted using a CSS class.</td>
<td>Data 4</td>
</tr>
<tr>
<td>Text Cell</td>
<td><img src="image.jpg" alt="Image"></td>
<td><a href="https://www.example.com">Link Cell</a></td>
</tr>
</tbody>
</table>
</body>
</html>

In this example:
The table structure and basic styling are similar to the previous examples.
The table header section (<thead>) contains a single row (<tr>) with three header cells (<th>).
The table body section (<tbody>) contains three rows, each with three data cells (<td>).
The first row contains regular data cells with the content “Data X”.
The second row has a CSS class called “highlight” applied to it using the class attribute. The “highlight” class defines a background color of yellow using CSS. You can define your own CSS classes to apply various styles.
The second row also includes a cell that spans two columns using the colspan attribute. This cell contains the text “This row is highlighted using a CSS class.”
The third row demonstrates different types of content in the cells. It includes a regular text cell, an image cell, and a link cell.
Remember to replace the image source (src) with the actual path to your desired image file. Similarly, update the link (href) with the appropriate URL.
Save the code in an HTML file (e.g., table-rows-example.html), and open it in a web browser to see the rendered table with different types of content in the rows.
How to create HTML Table Headers with complete code example
Here’s an example of an HTML table with table headers:
<!DOCTYPE html>
<html>
<head>
<title>HTML Table Headers Example</title>
<style>
table {
border-collapse: collapse;
width: 100%;
}
th, td {
border: 1px solid black;
padding: 8px;
text-align: left;
}
th {
background-color: #f2f2f2;
}
</style>
</head>
<body>
<table>
<thead>
<tr>
<th>Header 1</th>
<th>Header 2</th>
<th>Header 3</th>
</tr>
</thead>
<tbody>
<tr>
<td>Data 1</td>
<td>Data 2</td>
<td>Data 3</td>
</tr>
<tr>
<td>Data 4</td>
<td>Data 5</td>
<td>Data 6</td>
</tr>
</tbody>
</table>
</body>
</html>
In this example:
The table structure and basic styling are similar to the previous examples.
The table header section (<thead>) contains a single row (<tr>) with three header cells (<th>).
The table body section (<tbody>) contains two rows, each with three data cells (<td>).
The <th> elements define the table headers with the content “Header X”. These cells are typically used to describe the data in the respective columns.
Save the code in an HTML file (e.g., table-headers-example.html), and open it in a web browser to see the rendered table with table headers. The headers will be visually distinguished from the data cells with a different background color (background-color: #f2f2f2; in the provided CSS).
How to create HTML Table Borders with complete code example
Here’s an example of an HTML table with custom borders using CSS:
<!DOCTYPE html>
<html>
<head>
<title>HTML Table Borders Example</title>
<style>
table {
border-collapse: collapse;
width: 100%;
}
th, td {
border: 1px solid black;
padding: 8px;
text-align: left;
}
th {
background-color: #f2f2f2;
}
.custom-border {
border: 2px solid red;
}
</style>
</head>
<body>
<table>
<thead>
<tr>
<th>Header 1</th>
<th>Header 2</th>
<th>Header 3</th>
</tr>
</thead>
<tbody>
<tr>
<td>Data 1</td>
<td>Data 2</td>
<td>Data 3</td>
</tr>
<tr class="custom-border">
<td>Data 4</td>
<td>Data 5</td>
<td>Data 6</td>
</tr>
</tbody>
</table>
</body>
</html>

In this example:
The table structure and basic styling are similar to the previous examples.
The <table> element has the border-collapse: collapse; property, which collapses the borders of adjacent cells into a single border.
The <th> and <td> elements have the border: 1px solid black; property, which sets a solid black border around each cell.
The <th> elements have a different background color (background-color: #f2f2f2;), creating a visual distinction for the table headers.
The CSS class .custom-border is applied to the second row (<tr>) in the table body section (<tbody>). This class adds a custom border style (border: 2px solid red;) to the row, making it stand out with a thicker red border. You can define your own CSS classes to apply various border styles.
Save the code in an HTML file (e.g., table-borders-example.html), and open it in a web browser to see the rendered table with custom borders. The table will have regular 1px black borders, except for the second row, which will have a custom 2px red border.
How to cllapse HTML table border ?
Collapsed Table Borders:
Collapsed table borders refer to the style of borders in an HTML table where the borders between adjacent cells are collapsed into a single border. This creates a cleaner and more compact appearance for the table.
To achieve collapsed table borders, you need to use the CSS border-collapse property and set it to collapse for the table element.
Here’s an example of an HTML table with collapsed borders:
<!DOCTYPE html>
<html>
<head>
<title>Collapsed Table Borders Example</title>
<style>
table {
border-collapse: collapse;
width: 100%;
}
th, td {
border: 1px solid black;
padding: 8px;
text-align: left;
}
th {
background-color: #f2f2f2;
}
</style>
</head>
<body>
<table>
<thead>
<tr>
<th>Header 1</th>
<th>Header 2</th>
<th>Header 3</th>
</tr>
</thead>
<tbody>
<tr>
<td>Data 1</td>
<td>Data 2</td>
<td>Data 3</td>
</tr>
<tr>
<td>Data 4</td>
<td>Data 5</td>
<td>Data 6</td>
</tr>
</tbody>
</table>
</body>
</html>
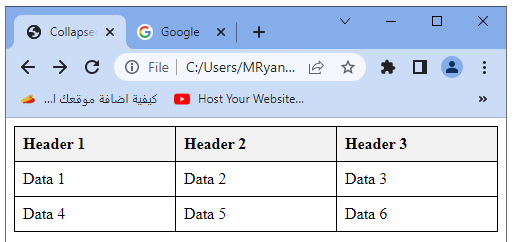
In this example:
The table structure and basic styling are similar to the previous examples.
The <table> element has the border-collapse: collapse; property, which collapses the borders of adjacent cells into a single border.
The <th> and <td> elements have the border: 1px solid black; property, which sets a solid black border around each cell.
The <th> elements have a different background color (background-color: #f2f2f2;), creating a visual distinction for the table headers.
Save the code in an HTML file (e.g., example.html), and open it in a web browser to see the rendered table with collapsed borders.
The table will have a cleaner appearance with single borders between adjacent cells.
How to style HTML table border?
Styling table borders in HTML allows you to customize the appearance of the table’s borders, such as changing the color, thickness, and style.
This can be achieved using CSS by targeting the <table>, <th>, and <td> elements and applying border-related properties.
Here’s an example of an HTML table with styled borders:
<!DOCTYPE html>
<html>
<head>
<title>Styled Table Borders Example</title>
<style>
table {
border-collapse: separate;
border-spacing: 0;
width: 100%;
}
th, td {
border: 2px solid black;
padding: 8px;
text-align: left;
}
th {
background-color: #f2f2f2;
}
.custom-border {
border-color: red;
border-width: 3px;
border-style: dashed;
}
</style>
</head>
<body>
<table>
<thead>
<tr>
<th>Header 1</th>
<th>Header 2</th>
<th>Header 3</th>
</tr>
</thead>
<tbody>
<tr>
<td>Data 1</td>
<td>Data 2</td>
<td>Data 3</td>
</tr>
<tr class="custom-border">
<td>Data 4</td>
<td>Data 5</td>
<td>Data 6</td>
</tr>
</tbody>
</table>
</body>
</html>
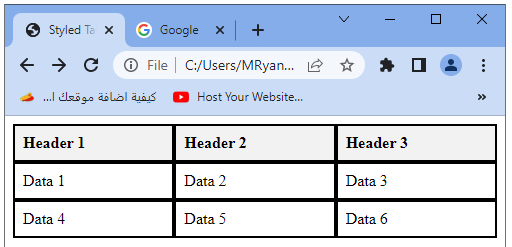
In this example:
The table structure and basic styling are similar to the previous examples.
The <table> element has the border-collapse: separate; property, which separates the borders of adjacent cells.
The border-spacing: 0; property ensures that there is no spacing between the table cells.
The <th> and <td> elements have the border: 2px solid black; property, which sets a solid black border around each cell with a thickness of 2 pixels.
The <th> elements have a different background color (background-color: #f2f2f2;), creating a visual distinction for the table headers.
The CSS class .custom-border is applied to the second row (<tr>) in the table body section (<tbody>). This class overrides the default border style and sets a red color, 3-pixel thickness, and dashed border style (border-color: red; border-width: 3px; border-style: dashed;). You can modify these properties to customize the border style further.
Save the code in an HTML file (e.g., styled-borders-example.html), and open it in a web browser to see the rendered table with styled borders. The table will have customized border styles, with different colors, thicknesses, and styles applied to specific cells or rows based on the CSS classes.
How to create round table border in HTML ?
To create round table borders in HTML, you can use CSS to apply border-radius to the table, <th>, and <td> elements. The border-radius property allows you to round the corners of an element, giving it a more visually appealing appearance. Here’s an example of an HTML table with round table borders:
<!DOCTYPE html>
<html>
<head>
<title>Round Table Borders Example</title>
<style>
table {
border-collapse: collapse;
width: 100%;
border-radius: 10px;
overflow: hidden; /* Optional: hides any content that exceeds the rounded border */
}
th, td {
border: 1px solid black;
padding: 8px;
}
th {
background-color: #f2f2f2;
}
</style>
</head>
<body>
<table>
<thead>
<tr>
<th>Header 1</th>
<th>Header 2</th>
<th>Header 3</th>
</tr>
</thead>
<tbody>
<tr>
<td>Data 1</td>
<td>Data 2</td>
<td>Data 3</td>
</tr>
<tr>
<td>Data 4</td>
<td>Data 5</td>
<td>Data 6</td>
</tr>
</tbody>
</table>
</body>
</html>

In this example:
The table structure and basic styling are similar to the previous examples.
The <table> element has the border-radius: 10px; property, which sets a 10-pixel border radius to round the corners of the table.
The overflow: hidden; property is optional but useful to hide any content that exceeds the rounded border, ensuring the content stays within the rounded boundaries.
The <th> and <td> elements have the border: 1px solid black; property, which sets a solid black border around each cell.
The <th> elements have a different background color (background-color: #f2f2f2;), creating a visual distinction for the table headers.
Save the code in an HTML file (e.g., round-borders-example.html), and open it in a web browser to see the rendered table with round table borders. The table will have rounded corners, providing a more visually appealing look. Adjust the border-radius value in the CSS to increase or decrease the roundness of the table borders according to your preference.