
PHP with MySQL using XAMPP tutorial
How to Set Up MySQL with XAMPP: Step-by-Step Tutorial for Web Development
Introduction:
Learn how to install and configure MySQL using XAMPP, a powerful web development tool. Follow this step-by-step tutorial to create a local development environment and build dynamic applications with PHP and MySQL.
Setting up MySQL using XAMPP is a common practice for local development environments. Below is a step-by-step tutorial on how to install and configure MySQL using XAMPP:
Step 1: Download and Install XAMPP
Visit the official XAMPP website:
https://www.apachefriends.org.
Download the XAMPP installer suitable for your operating system (Windows, macOS, or Linux).
Run the installer and follow the on-screen instructions to install XAMPP.
Step 2: Start the XAMPP Control Panel
- Once installed, open the XAMPP Control Panel.
- On Windows: You can find it in the Start menu or on your desktop.
- On macOS: Open the Applications folder and find XAMPP there.
Start the Apache server and MySQL by clicking the “Start” button next to their respective names.

Step 3: Access phpMyAdmin
Open your web browser and go to:
http://localhost/phpmyadmin/
The phpMyAdmin interface will appear. Here, you can manage your MySQL databases.

Step 4: Create a Database
- In phpMyAdmin, click on the “Databases” tab.
- Enter a name for your new database in the “Create database” field.
- Choose a collation (usually, you can leave it as the default).
- Click the “Create” button.

Step 5: Create a User and Set Privileges
- In phpMyAdmin, click on the “User accounts” tab.
- Click on “Add user account.”
- Enter a username and password for your MySQL user.
- Under “Database for user,” select the database you created in Step 4.
- Set the host to “localhost.”
- Click the “Go” or “Add User” button.

- create user account
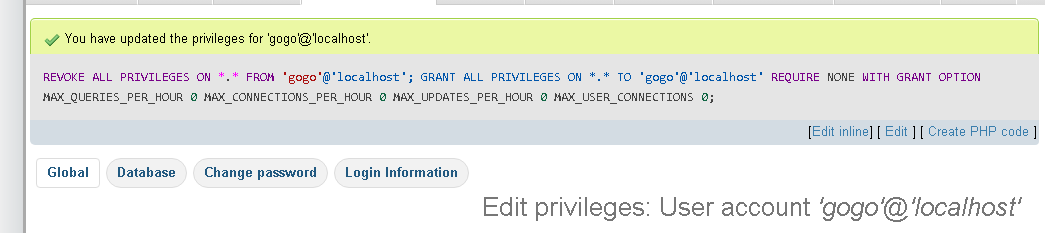
- After adding the user, click on the “Check privileges” link next to the user.
- In the next page, click on “Check All” and then click the “Go” button.
-
- create user account
Step 6: Update Database Configuration in your Applications
When you connect to the MySQL database from your application, use the following configuration:
Host: localhost
Username: root
Password: root
Database: mydatabase
Step 7: Test Your MySQL Connection
Create a simple PHP script or use an existing one to test the database connection.
<?php
$conn = new mysqli("localhost", "root", "root", "test1");
if ($conn->connect_error) {
die("Connection failed: " . $conn->connect_error);
}
echo "Connected successfully";
$conn->close();
?>
- Save the script in your XAMPP web server directory (usually, htdocs).
Open the script in your browser: - (e.g., http://localhost/connection.php).
- If the connection is successful, you should see “Connected successfully.”
Now, you have successfully set up MySQL using XAMPP and can start building and testing your applications locally.

Practical complete example with explanation step by step
Let’s create a simple PHP application that interacts with a MySQL database using XAMPP.
- In this example, we’ll create a basic task management system where you can add and view tasks.
- Step 1: Install XAMPP
Follow the steps mentioned earlier to download and install XAMPP on your machine.
Step 2: Start Apache and MySQL
Open the XAMPP Control Panel and start the Apache server and MySQL.
Step 3: Create a Database
- Open your browser and go to :
http://localhost/phpmyadmin/. - Click on the “Databases” tab.
- Enter “task_manager” as the database name and click “Create.”
Step 4: Create a Table
Inside the “task_manager” database, click on the “SQL” tab.
Execute the following SQL query to create a simple tasks table:
CREATE TABLE tasks ( id INT AUTO_INCREMENT PRIMARY KEY, description VARCHAR(255) NOT NULL, created_at TIMESTAMP DEFAULT CURRENT_TIMESTAMP );
Step 5: Create a PHP Script for Task Management
Open your text editor and create a new file named index.php.
Place the following code in index.php:
<!DOCTYPE html>
<html lang="en">
<head>
<meta charset="UTF-8">
<meta name="viewport" content="width=device-width, initial-scale=1.0">
<title>Task Manager</title>
</head>
<body>
<h2>Task Manager</h2>
<?php
// Database configuration
$servername = "localhost";
$username = "root"; // Change this to your MySQL username
$password = ""; // Change this to your MySQL password
$database = "task_manager";
// Create connection
$conn = new mysqli($servername, $username, $password, $database);
// Check connection
if ($conn->connect_error) {
die("Connection failed: " . $conn->connect_error);
}
// If the form is submitted, add a task to the database
if ($_SERVER["REQUEST_METHOD"] == "POST" && isset($_POST["description"])) {
$description = $_POST["description"];
$sql = "INSERT INTO tasks (description) VALUES ('$description')";
if ($conn->query($sql) === TRUE) {
echo "Task added successfully";
} else {
echo "Error adding task: " . $conn->error;
}
}
// Display existing tasks
$sql = "SELECT id, description, created_at FROM tasks";
$result = $conn->query($sql);
if ($result->num_rows > 0) {
echo "<h3>Tasks:</h3>";
echo "<ul>";
while ($row = $result->fetch_assoc()) {
echo "<li>{$row['description']} (Created at: {$row['created_at']})</li>";
}
echo "</ul>";
} else {
echo "<p>No tasks found</p>";
}
// Close connection
$conn->close();
?>
<!-- Task form -->
<form method="post" action="<?php echo $_SERVER['PHP_SELF']; ?>">
<label for="description">Task description:</label>
<input type="text" name="description" required>
<button type="submit">Add Task</button>
</form>
</body>
</html>
Step 6: Test the Application
- Save the index.php file in the htdocs folder inside your XAMPP installation directory.
- For example, if you installed XAMPP on Windows, the path might be:
C:\xampp\htdocs\index.php. - Open your browser and go to:
http://localhost/index.php.
You should see a simple Task Manager interface.
Add tasks using the form, and they should be displayed below.
This example demonstrates a basic PHP application that connects to a MySQL database, adds tasks, and displays existing tasks. Feel free to expand and modify the code based on your requirements.

Quiz about this lesson:15 questions with explanation
Here’s a quiz based on the MySQL with XAMPP tutorial, along with explanations for each question.
1. What is XAMPP used for?
a. Video editing
b. Web development
c. Graphic design
d. System administration
Explanation: XAMPP is a free and open-source cross-platform web server solution stack package developed by Apache Friends. It is used for web development.
2. Which component of XAMPP is responsible for running PHP scripts?
a. MySQL
b. Apache
c. phpMyAdmin
d. MariaDB
Explanation: Apache is the web server component in XAMPP that handles the execution of PHP scripts.
3. How can you access the XAMPP Control Panel?
a. Through the command line
b. From the browser
c. In the XAMPP folder
d. Both b and c
Explanation: You can access the XAMPP Control Panel both through the browser and by navigating to the XAMPP folder on your system.
4. What is phpMyAdmin used for in the context of XAMPP?
a. Running PHP scripts
b. Managing MySQL databases
c. Configuring Apache
d. Debugging PHP code
Explanation: phpMyAdmin is a web-based tool used for managing MySQL databases.
5. In which tab of phpMyAdmin can you create a new database?
a. SQL
b. Operations
c. Databases
d. Users
Explanation: The “Databases” tab in phpMyAdmin allows you to create a new database.
6. What is the default username for MySQL in XAMPP?
a. admin
b. root
c. user
d. mysql_user
Explanation: The default MySQL username in XAMPP is “root.”
7. What is the purpose of the CREATE TABLE SQL statement in XAMPP?
a. Create a new database
b. Create a new table in the database
c. Insert data into a table
d. Update data in a table
Explanation: The CREATE TABLE SQL statement is used to create a new table in the database.
8. Where should you save your PHP scripts to run them on the XAMPP web server?
a. In the XAMPP installation folder
b. In the PHP folder
c. In the Apache folder
d. In the htdocs folder
Explanation: You should save your PHP scripts in the “htdocs” folder inside the XAMPP installation directory.
9. What information is required to connect to a MySQL database in a PHP script?
a. Database name only
b. Username and password only
c. Host and database name only
d. Host, username, password, and database name
Explanation: To connect to a MySQL database in a PHP script, you need the host, username, password, and database name.
10. What PHP superglobal is used to check the request method in a form submission?
a. $_REQUEST
b. $_POST
c. $_GET
d. $_SERVER
Explanation: The $_SERVER[“REQUEST_METHOD”] superglobal is used to check the request method in a form submission.
11. In the provided PHP script, how is a new task added to the database?
a. Using $_GET method
b. Using $_POST method
c. Using $_REQUEST method
d. Using $_SERVER method
Explanation: A new task is added to the database using the $_POST method in the provided PHP script.
12. What is the purpose of the TIMESTAMP column in the tasks table?
a. It stores the task description
b. It stores the task ID
c. It stores the task creation time
d. It stores the task completion status
Explanation: The TIMESTAMP column in the tasks table is used to store the task creation time.
13. How can you view the existing tasks in the Task Manager application?
a. By executing a SELECT query in phpMyAdmin
b. By checking the error log in XAMPP
c. By running the PHP script in the browser
d. By accessing the MySQL command line
Explanation: Existing tasks in the Task Manager application are displayed by running the PHP script in the browser.
14. What does the $conn->close() statement do in the PHP script?
a. Closes the XAMPP Control Panel
b. Ends the PHP script execution
c. Closes the database connection
d. Deletes the tasks table
Explanation: The $conn->close() statement in the PHP script closes the database connection.
15. What URL should you visit to test the Task Manager application in your browser?
a. http://localhost/task_manager.php
b. http://localhost/phpmyadmin/
c. http://localhost/index.php
d. http://localhost/tasks
Explanation: You should visit http://localhost/index.php to test the Task Manager application in your browser.