
Python Tkinter Button
Python Tkinter Button
In this lesson, we covered the various parameters that can be used with the Tkinter Button widget. For each parameter, we provided a definition, syntax, and an example code snippet that demonstrates how to use it. The parameters covered include activebackground, activeforeground, anchor, bg, bitmap, bd, command, compound, cursor, default, disabledforeground, font, fg, height, highlightbackground, highlightcolor, highlightthickness, image, justify, padx, pady, relief, repeatdelay, repeatinterval, state, takefocus, text, textvariable, underline, width, and wraplength. By the end of this lesson, you should have a good understanding of how to use these parameters to customize the appearance and behavior of Tkinter buttons in your Python GUI applications.
What is about Tkinter Button ?
Tkinter Button is a graphical user interface (GUI) widget in Python’s Tkinter library that represents a clickable button on the screen. It is used to create buttons on a GUI that can be clicked to trigger an action or a series of actions.
To create a Tkinter Button, you need to first import the Tkinter module and then create an instance of the Button class. You can customize the appearance of the button by specifying various attributes like its text, color, font, size, etc. You can also bind a function to the button’s click event using the command parameter.
The syntax for creating a Tkinter Button is as follows:
button_widget = tk.Button(parent, options...)
Here,
tk.Buttonis the class name for creating a button widget.parentis the parent widget (usually aTkorToplevelinstance) on which the button will be placed.optionsare the various options that can be used to customize the appearance and behavior of the button. These options can be specified as keyword arguments
Here’s an example code snippet that creates a Tkinter button:
import tkinter as tk
root = tk.Tk()
button = tk.Button(root, text="Click me!", command=lambda: print("Button clicked!"))
button.pack()
root.mainloop()
In this code snippet:
- we first create an instance of the Tk class to create the main window.
- Then create an instance of the Button class with the specified text and function to be executed on button click.
- The
pack()method is used to add the button to the window. Finally, we call themainloop()method to start the event loop and display the window. - When the button is clicked, the function specified in the
commandparameter is executed. - In this example, the function simply prints a message to the console.
- You can replace this with any function that you want to execute on button click, such as opening a file, displaying a message, or performing a calculation.
The output:

The Parameters (or options) that you can use to customize a Tkinter Button:
Here are the parameters (or options) that you can use to customize a Tkinter Button widget:
- activebackground: Background color of the button when it is being pressed or hovered over.
- activeforeground: Foreground color of the button when it is being pressed or hovered over.
- anchor: Determines the position of the text within the button (valid values are “center”, “n”, “e”, “s”, “w”, “nw”, “ne”, “sw”, “se”).
- bg: Background color of the button.
- bitmap: A bitmap to be displayed on the button instead of text.
- bd: Border width of the button.
- command: A function or method that will be called when the button is clicked.
- compound: If set to “left”, “right”, “top”, or “bottom”, allows for text and image to be displayed on the button.
- cursor: Sets the cursor to be displayed when the mouse is hovering over the button.
- default: If set to “active”, the button can be triggered by hitting the Enter key while the button has focus.
- disabledforeground: Foreground color of the button when it is disabled.
- font: Font of the button text.
- fg: Foreground color of the button text.
- height: Height of the button (in pixels).
- highlightbackground: Color of the button’s highlight ring when it does not have focus.
- highlightcolor: Color of the button’s highlight ring when it has focus.
- highlightthickness: Thickness of the button’s highlight ring.
- image: An image to be displayed on the button instead of text.
- justify: Determines how the text is justified within the button.
- padx: Padding (in pixels) on the left and right sides of the button.
- pady: Padding (in pixels) on the top and bottom sides of the button.
- relief: Style of the button’s border (valid values are “flat”, “raised”, “sunken”, “groove”, “ridge”).
- repeatdelay: Amount of time (in milliseconds) between repeated button presses when the button is being held down.
- repeatinterval: Amount of time (in milliseconds) between each repeated button press when the button is being held down.
- state: Determines whether the button is active, disabled, or in a special state (valid values are “normal”, “active”, “disabled”).
- takefocus: Determines whether the button can be given focus.
- text: The text to be displayed on the button.
- textvariable: A StringVar object that can be used to set the text displayed on the button.
- underline: Index of the character in the button text that should be underlined.
- width: Width of the button (in characters).
- wraplength: Maximum line length of the button text before it is wrapped to a new line.
You can specify these parameters as keyword arguments when creating a Button widget in Tkinter.
The activebackground parameter
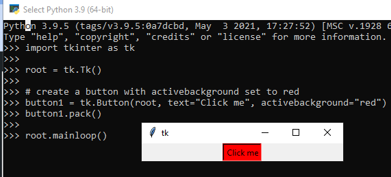
it is used to specify the background color of the button when it is active or pressed. Here’s an example code that shows how to use it:
import tkinter as tk root = tk.Tk() # create a button with activebackground set to red button1 = tk.Button(root, text="Click me", activebackground="red") button1.pack() root.mainloop()
In this example, a button with the text “Click me” is created and the activebackground parameter is set to red. When the button is clicked, its background color changes to red temporarily, until the button is released.
The output:
The activeforeground parameter
It is used to specify the text color of the button when it is active or pressed. Here’s an example code that shows how to use it:
import tkinter as tk root = tk.Tk() # create a button with activeforeground set to white and background set to black button1 = tk.Button(root, text="Click me", activeforeground="white", bg="black") button1.pack() root.mainloop()
In this example, a button with the text “Click me” is created and the activeforeground parameter is set to white, while the bg parameter is set to black. When the button is clicked, its text color changes to white temporarily, until the button is released.
The output:

The anchor parameter
It is used to specify the position of the text within the button. Here’s an example code that shows how to use it:
import tkinter as tk root = tk.Tk() # create a button with text centered horizontally and aligned to the left vertically button1 = tk.Button(root, text="Click me", anchor="w") button1.pack() root.mainloop()
In this example, a button with the text “Click me” is created and the anchor parameter is set to “w”, which means that the text is aligned to the left vertically and centered horizontally within the button. You can use other values for the anchor parameter, such as “e” for right alignment or “center” for centered alignment.
The output:

The bg parameter of Button Tkinter
It is used to specify the background color of the button.
Here’s an example code that shows how to use it:
import tkinter as tk root = tk.Tk() # create a button with a blue background color button1 = tk.Button(root, text="Click me", bg="blue") button1.pack() root.mainloop()
In this example, a button with the text “Click me” is created and the bg parameter is set to blue, which means that the background color of the button is blue. You can use other color names, such as “red”, “green”, “yellow”, or you can use hexadecimal color codes, such as “#FF0000” for red or “#00FF00” for green.
the output:

The bitmap parameter of Tkinter Button
is used to display a bitmap image on the button instead of text. Here’s an example code that shows how to use it:
import tkinter as tk root = tk.Tk() # create a button with a bitmap image button1 = tk.Button(root, bitmap="error") button1.pack() root.mainloop()
In this example, a button with a bitmap image is created using the bitmap parameter. The error value of the parameter specifies the bitmap image to be used. You can use other values for the bitmap parameter to display other bitmap images, such as “info”, “question”, or “warning”. Note that the bitmap parameter is used only when the text parameter is not used.

The bd parameter of Tkinter button
It is used to specify the border width of the button. Here’s an example code that shows how to use it:
import tkinter as tk root = tk.Tk() # create a button with a border width of 5 pixels button1 = tk.Button(root, text="Click me", bd=5) button1.pack() root.mainloop()
In this example, a button with the text “Click me” is created and the bd parameter is set to 5, which means that the border width of the button is 5 pixels. You can use other integer values for the bd parameter to set the border width of the button to other values.
The output:

The command parameter of tkinter button
It is used to specify the function that will be called when the button is clicked. Here’s an example code that shows how to use it:
import tkinter as tk
def on_button_click():
print("Button clicked")
root = tk.Tk()
# create a button with a command function
button1 = tk.Button(root, text="Click me", command=on_button_click)
button1.pack()
root.mainloop()
In this example, a button with the text “Click me” is created and the command parameter is set to the on_button_click function. When the button is clicked, the on_button_click function is called, which prints “Button clicked” to the console. You can use any function that you define as the command for the button, and the function will be executed when the button is clicked.
The output:

The compound parameter of Tkinter button
It is used to specify how the button text and image should be positioned in relation to each other. Here’s an example code that shows how to use it:
import tkinter as tk root = tk.Tk() # create a button with an image and text button1 = tk.Button(root, text="Click me", image=tk.PhotoImage(file="example.gif"), compound="left") button1.pack() root.mainloop()
In this example, a button with both an image and text is created using the image and text parameters. The compound parameter is set to “left”, which means that the image will be positioned to the left of the text. You can use other values for the compound parameter, such as “right”, “top”, “bottom”, or “center”, to position the image and text in different ways. Note that the compound parameter is used only when both the text and image parameters are used.
The cursor parameter of thinter button
It is used to specify the mouse cursor that is displayed when the mouse is over the button. Here’s an example code that shows how to use it:
import tkinter as tk root = tk.Tk() # create a button with a cursor that looks like a hand button1 = tk.Button(root, text="Click me", cursor="hand2") button1.pack() root.mainloop()
In this example, a button with the text “Click me” is created and the cursor parameter is set to “hand2”, which means that the mouse cursor will change to a hand when it is over the button. You can use other values for the cursor parameter, such as “arrow”, “cross”, “fleur”, “watch”, or “xterm”, to specify different mouse cursors.
The default parameter of thinter button
It is used to specify whether the button should be the default button in a dialog box or not. Here’s an example code that shows how to use it:
import tkinter as tk root = tk.Tk() # create a button that is the default button button1 = tk.Button(root, text="OK", default="active") button1.pack() # create another button that is not the default button button2 = tk.Button(root, text="Cancel") button2.pack() root.mainloop()
In this example, two buttons are created. The first button with the text “OK” is set to be the default button by setting the default parameter to “active”. The second button with the text “Cancel” is not set to be the default button. Note that the default parameter is used only in dialog boxes where there are multiple buttons, and it is used to specify which button should be activated when the user presses the Enter key.
The output:

The disabledforeground parameter of tkinter button
It is used to specify the foreground color of the button when it is disabled. Here’s an example code that shows how to use it:
import tkinter as tk
root = tk.Tk()
# create a button that is initially disabled
button1 = tk.Button(root, text="Click me", state="disabled", disabledforeground="gray")
button1.pack()
# create a button that can enable and disable the first button
def toggle_button():
if button1["state"] == "normal":
button1["state"] = "disabled"
else:
button1["state"] = "normal"
button2 = tk.Button(root, text="Toggle Button", command=toggle_button)
button2.pack()
root.mainloop()
In this example, a button with the text “Click me” is created and initially set to be disabled by setting the state parameter to “disabled”. The disabledforeground parameter is set to “gray”, which means that the text color of the button will be gray when it is disabled. A second button with the text “Toggle Button” is created that can enable and disable the first button by changing its state parameter.

The font parameter of tkinter button
It is used to specify the font style of the button text. Here’s an example code that shows how to use it:
import tkinter as tk
root = tk.Tk()
# create a button with a custom font
button1_font = ("Arial", 12, "bold")
button1 = tk.Button(root, text="Click me", font=button1_font)
button1.pack()
root.mainloop()
n this example, a button with the text “Click me” is created and the font parameter is set to a custom font that is defined using the ("font family", font size, "font weight") tuple. The button1_font variable is defined as ("Arial", 12, "bold"), which means that the button text will be in the Arial font with a size of 12 and a bold weight. You can use other font families, font sizes, and font weights to customize the button text.

The fg parameter of tkinter button
It is used to specify the foreground color of the button text. Here’s an example code that shows how to use it:
import tkinter as tk root = tk.Tk() # create a button with red text button1 = tk.Button(root, text="Click me", fg="red") button1.pack() root.mainloop()
In this example, a button with the text “Click me” is created and the fg parameter is set to “red”, which means that the text color of the button will be red. You can use other color names, color codes, or color tuples to customize the button text color.

The height parameter of tkinter button
It is used to specify the height of the button in text lines. Here’s an example code that shows how to use it:
import tkinter as tk root = tk.Tk() # create a button with a height of 2 text lines button1 = tk.Button(root, text="Click me", height=2) button1.pack() root.mainloop()
In this example, a button with the text “Click me” is created and the height parameter is set to 2, which means that the button will be tall enough to display two lines of text. Note that the height is specified in text lines, not pixels. If the button text is shorter than the specified height, the button will be padded with empty space. If the button text is longer than the specified height, the text will be truncated.
The output:

The highlightbackground parameter
It is used to specify the color of the highlight border when the button does not have the focus. Here’s an example code that shows how to use it:
import tkinter as tk root = tk.Tk() # create a button with a yellow highlight border button1 = tk.Button(root, text="Click me", highlightbackground="yellow") button1.pack() root.mainloop()
In this example, a button with the text “Click me” is created and the highlightcolor parameter is set to “red”, which means that the highlight border of the button will be red when it has the focus. The highlight border is the border that appears around the button when it is highlighted (e.g. when the mouse pointer is over it) and selected (e.g. when the user presses the Enter key while the button is focused).
The highlightcolor parameter
It is used to specify the color of the highlight border when the button has the focus. Here’s an example code that shows how to use it:
import tkinter as tk root = tk.Tk() # create a button with a red highlight border button1 = tk.Button(root, text="Click me", highlightcolor="red") button1.pack() root.mainloop()
In this example, a button with the text “Click me” is created and the highlightcolor parameter is set to “red”, which means that the highlight border of the button will be red when it has the focus. The highlight border is the border that appears around the button when it is highlighted (e.g. when the mouse pointer is over it) and selected (e.g. when the user presses the Enter key while the button is focused).
The highlightthickness parameter
It is used to specify the thickness of the highlight border. Here’s an example code that shows how to use it:
import tkinter as tk root = tk.Tk() # create a button with a thicker highlight border button1 = tk.Button(root, text="Click me", highlightthickness=3) button1.pack() root.mainloop()
In this example, a button with the text “Click me” is created and the highlightthickness parameter is set to 3, which means that the highlight border of the button will be 3 pixels thick. The highlight border is the border that appears around the button when it is highlighted (e.g. when the mouse pointer is over it) and/or selected (e.g. when the user presses the Enter key while the button is focused). Note that the highlight border is drawn outside the button border, so if you want the highlight border to be visible, you need to set a non-zero borderwidth parameter as well.
The image parameter
It is used to display an image on the button. Here’s an example code that shows how to use it:
import tkinter as tk
from PIL import ImageTk, Image
root = tk.Tk()
# open an image file and create an ImageTk object
image = Image.open("my_image.png")
photo = ImageTk.PhotoImage(image)
# create a button with the image
button1 = tk.Button(root, image=photo)
button1.pack()
root.mainloop()
In this example, an image file named “my_image.png” is opened using the PIL library and an ImageTk object is created from it. Then, a button is created with the image parameter set to the ImageTk object, which displays the image on the button. Note that the image must be in a format that is supported by PIL and that you need to keep a reference to the ImageTk object in order to prevent it from being garbage collected.
The justify parameter
It is used to specify the alignment of the text inside the button. Here’s an example code that shows how to use it:
import tkinter as tk root = tk.Tk() # create a button with centered text button1 = tk.Button(root, text="Click me", justify="center") button1.pack() root.mainloop()
In this example, a button with the text “Click me” is created and the justify parameter is set to “center”, which means that the text inside the button will be centered. The justify parameter can also be set to “left” or “right” to align the text to the left or right, respectively. Note that the justify parameter only affects the alignment of the text inside the button, not the alignment of the button itself. To align the button, you can use the anchor parameter.
The padx parameter
It is used to add extra horizontal padding to the button. Here’s an example code that shows how to use it:
import tkinter as tk root = tk.Tk() # create a button with extra horizontal padding button1 = tk.Button(root, text="Click me", padx=20) button1.pack() root.mainloop()
In this example, a button with the text “Click me” is created and the padx parameter is set to 20, which means that 20 pixels of extra padding will be added to the left and right sides of the button. The pady parameter can be used in the same way to add extra vertical padding to the button.
the output:

The pady parameter
It is used to add extra vertical padding to the button. Here’s an example code that shows how to use it:
import tkinter as tk root = tk.Tk() # create a button with extra vertical padding button1 = tk.Button(root, text="Click me", pady=10) button1.pack() root.mainloop()
In this example, a button with the text “Click me” is created and the pady parameter is set to 10, which means that 10 pixels of extra padding will be added to the top and bottom of the button. The padx parameter can be used in the same way to add extra horizontal padding to the button.

The relief parameter
It is used to specify the appearance of the button border. Here’s an example code that shows how to use it:
import tkinter as tk root = tk.Tk() # create a button with a raised border button1 = tk.Button(root, text="Click me", relief="raised") button1.pack() # create a button with a sunken border button2 = tk.Button(root, text="Click me", relief="sunken") button2.pack() root.mainloop()
In this example, two buttons are created, one with a relief of “raised” and one with a relief of “sunken”. The “raised” border makes the button appear to be raised above the surrounding area, while the “sunken” border makes the button appear to be pressed into the surrounding area. Other values for relief include “flat”, which makes the button appear to be flat with no border, “ridge”, which makes the border appear to be a ridge, and “groove”, which makes the border appear to be a groove.

The repeatdelay parameter of tkinter button
It is used to specify the delay in milliseconds between when the button is first pressed and when the button starts repeating if the button is held down. Here’s an example code that shows how to use it:
import tkinter as tk root = tk.Tk() # create a button with a repeat delay of 1000 milliseconds button1 = tk.Button(root, text="Click me", repeatdelay=1000) button1.pack() root.mainloop()
In this example, a button with the text “Click me” is created and the repeatdelay parameter is set to 1000 milliseconds, which means that if the button is held down, it will start repeating after a delay of 1000 milliseconds (1 second). The repeatinterval parameter can also be used to specify the delay in milliseconds between repeats.
The repeatinterval parameter
It is used to specify the delay in milliseconds between repeats if the button is held down. Here’s an example code that shows how to use it:
import tkinter as tk root = tk.Tk() # create a button with a repeat delay of 1000 milliseconds and a repeat interval of 500 milliseconds button1 = tk.Button(root, text="Click me", repeatdelay=1000, repeatinterval=500) button1.pack() root.mainloop()
In this example, a button with the text “Click me” is created and the repeatdelay parameter is set to 1000 milliseconds and the repeatinterval parameter is set to 500 milliseconds, which means that if the button is held down, it will start repeating after a delay of 1000 milliseconds (1 second) and then repeat every 500 milliseconds (0.5 seconds). The repeatdelay parameter can also be used to specify the delay before the button starts repeating.
The state parameter of tkinter button
It is used to specify the state of the button, which can be either “normal”, “active”, “disabled”, or “hidden”. Here’s an example code that shows how to use it:
import tkinter as tk root = tk.Tk() # create a normal button button1 = tk.Button(root, text="Click me") button1.pack() # create an active button button2 = tk.Button(root, text="Click me", state="active") button2.pack() # create a disabled button button3 = tk.Button(root, text="Click me", state="disabled") button3.pack() # create a hidden button button4 = tk.Button(root, text="Click me", state="hidden") button4.pack() root.mainloop()
In this example, four buttons are created with different states. The first button has a state of “normal”, which is the default state and means that the button is clickable. The second button has a state of “active”, which means that the button is clickable and appears to be pressed down. The third button has a state of “disabled”, which means that the button is not clickable and appears grayed out. The fourth button has a state of “hidden”, which means that the button is not visible and cannot be clicked.

The takefocus parameter
It is used to specify whether the button can receive focus when the user presses the Tab key to navigate between widgets. Here’s an example code that shows how to use it:
import tkinter as tk root = tk.Tk() # create a button that can receive focus button1 = tk.Button(root, text="Click me", takefocus=True) button1.pack() # create a button that cannot receive focus button2 = tk.Button(root, text="Click me", takefocus=False) button2.pack() root.mainloop()
In this example, two buttons are created with different takefocus parameters. The first button has takefocus set to True, which means that it can receive focus when the user navigates using the Tab key. The second button has takefocus set to False, which means that it cannot receive focus when the user navigates using the Tab key. By default, the takefocus parameter is set to True.
The text parameter
It is used to specify the text displayed on the button. Here’s an example code that shows how to use it:
import tkinter as tk root = tk.Tk() # create a button with text button1 = tk.Button(root, text="Click me") button1.pack() # create a button with a longer text button2 = tk.Button(root, text="Click me if you dare") button2.pack() root.mainloop()
In this example, two buttons are created with different texts. The first button has a text of “Click me”, and the second button has a longer text of “Click me if you dare”. The text parameter is used to specify the text displayed on the button, and it can be a string of any length.

The textvariable parameter
It is used to associate a StringVar or IntVar variable with the button’s text. Here’s an example code that shows how to use it with a StringVar variable:
import tkinter as tk
root = tk.Tk()
# create a StringVar variable
text_var = tk.StringVar()
text_var.set("Click me")
# create a button with a textvariable
button1 = tk.Button(root, textvariable=text_var)
button1.pack()
# change the value of the StringVar variable
text_var.set("Click me if you dare")
root.mainloop()
In this example, a StringVar variable is created and set to “Click me”. Then a button is created with the textvariable parameter set to the StringVar variable. This means that the button’s text is linked to the value of the StringVar variable, and any changes to the variable’s value will be reflected in the button’s text. Finally, the value of the StringVar variable is changed to “Click me if you dare”, which causes the button’s text to change as well.
The textvariable parameter can be used with both StringVar and IntVar variables. When used with an IntVar variable, the button’s text will automatically update to reflect any changes to the variable’s value.
The underline parameter
It is used to specify which character in the button’s text should be underlined. Here’s an example code that shows how to use it:
import tkinter as tk root = tk.Tk() # create a button with an underlined character button1 = tk.Button(root, text="Click _me", underline=5) button1.pack() # create a button with a different underlined character button2 = tk.Button(root, text="Click _here", underline=6) button2.pack() root.mainloop()
In this example, two buttons are created with different underlined characters. The text parameter is used to specify the text displayed on the button, and the underline parameter is used to specify which character should be underlined. In the first button, the fifth character (“m”) is underlined, and in the second button, the sixth character (“h”) is underlined. When the user presses the Alt key and the underlined character together, the button is activated as if it had been clicked.

The width parameter
It is used to specify the width of the button in characters. Here’s an example code that shows how to use it:
import tkinter as tk root = tk.Tk() # create a button with a width of 10 characters button1 = tk.Button(root, text="ok ok ok ok ok ", width=10) button1.pack() # create a button with a different width button2 = tk.Button(root, text="ok ok ok ok ok Ok OK", width=20) button2.pack() root.mainloop()
In this example, two buttons are created with different widths. The text parameter is used to specify the text displayed on the button, and the width parameter is used to specify the width of the button in characters. In the first button, the width is set to 10 characters, and in the second button, the width is set to 20 characters. The button’s width affects the size of the button, but not the size of the text displayed on it.

The wraplength parameter
It is used to specify the maximum line length for wrapped text on the button. Here’s an example code that shows how to use it:
import tkinter as tk root = tk.Tk() # create a button with wrapped text button1 = tk.Button(root, text="This is a long button label that will wrap to the next line", wraplength=80) button1.pack() # create a button with a different wrap length button2 = tk.Button(root, text="This button label will wrap to a shorter line", wraplength=40) button2.pack() root.mainloop()
In this example, two buttons are created with different wrap lengths. The text parameter is used to specify the text displayed on the button, and the wraplength parameter is used to specify the maximum line length for wrapped text. In the first button, the wrap length is set to 80 pixels, and in the second button, the wrap length is set to 40 pixels. When the button’s text exceeds the maximum line length, it is wrapped to the next line.
The methods used in Tkinter button
Here are some commonly used methods in Tkinter button along with an example:
config(**options):
- This method is used to configure one or more options of a button. It takes keyword arguments where each keyword represents the name of the option to be configured and the value represents the new value for that option. For example:
import tkinter as tk root = tk.Tk() # Create a button btn = tk.Button(root, text="Click me!") btn.pack() # Change the button text btn.config(text="New Text")

flash():
This method is used to flash the button. When this method is called, the button appears to flash for a short period of time.
For example:
import tkinter as tk root = tk.Tk() # Create a button btn = tk.Button(root, text="Click me!") btn.pack() # Flash the button btn.flash()
invoke():
This method is used to invoke the button command. When this method is called, the function specified in the command option of the button is called.
For example:
import tkinter as tk
root = tk.Tk()
# Define a function
def say_hello():
print("Hello!")
# Create a button with a command function
btn = tk.Button(root, text="Click me!", command=say_hello)
btn.pack()
# Invoke the button command
btn.invoke()

state(newstate=None):
This method is used to get or set the state of the button. The state can be either ‘normal’, ‘active’, ‘disabled’, or ‘pressed’. If no argument is provided, the method returns the current state of the button. If an argument is provided, the method sets the state of the button to the given value.
For example:
import tkinter as tk root = tk.Tk() # Create a button btn = tk.Button(root, text="Click me!") btn.pack() # Disable the button btn.state(newstate="disabled") # Get the current state of the button print(btn.state())
wait_variable(variable):
This method is used to wait until a Tkinter variable changes its value. This method blocks the program until the value of the specified variable changes.
For example:
import tkinter as tk
root = tk.Tk()
# Create a Tkinter variable
var = tk.StringVar()
# Create a button that changes the variable value
btn = tk.Button(root, text="Click me!", command=lambda: var.set("New Value"))
btn.pack()
# Wait until the variable changes its value
btn.wait_variable(var)
print("Variable changed!")

Quiz
Here are 10 multiple-choice quiz questions about Tkinter buttons:
1-What is the function of a button in Tkinter?
A) To display images
B) To display text
C) To display both images and text
D) To close the window
Answer: C
2-Which attribute is used to set the background color of a button?
A) bg
B) background
C) color
D) bgcolor
Answer: A
3-Which attribute is used to set the foreground color of a button?
A) fg
B) foreground
C) color
D) textcolor
Answer: A
4-Which attribute is used to set the text on a button?
A) text
B) label
C) message
D) caption
Answer: A
5-Which attribute is used to set the font of the text on a button?
A) font
B) textfont
C) typeface
D) style
Answer: A
6-Which attribute is used to set the relief of a button?
A) relief
B) outline
C) border
D) frame
Answer: A
7-Which attribute is used to specify the function to be executed when the button is clicked?
A) command
B) function
C) click
D) action
Answer: A
8-Which attribute is used to set the width of a button?
A) width
B) size
C) length
D) dimension
Answer: A
9-Which attribute is used to set the height of a button?
A) height
B) size
C) length
D) dimension
Answer: A
10-Which attribute is used to disable a button?
A) state
B) disabled
C) off
D) inactive
Answer: A
References:
Tkinter Button examples:
Tkinter Button options:
TkDocs – Tk Tutorial – Buttons: