Python tkinter Canvas widgets
Python tkinter Canvas widgets
we will Learn how to create interactive graphics and user interfaces using Tkinter Canvas widgets in Python GUI applications.
This beginner’s guide covers the basics of Canvas widgets, their methods, options, and uses with complete code examples.
Canvas widgets are a type of graphical user interface (GUI) element in the Tkinter library of Python programming language. The canvas widget provides a surface for drawing various shapes and objects, such as lines, circles, rectangles, and text, using methods such as create_line(), create_rectangle(), and create_text().
The canvas widget is useful for creating dynamic and interactive graphics in Python applications.
It allows the user to create, modify, and delete graphical objects on the fly.
For example, a canvas widget can be used to create a simple paint program, or to create a game that involves moving graphical objects around the screen.
How to use the canvas widget in Tkinter?
Here are the steps to create a basic canvas widget in Python using Tkinter:
1-Import the Tkinter module by using import tkinter as tk.
2-Create the main window by using root = tk.Tk().
3-Create the canvas widget by using canvas = tk.Canvas(root, width=width, height=height), where root is the main window, and width and height are the desired dimensions of the canvas.
4-Add the canvas widget to the main window by using canvas.pack().
5-Use the various canvas methods such as create_line(), create_rectangle(), and create_text() to add graphical objects to the canvas.
6-Optionally, bind event handlers to the canvas widget using the canvas.bind() method to respond to user input such as mouse clicks and keyboard events.
7-Start the main event loop by using root.mainloop().
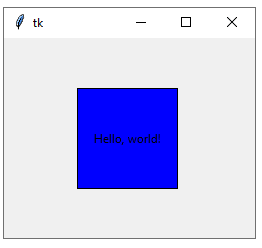
Here’s a basic code example that creates a canvas widget with a blue rectangle and some text:
import tkinter as tk # Create the main window root = tk.Tk() # Create the canvas widget canvas = tk.Canvas(root, width=200, height=200) # Add the canvas widget to the main window canvas.pack() # Create a blue rectangle on the canvas rect = canvas.create_rectangle(50, 50, 150, 150, fill='blue') # Create some text on the canvas text = canvas.create_text(100, 100, text='Hello, world!') # Start the main event loop root.mainloop()
When you run this code, you should see a window with a blue rectangle and the text “Hello, world!” on a white background.
You can modify the code to add more graphical objects and event handlers as needed.
Types of graphical objects on the Canvas widgets
In Tkinter, there is only one type of canvas widget, which is simply called the Canvas widget.
However, the Canvas widget provides a wide range of methods that can be used to create and manipulate various types of graphical objects on the canvas. Here are some of the most commonly used types of graphical objects that can be created using the Canvas widget:
Lines:
straight lines can be drawn between two points using the create_line() method.
Rectangles:
rectangles can be created using the create_rectangle() method.
Ovals:
ovals can be created using the create_oval() method.
Arcs:
arcs can be created using the create_arc() method.
Polygons:
polygons can be created using the create_polygon() method.
Images:
images can be displayed on the canvas using the create_image() method.
Text:
text can be displayed on the canvas using the create_text() method.
Widgets:
other widgets such as buttons, labels, and entry fields can be embedded in the canvas using the create_window() method.
In addition to these basic types of graphical objects, the Canvas widget also provides methods for transforming and animating these objects, as well as for handling user input through event bindings.
By using these methods creatively, you can create a wide range of dynamic and interactive graphics applications in Python.
The methods of Canvas widgets with complete code examples
The Canvas widget in Tkinter provides a large number of methods for creating and manipulating graphical objects on the canvas.
Here are the most commonly used methods, along with code examples:
How to create line on canvas tkinter widget?
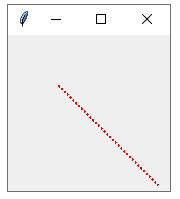
by using create_line(x1, y1, x2, y2, …, options):
Draws a straight line on the canvas between two points specified by their x and y coordinates. The options parameter is optional and can be used to specify various attributes such as line color, thickness, and style.
Here’s an example:
import tkinter as tk root = tk.Tk() canvas = tk.Canvas(root, width=200, height=200) canvas.pack() # Draw a red line on the canvas line = canvas.create_line(50, 50, 150, 150, fill='red', width=2, dash=(4, 2)) root.mainloop()
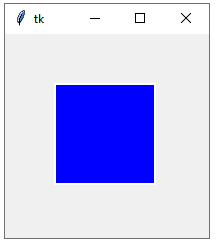
How to create rectangle in canvas tkinter widget?
create_rectangle(x1, y1, x2, y2, …, options):
Draws a rectangle on the canvas with the specified corner coordinates.
The options parameter is optional and can be used to specify various attributes such as fill color, outline color, and outline thickness.
Here’s an example:
import tkinter as tk root = tk.Tk() canvas = tk.Canvas(root, width=200, height=200) canvas.pack() # Draw a blue rectangle on the canvas rect = canvas.create_rectangle(50, 50, 150, 150, fill='blue', outline='white', width=2) root.mainloop()
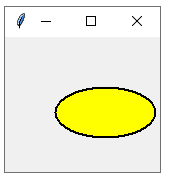
How to draw an oval shape on canvas tkinter widget?
create_oval(x1, y1, x2, y2, …, options):
Draws an oval on the canvas with the specified bounding box coordinates.
The options parameter is optional and can be used to specify various attributes such as fill color, outline color, and outline thickness.
Here’s an example:
import tkinter as tk root = tk.Tk() canvas = tk.Canvas(root, width=200, height=200) canvas.pack() # Draw a yellow oval on the canvas oval = canvas.create_oval(50, 50, 150, 100, fill='yellow', outline='black', width=2) root.mainloop()
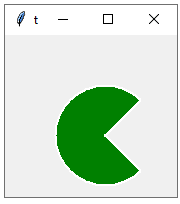
How to draw arc shape by canvas tkinter widget?
create_arc(x1, y1, x2, y2, …, options):
Draws an arc on the canvas with the specified bounding box coordinates.
The options parameter is optional and can be used to specify various attributes such as fill color, outline color, and outline thickness, as well as the start and extent angles of the arc.
Here’s an example:
import tkinter as tk root = tk.Tk() canvas = tk.Canvas(root, width=200, height=200) canvas.pack() # Draw a green arc on the canvas arc = canvas.create_arc(50, 50, 150, 150, start=45, extent=270, fill='green', outline='white', width=2) root.mainloop()
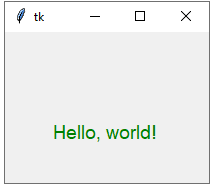
How to draw text shape by canvas tkinter widget?
create_text(x, y, …, options):
Draws text on the canvas at the specified coordinates.
The options parameter is optional and can be used to specify various attributes such as font, color, and justification.
Here’s an example:
import tkinter as tk
root = tk.Tk()
canvas = tk.Canvas(root, width=200, height=200)
canvas.pack()
# Draw text on the canvas
text = canvas.create_text(100, 100, text='Hello, world!', font=('Arial', 14), fill='white')
root.mainloop()
How to display image on the canvas ?
create_image(x, y, …, options):
Displays an image on the canvas at the specified coordinates.
The options parameter is optional and can be used to specify various attributes such as image file, anchor position, and image size.
Here’s an example:
import tkinter as tk root = tk.Tk() canvas = tk.Canvas(root, width=200, height=200) canvas.pack() # Load an image and display it on the canvas photo = tk.PhotoImage(file='image.gif') image = canvas.create_image(100, 100, image=photo) root.mainloop()

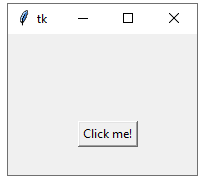
How to create a window on canvas tkinter widget?
create_window(x, y, …, options):
Embeds a child widget inside the canvas at the specified coordinates.
The options parameter is optional and can be used to specify various attributes such as widget type, widget options, and anchor position.
Here’s an example:
import tkinter as tk root = tk.Tk() canvas = tk.Canvas(root, width=200, height=200) canvas.pack() # Create a child button and embed it in the canvas button = tk.Button(canvas, text='Click me!') window = canvas.create_window(100, 100, window=button, anchor='center') root.mainloop()
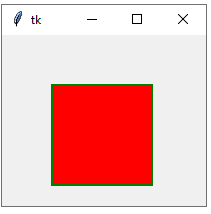
How to Configure the specified item or items on the canvas.
By: itemconfig(item, …, options):
The item parameter can be either a single item ID or a list of item IDs.
The options parameter is optional and can be used to specify various attributes to be changed.
Here’s an example:
import tkinter as tk root = tk.Tk() canvas = tk.Canvas(root, width=200, height=200) canvas.pack() # Draw a blue rectangle on the canvas rect = canvas.create_rectangle(50, 50, 150, 150, fill='blue', outline='white', width=2) # Change the fill color of the rectangle to red canvas.itemconfig(rect, fill='red') root.mainloop()
How to Change the coordinates of the specified item on the canvas?
By : coords(item, x1, y1, x2, y2, …):
The item parameter can be either a single item ID or a list of item IDs.
The new coordinates are specified as additional arguments to the method.
Here’s an example:
import tkinter as tk root = tk.Tk() canvas = tk.Canvas(root, width=200, height=200) canvas.pack() # Draw a yellow oval on the canvas oval = canvas.create_oval(50, 50, 150, 100, fill='yellow', outline='black', width=2) # Change the size and position of the oval canvas.coords(oval, 25, 25, 175, 125) root.mainloop()
How to delete the item from the canvas tkinter widget?
delete(item):
Removes the specified item or items from the canvas.
The item parameter can be either a single item ID or a list of item IDs.
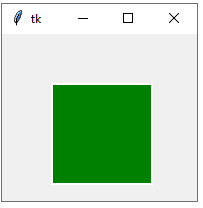
Here’s an example:
import tkinter as tk root = tk.Tk() canvas = tk.Canvas(root, width=200, height=200) canvas.pack() # Draw a green rectangle and a red oval on the canvas rect = canvas.create_rectangle(50, 50, 150, 150, fill='green', outline='white', width=2) oval = canvas.create_oval(75, 75, 125, 125, fill='red', outline='black', width=2) # Delete the oval from the canvas canvas.delete(oval) root.mainloop()