
Python Tkinter Toplevel Widget
Python Tkinter Toplevel Widget
Tkinter Toplevel is a widget in the Python Tkinter GUI toolkit that provides a separate top-level window container for displaying additional widgets or sub-windows.
The Toplevel widget can be used to create a pop-up window, a dialog box, or a child window that appears above the parent window. It can also be used to create multiple independent windows that can interact with each other.
Some common uses of Toplevel widgets include creating message boxes, file selection dialogs, and custom dialog boxes for data input or configuration.
How to create Toplevel Window ?
To create a Toplevel widget, you first create a new instance of the Toplevel class and then use its methods to configure and add other widgets as needed.
You can also set various attributes of the Toplevel widget, such as its size, position, title, and window decorations.
In addition to the standard Tkinter widgets, you can also use custom widgets or frames within a Toplevel window to create a more complex user interface.
You can also bind events and callbacks to Toplevel widgets to respond to user actions or update the contents of the window.
Overall, Toplevel widgets provide a powerful and flexible way to create new windows and dialogs in a Tkinter application.
syntax
The syntax for creating a Tkinter Toplevel widget in Python is:
widget = Toplevel(master=None, **options)
where:
widget is the name of the variable to hold the Toplevel widget instance.
master is the parent widget or the main window of the Toplevel widget. If not specified, it defaults to the root window of the Tkinter application.
**options are the configuration options for the Toplevel widget, such as its title, size, position, and decorations.
Once the Toplevel widget is created, you can use its methods and attributes to configure and add other widgets to the window, as well as to bind events and callbacks to the widget. Finally, you need to start the main event loop using the mainloop() method to display the Toplevel window and handle user events.
How to create Tkinter Toplevel widget?
To create a Tkinter Toplevel widget in Python, you can follow these general steps:
1-Import the Tkinter module:
import tkinter as tk
2-Create an instance of the Toplevel widget using the Toplevel() constructor:
top = tk.Toplevel()
3-Optionally, set the attributes and options of the Toplevel widget using its methods or attributes, such as title(), geometry(), resizable(), transient(), grab_set(), and protocol().
4-Add other widgets to the Toplevel window using their respective constructors and methods, such as Label(), Entry(), Button(), Text(), Canvas(), and Frame().
5-Configure the layout and appearance of the widgets using geometry managers, such as pack(), grid(), and place().
6-Optionally, bind events and callbacks to the widgets using the bind() method or other event-specific methods, such as command() and validate().
7-Start the main event loop using the mainloop() method of the Toplevel widget or the root window of the Tkinter application.
Here is an example of creating a simple Tkinter Toplevel window with a label:
import tkinter as tk
# create the main window
root = tk.Tk()
# create the Toplevel window
top = tk.Toplevel(root)
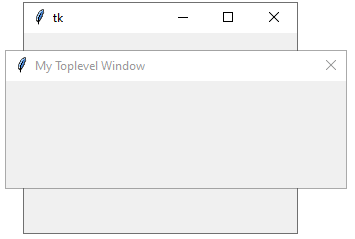
top.title("My Toplevel Window")
# create a label widget
label = tk.Label(top, text="Hello World!")
# pack the label widget
label.pack()
# start the main event loop
root.mainloop()

This code will create a main window and a Toplevel window with a label widget that displays the text “Hello World!”.
Example:
import tkinter as tk
# create a new instance of the Toplevel widget
top = tk.Toplevel()
# configure the Toplevel widget
top.title("My Window")
top.geometry("400x300")
# add other widgets to the Toplevel window
label = tk.Label(top, text="I am a toplevel window")
label.pack()
# start the main event loop
top.mainloop()

In this example, we first import the Tkinter module and create a new instance of the Toplevel widget using the tk.Toplevel() constructor. We then configure the widget by setting its title and size using the title() and geometry() methods.
Next, we add a Label widget to the Toplevel window using the tk.Label() constructor and the pack() method to display it. Finally, we start the main event loop using the mainloop() method to display the Toplevel window and handle user events.
Example:
Example:
# Import the required libraries
from tkinter import *
from tkinter import ttk
# Create an instance of tkinter frame or window
win=Tk()
# Set the size of the window
win.geometry("200x150")
win.title("Parent Window")
# Create a Toplevel window
top=Toplevel(win)
top.geometry('60x60')
top.title("Child Window")
# Place the toplevel window at the top
top.wm_transient(win)
win.mainloop()

The options of Tkinter Toplevel
|
option |
uses |
|
bg or background |
sets the background color of the Toplevel widget. |
|
bd or borderwidth |
sets the background color of the Toplevel widget. |
|
bd or borderwidth |
sets the border width of the Toplevel widget. |
|
class_ or class |
sets the class name of the Toplevel widget for styling. |
|
cursor |
sets the mouse cursor shape when hovering over the Toplevel widget. |
|
height |
sets the height of the Toplevel widget in pixels. |
|
width |
sets the width of the Toplevel widget in pixels. |
|
highlightbackground |
sets the color of the highlight border when the Toplevel widget loses focus. |
|
highlightcolor |
sets the color of the highlight border when the Toplevel widget has focus. |
|
highlightthickness |
sets the thickness of the highlight border around the Toplevel widget. |
|
padx or pady |
sets the amount of padding around the interior of the Toplevel widget. |
|
relief |
sets the border style of the Toplevel widget, such as “flat”, “raised”, “sunken”, or “groove” |
|
title |
sets the title text of the Toplevel widget. |
|
transient |
sets the parent widget for the Toplevel widget and makes it a child window. |
|
resizable |
sets whether the Toplevel widget can be resized by the user. |
|
screen |
sets the screen to display the Toplevel widget on. |
|
takefocus |
sets whether the Toplevel widget can receive focus by keyboard traversal. |
|
use |
sets the window identifier of an existing window to use as the Toplevel widget. |
|
visual |
sets the color visual of the Toplevel widget. |
You can use these options with the Toplevel() constructor or with the config() method to set or modify the attributes of a Toplevel widget.
Here is an example code that creates a Toplevel window and sets various options using the Toplevel() constructor:
import tkinter as tk # create the main window root = tk.Tk() # create a Toplevel window with options top = tk.Toplevel(root, bg="blue", bd=5, cursor="dot", height=300, width=400, highlightbackground="black",highlightcolor="red", highlightthickness=2, padx=20, pady=10,relief="groove", takefocus=True) # add a label widget to the Toplevel window label = tk.Label(top, text="This is a Toplevel window!") label.pack() # start the main event loop root.mainloop()

In this example, the Toplevel window is created with the following options:
bg=”white” sets the background color of the window to white.
bd=5 sets the border width of the window to 5 pixels.
cursor=”dot” sets the mouse cursor to a dot when hovering over the window.
height=300 sets the height of the window to 300 pixels.
width=400 sets the width of the window to 400 pixels.
highlightbackground=”black” sets the color of the highlight border to black when the window loses focus.
highlightcolor=”red” sets the color of the highlight border to red when the window has focus.
highlightthickness=2 sets the thickness of the highlight border to 2 pixels.
padx=20 sets the horizontal padding inside the window to 20 pixels.
pady=10 sets the vertical padding inside the window to 10 pixels.
relief=”groove” sets the border style of the window to a grooved effect.
title=”My Toplevel Window” sets the title of the window to “My Toplevel Window”.
takefocus=True allows the window to receive focus by keyboard traversal.
Methods of Tkinter Toplevel with code examples
Here are some of the common methods that can be used with Tkinter Toplevel widgets, along with code examples:
geometry(geometry_string):
This method can be used to set the size and position of a Toplevel widget. It takes a geometry string as an argument, which specifies the width, height, and position of the widget. Here is an example:
import tkinter as tk
# create the main window
root = tk.Tk()
# create a Toplevel window
top = tk.Toplevel(root, title="My Toplevel Window")
# set the size and position of the Toplevel window
top.geometry("300x200+100+100")
# start the main event loop
root.mainloop()

maxsize(width=-1, height=-1):
This method can be used to set the maximum size of a Toplevel widget.
It takes two optional arguments, which specify the maximum width and height of the widget.
Here is an example:
import tkinter as tk
# create the main window
root = tk.Tk()
# create a Toplevel window
top = tk.Toplevel(root)
top.title("My Toplevel Window")
# set the maximum size of the Toplevel window
top.maxsize(200, 200)
# start the main event loop
root.mainloop()

minsize(width=-1, height=-1):
This method can be used to set the minimum size of a Toplevel widget. It takes two optional arguments, which specify the minimum width and height of the widget.
Here is an example:
import tkinter as tk
# create the main window
root = tk.Tk()
# create a Toplevel window
top = tk.Toplevel(root)
top.title("My Toplevel Window")
# set the minimum size of the Toplevel window
top.minsize(200, 100)
# start the main event loop
root.mainloop()

protocol(protocol, function):
This method can be used to bind a function to a protocol event of a Toplevel widget.
The protocol argument specifies the event, such as “WM_DELETE_WINDOW” or “WM_TAKE_FOCUS”. The function argument is the name of the function to be bound to the event.
Here is an example:
import tkinter as tk
# create the main window
root = tk.Tk()
# create a Toplevel window
top = tk.Toplevel(root)
top. Title("My Toplevel Window")
# define a function to handle the WM_DELETE_WINDOW event
def close_window():
top.destroy()
# bind the close_window function to the WM_DELETE_WINDOW event
top.protocol("WM_DELETE_WINDOW", close_window)
# start the main event loop
root.mainloop()
resizable(width=True, height=True):
This method can be used to enable or disable resizing of a Toplevel widget.
It takes two Boolean arguments, which specify whether the widget should be resizable in the horizontal and vertical directions.
Here is an example:
import tkinter as tk
# create the main window
root = tk.Tk()
# create a Toplevel window
top = tk.Toplevel(root)
top.title("My Toplevel Window")
# disable resizing of the Toplevel window
top.resizable(False, False)
# start the main event loop
root.mainloop()

withdraw():
This method can be used to hide a Toplevel widget without destroying it.
Here is an example:
import tkinter as tk
# create the main window
root = tk.Tk()
# create a Toplevel window
top = tk.Toplevel(root)
top.title("My Toplevel Window")
# hide the Toplevel window
top.withdraw()
# start the main event loop
root.mainloop()

deiconify():
This method can be used to show a Toplevel widget that has been hidden with the withdraw() method. Here is an example:
import tkinter as tk
# create the main window
root = tk.Tk()
# create a Toplevel window
top = tk.Toplevel(root)
top.title("My Toplevel Window")
# hide the Toplevel window
top.withdraw()
# show the Toplevel window
top.deiconify()
# start the main event loop
root.mainloop()

grab_release():
This method can be used to release the modal state of a Toplevel widget that was set with the grab_set() method.
Here is an example:
import tkinter as tk
# create the main window
root = tk.Tk()
# create a Toplevel window
top = tk.Toplevel(root)
top.title("My Toplevel Window")
# make the Toplevel window modal
top.grab_set()
# release the modal state after 5 seconds
top.after(5000, top.grab_release)
# start the main event loop
root.mainloop()

transient(master=None):
This method can be used to make a Toplevel window transient with respect to another window.
This means that the Toplevel window will always appear on top of the specified master window, and will be destroyed automatically if the master window is destroyed.
Here is an example:
import tkinter as tk
# create the main window
root = tk.Tk()
# create a Toplevel window
top = tk.Toplevel(root)
top.title("My Toplevel Window")
# make the Toplevel window transient with respect to the main window
top.transient(root)
# start the main event loop
root.mainloop()
overrideredirect(flag=None):
This method can be used to remove the window decorations (such as the title bar and borders) from a Toplevel widget.
This can be useful if you want to create a custom window design.
The method takes a Boolean argument, which specifies whether to remove or restore the window decorations. If no argument is provided, the method returns the current state of the flag.
Here is an example:
import tkinter as tk # create the main window root = tk.Tk() # create a Toplevel window with no decorations top = tk.Toplevel(root) top.overrideredirect(True) # add a label to the window label = tk.Label(top, text="This is my custom window design!") label.pack(padx=10, pady=10) # start the main event loop root.mainloop()

state(newstate=None):
This method can be used to set or get the state of a Toplevel widget.
The state can be “normal” (the default), “iconic” (minimized), or “withdrawn” (hidden).
Here is an example:
import tkinter as tk
# create the main window
root = tk.Tk()
# create a Toplevel window
top = tk.Toplevel(root)
top.title("My Toplevel Window")
# set the Toplevel window to the "iconic" state (minimized)
top.state("iconic")
# start the main event loop
root.mainloop()

Refrences of this lesson
Here are some references used for creating this lesson:
Tkinter Toplevel documentation:
Python GUI Programming with Tkinter: