
Understanding Tkinter Events in Python: A Comprehensive Guide
Understanding Tkinter Events in Python: A Comprehensive Guide
In this lesson we will learn:
Learn about the different types of events available in Tkinter and how to use them in your Python GUI applications.
Discover how to handle events in Tkinter using various event types and techniques, with examples and code snippets.
Dive into the world of event binding in Tkinter and learn how to create dynamic and responsive user interfaces with Python.
Here are common events in Tkinter:
| Event | Function |
| <Button-1> |
Occurs when the left mouse button is clicked. |
| <Button-2>: | Occurs when the middle mouse button is clicked. |
| <Button-3> | Occurs when the right mouse button is clicked. |
| <Double-Button-1> |
Occurs when the left mouse button is double-clicked. |
| <Double-Button-2> |
Occurs when the middle mouse button is double-clicked. |
| <Double-Button-3>: |
Occurs when the right mouse button is double-clicked. |
| <Motion>: | Occurs when the mouse pointer moves over the widget. |
| <Enter> |
Occurs when the mouse pointer enters the widget. |
| <Leave> |
Occurs when the mouse pointer leaves the widget. |
| <Return> |
Occurs when the user presses the Return or Enter key. |
| <Key> |
Occurs when a key is pressed. |
| <FocusIn> |
Occurs when the widget gains focus. |
| <FocusOut> |
Occurs when the widget loses focus. |
| <Configure>: |
Occurs when the widget is resized. |
| <Destroy> |
Occurs when the widget is destroyed. |
| <ButtonRelease-1> |
Occurs when the left mouse button is released after being clicked. |
| <ButtonRelease-2> |
Occurs when the middle mouse button is released after being clicked. |
| <ButtonRelease-3> |
Occurs when the right mouse button is released after being clicked. |
| <Double-ButtonRelease-1> |
Occurs when the left mouse button is double-clicked and released. |
| <Double-ButtonRelease-2> |
Occurs when the middle mouse button is double-clicked and released. |
| <Double-ButtonRelease-3> |
Occurs when the right mouse button is double-clicked and released. |
| <KeyPress> |
Occurs when a key is pressed (with key code) |
| <KeyRelease> |
Occurs when a key is released (with key code). |
| <Map> |
Occurs when the widget is mapped to the screen. |
| <Unmap> |
Occurs when the widget is unmapped from the screen. |
| <Visibility> |
Occurs when the widget is shown or hidden. |
| <MouseWheel> |
Occurs when the mouse wheel is scrolled (up or down). |
These events can be bound to a widget using the bind() method in Tkinter.
Uses of the tkinter events with complete code examples
Sure! Here are some examples of how you can use the events in Tkinter with complete code examples:
Example 1:
Responding to a button click event
import tkinter as tk
def button_clicked(event):
print("Button clicked")
root = tk.Tk()
button = tk.Button(root, text="Click me!")
button.pack()
# bind the button click event to the function
button.bind("<Button-1>", button_clicked)
root.mainloop()
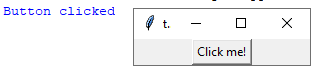
In this example, we have created a Button widget and bound the <Button-1> event to the button_clicked function. When the user clicks the button, the function will be called and the message “Button clicked” will be printed to the console.
Example 2:
Responding to a key press event
import tkinter as tk
def key_pressed(event):
print("Key pressed:", event.keysym)
root = tk.Tk()
label = tk.Label(root, text="Press a key")
label.pack()
# bind the key press event to the function
root.bind("<Key>", key_pressed)
root.mainloop()
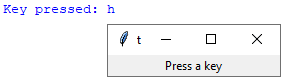
In this example, we have created a Label widget and bound the <Key> event to the key_pressed function.
When the user presses a key, the function will be called and the message “Key pressed: [key code]” will be printed to the console.
Example 3:
Responding to a mouse hover event
import tkinter as tk
def mouse_enter(event):
print("Mouse entered")
def mouse_leave(event):
print("Mouse left")
root = tk.Tk()
label = tk.Label(root, text="Hover over me")
label.pack()
# bind the mouse enter and leave events to the functions
label.bind("<Enter>", mouse_enter)
label.bind("<Leave>", mouse_leave)
root.mainloop()
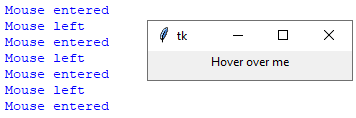
In this example, we have created a Label widget and bound the <Enter> and <Leave> events to the mouse_enter and mouse_leave functions, respectively.
When the user hovers over the label, the “Mouse entered” message will be printed to the console, and when the user moves the mouse away from the label, the “Mouse left” message will be printed.
<Button-1>: event with complete code example
The <Button-1> event is used to detect when the left mouse button is clicked on a widget.
Here is an example of how to use it in a complete code example:
import tkinter as tk
def button_clicked(event):
print("Button clicked")
root = tk.Tk()
button = tk.Button(root, text="Click me!")
button.pack()
# bind the button click event to the function
button.bind("<Button-1>", button_clicked)
root.mainloop()
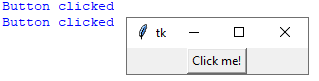
In this example, we have created a Button widget with the text “Click me!” and packed it into the main window using the pack() method. We then bound the <Button-1> event to the button_clicked function using the bind() method. When the user clicks the button with the left mouse button, the button_clicked function will be called and the message “Button clicked” will be printed to the console.
note:
You can use this event to perform any action you want when the user clicks a button with the left mouse button.
For example, you might use it to update the text in a label or perform a calculation based on the current state of the user interface. The possibilities are endless!
<ButtonRelease-2> event with code example
The <ButtonRelease-2> event is used to detect when the middle mouse button is released after being clicked on a widget.
Here is an example of how to use it in a code example:
import tkinter as tk
def middle_button_released(event):
print("Middle button released")
root = tk.Tk()
label = tk.Label(root, text="Click the middle mouse button")
label.pack()
# bind the middle button release event to the function
label.bind("<ButtonRelease-2>", middle_button_released)
root.mainloop()
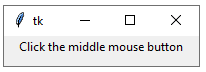
In this example, we have created a Label widget with the text “Click the middle mouse button” and packed it into the main window using the pack() method.
We then bound the <ButtonRelease-2> event to the middle_button_released function using the bind() method. When the user clicks the label with the middle mouse button and then releases it, the middle_button_released function will be called and the message “Middle button released” will be printed to the console.
Note:
You can use this event to perform any action you want when the user releases the middle mouse button on a widget.
For example, you might use it to zoom in or out of an image or perform a special action in your program. The possibilities are endless!
<Button-3> thinter event
The <Button-3> event is used to detect when the right mouse button is clicked on a widget.
Here is an example of how to use it in a code example:
import tkinter as tk
def right_button_clicked(event):
print("Right button clicked")
root = tk.Tk()
label = tk.Label(root, text="Click the right mouse button")
label.pack()
# bind the right button click event to the function
label.bind("<Button-3>", right_button_clicked)
root.mainloop()

In this example, we have created a Label widget with the text “Click the right mouse button” and packed it into the main window using the pack() method. We then bound the <Button-3> event to the right_button_clicked function using the bind() method. When the user clicks the label with the right mouse button, the right_button_clicked function will be called and the message “Right button clicked” will be printed to the console.
You can use this event to perform any action you want when the user clicks a widget with the right mouse button. For example, you might use it to open a context menu or perform a special action in your program. The possibilities are endless!
<Double-Button-1> Tkinter event
The <Double-Button-1> event is used to detect when the left mouse button is double-clicked on a widget. Here is an example of how to use it in a code example:
import tkinter as tk
def left_button_double_clicked(event):
print("Left button double-clicked")
root = tk.Tk()
label = tk.Label(root, text="Double-click the left mouse button")
label.pack()
# bind the left button double-click event to the function
label.bind("<Double-Button-1>", left_button_double_clicked)
root.mainloop()

In this example, we have created a Label widget with the text “Double-click the left mouse button” and packed it into the main window using the pack() method. We then bound the <Double-Button-1> event to the left_button_double_clicked function using the bind() method. When the user double-clicks the label with the left mouse button, the left_button_double_clicked function will be called and the message “Left button double-clicked” will be printed to the console.
You can use this event to perform any action you want when the user double-clicks a widget with the left mouse button. For example, you might use it to open a new window or perform a special action in your program. The possibilities are endless!
<Double-Button-2> tkinter event
The <Double-Button-2> event is used to detect when the middle mouse button is double-clicked on a widget.
Here is an example of how to use it in a code example:
import tkinter as tk
def middle_button_double_clicked(event):
print("Middle button double-clicked")
root = tk.Tk()
label = tk.Label(root, text="Double-click the middle mouse button")
label.pack()
# bind the middle button double-click event to the function
label.bind("<Double-Button-2>", middle_button_double_clicked)
root.mainloop()
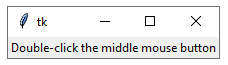
In this example, we have created a Label widget with the text “Double-click the middle mouse button” and packed it into the main window using the pack() method.
We then bound the <Double-Button-2> event to the middle_button_double_clicked function using the bind() method. When the user double-clicks the label with the middle mouse button, the middle_button_double_clicked function will be called and the message “Middle button double-clicked” will be printed to the console.
You can use this event to perform any action you want when the user double-clicks a widget with the middle mouse button. For example, you might use it to zoom in or out of an image or perform a special action in your program. The possibilities are endless!
<Double-Button-3> tkinter event
The <Double-Button-3> event is used to detect when the right mouse button is double-clicked on a widget.
Here is an example of how to use it in a code example:
import tkinter as tk
def right_button_double_clicked(event):
print("Right button double-clicked")
root = tk.Tk()
label = tk.Label(root, text="Double-click the right mouse button")
label.pack()
# bind the right button double-click event to the function
label.bind("<Double-Button-3>", right_button_double_clicked)
root.mainloop()
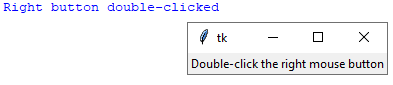
In this example, we have created a Label widget with the text “Double-click the right mouse button” and packed it into the main window using the pack() method. We then bound the <Double-Button-3> event to the right_button_double_clicked function using the bind() method. When the user double-clicks the label with the right mouse button, the right_button_double_clicked function will be called and the message “Right button double-clicked” will be printed to the console.
You can use this event to perform any action you want when the user double-clicks a widget with the right mouse button. For example, you might use it to close a window or perform a special action in your program. The possibilities are endless!
<Motion> tkinter event
The <Motion> event is used to detect when the mouse is moved over a widget.
Here is an example of how to use it in a code example:
import tkinter as tk
def mouse_moved(event):
print("Mouse moved to:", event.x, event.y)
root = tk.Tk()
label = tk.Label(root, text="Move the mouse over this label")
label.pack()
# bind the motion event to the function
label.bind("<Motion>", mouse_moved)
root.mainloop()
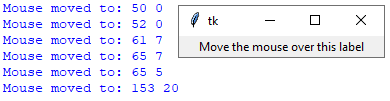
In this example, we have created a Label widget with the text “Move the mouse over this label” and packed it into the main window using the pack() method. We then bound the <Motion> event to the mouse_moved function using the bind() method. When the user moves the mouse over the label, the mouse_moved function will be called and the current mouse position (in pixels) will be printed to the console.
You can use this event to perform any action you want when the mouse is moved over a widget. For example, you might use it to update a status bar with the current mouse position or to highlight certain parts of the widget when the mouse is over them. The possibilities are endless!
<Enter> tkinter event
The <Enter> event is used to detect when the mouse pointer enters a widget.
Here is an example of how to use it in a code example:
import tkinter as tk
def mouse_entered(event):
print("Mouse entered the widget")
root = tk.Tk()
label = tk.Label(root, text="Hover the mouse over this label")
label.pack()
# bind the enter event to the function
label.bind("<Enter>", mouse_entered)
root.mainloop()

In this example, we have created a Label widget with the text “Hover the mouse over this label” and packed it into the main window using the pack() method. We then bound the <Enter> event to the mouse_entered function using the bind() method. When the user moves the mouse over the label and enters the widget, the mouse_entered function will be called and the message “Mouse entered the widget” will be printed to the console.
You can use this event to perform any action you want when the mouse enters a widget. For example, you might use it to change the color of the widget or to display additional information in a tooltip. The possibilities are endless!
<Leave> tkinter event
The <Leave> event is used to detect when the mouse pointer leaves a widget.
Here is an example of how to use it in a code example:
import tkinter as tk
def mouse_left(event):
print("Mouse left the widget")
root = tk.Tk()
label = tk.Label(root, text="Hover the mouse over this label")
label.pack()
# bind the leave event to the function
label.bind("<Leave>", mouse_left)
root.mainloop()

In this example, we have created a Label widget with the text “Hover the mouse over this label” and packed it into the main window using the pack() method.
We then bound the <Leave> event to the mouse_left function using the bind() method.
When the user moves the mouse over the label and then leaves the widget, the mouse_left function will be called and the message “Mouse left the widget” will be printed to the console.
You can use this event to perform any action you want when the mouse leaves a widget. For example, you might use it to change the color of the widget back to its original color or to hide additional information that was displayed when the mouse entered the widget. The possibilities are endless!
<Return> tkinter event
The <Return> event is used to detect when the user presses the “Return” or “Enter” key on the keyboard.
Here is an example of how to use it in a code example:
import tkinter as tk
def return_pressed(event):
print("Return key was pressed")
root = tk.Tk()
entry = tk.Entry(root)
entry.pack()
# bind the return event to the function
entry.bind("<Return>", return_pressed)
root.mainloop()
In this example, we have created an Entry widget and packed it into the main window using the pack() method. We then bound the <Return> event to the return_pressed function using the bind() method. When the user types something into the entry and presses the “Return” or “Enter” key, the return_pressed function will be called and the message “Return key was pressed” will be printed to the console.
You can use this event to perform any action you want when the user presses the “Return” or “Enter” key. For example, you might use it to validate user input or to perform a search when the user types in a query and presses “Enter”. The possibilities are endless!
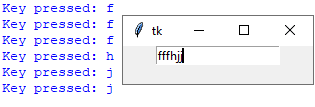
<Key> tkinter event
The <Key> event is used to detect when a key on the keyboard is pressed.
Here is an example of how to use it in a code example:
import tkinter as tk
def key_pressed(event):
print("Key pressed:", event.keysym)
root = tk.Tk()
entry = tk.Entry(root)
entry.pack()
# bind the key event to the function
entry.bind("<Key>", key_pressed)
root.mainloop()
In this example, we have created an Entry widget and packed it into the main window using the pack() method. We then bound the <Key> event to the key_pressed function using the bind() method. When the user types something into the entry and presses a key on the keyboard, the key_pressed function will be called and the message “Key pressed: {keysym}” will be printed to the console, where {keysym} is the name of the key that was pressed.
You can use this event to perform any action you want when a key is pressed.
For example, you might use it to validate user input, to move the focus to another widget when the user presses the “Tab” key, or to perform an action when the user presses a hotkey combination. The possibilities are endless!
<FocusIn> tkinter event
The <FocusIn> event is used to detect when a widget gains focus, meaning it becomes the widget that will receive keyboard input.
Here is an example of how to use it in a code example:
import tkinter as tk
def focus_in(event):
print("Widget has gained focus")
root = tk.Tk()
entry = tk.Entry(root)
entry.pack()
# bind the focus in event to the function
entry.bind("<FocusIn>", focus_in)
root.mainloop()
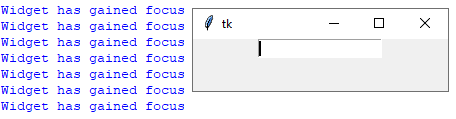
In this example, we have created an Entry widget and packed it into the main window using the pack() method.
We then bound the <FocusIn> event to the focus_in function using the bind() method.
When the user clicks on the entry to give it focus, the focus_in function will be called and the message “Widget has gained focus” will be printed to the console.
You can use this event to perform any action you want when a widget gains focus. For example, you might use it to change the color of the widget to indicate that it has focus, or to show additional information related to the widget. The possibilities are endless!
<FocusOut> tkinter event
The <FocusOut> event is used to detect when a widget loses focus, meaning it is no longer the widget that will receive keyboard input.
Here is an example of how to use it in a code example:
import tkinter as tk
def focus_out(event):
print("Widget has lost focus")
root = tk.Tk()
entry = tk.Entry(root)
entry.pack()
# bind the focus out event to the function
entry.bind("<FocusOut>", focus_out)
root.mainloop()
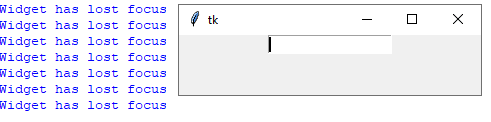
In this example, we have created an Entry widget and packed it into the main window using the pack() method. We then bound the <FocusOut> event to the focus_out function using the bind() method. When the user clicks outside of the entry to remove its focus, the focus_out function will be called and the message “Widget has lost focus” will be printed to the console.
You can use this event to perform any action you want when a widget loses focus. For example, you might use it to validate the user’s input when they leave an Entry widget, or to save the user’s progress when they leave a form element. The possibilities are endless!
<Configure> tkinter event
The <Configure> event is used to detect when a widget has been resized or moved.
Here is an example of how to use it in a code example:
import tkinter as tk
def on_configure(event):
# update the text with the new width and height
widget = event.widget
new_width = widget.winfo_width()
new_height = widget.winfo_height()
text.set(f"New width: {new_width}, new height: {new_height}")
root = tk.Tk()
frame = tk.Frame(root, width=200, height=100)
frame.pack()
text = tk.StringVar()
label = tk.Label(frame, textvariable=text)
label.pack()
# bind the configure event to the function
frame.bind("<Configure>", on_configure)
root.mainloop()
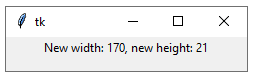
In this example, we have created a Frame widget with an initial width of 200 and height of 100, and packed it into the main window using the pack() method.
We then created a Label widget inside the frame to display the current width and height of the frame, and bound the <Configure> event to the on_configure function using the bind() method.
When the frame is resized or moved, the on_configure function will be called and the text variable will be updated with the new width and height of the frame.
You can use this event to perform any action you want when a widget is resized or moved. For example, you might use it to update the layout of your application when a window is resized, or to adjust the size of an image when a Canvas widget is resized. The possibilities are endless!
<Destroy> tkinter event
The <Destroy> event is used to detect when a widget is being destroyed, meaning it is being removed from the application.
Here is an example of how to use it in a code example:
import tkinter as tk
def on_destroy():
print("Widget has been destroyed")
root = tk.Tk()
button = tk.Button(root, text="Destroy widget", command=root.destroy)
button.pack()
# bind the destroy event to the function
root.bind("<Destroy>", lambda e: on_destroy())
root.mainloop()

In this example, we have created a Button widget with the text “Destroy widget” and packed it into the main window using the pack() method.
We then bound the <Destroy> event to the on_destroy function using a lambda function and the bind() method. When the user clicks on the button to destroy the main window, the on_destroy function will be called and the message “Widget has been destroyed” will be printed to the console.
You can use this event to perform any action you want when a widget is being destroyed.
For example, you might use it to clean up any resources or save data before closing the application. The possibilities are endless!
<ButtonRelease-1> tkinter event
The <ButtonRelease-1> event is used to detect when the left mouse button is released over a widget. Here is an example of how to use it in a code example:
import tkinter as tk
def button_release(event):
print("Left mouse button released")
root = tk.Tk()
frame = tk.Frame(root, width=200, height=100)
frame.pack()
# bind the button release event to the function
frame.bind("<ButtonRelease-1>", button_release)
root.mainloop()
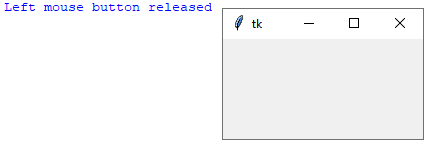
In this example, we have created a Frame widget with an initial width of 200 and height of 100, and packed it into the main window using the pack() method. We then bound the <ButtonRelease-1> event to the button_release function using the bind() method. When the user releases the left mouse button over the frame, the button_release function will be called and the message “Left mouse button released” will be printed to the console.
You can use this event to perform any action you want when the left mouse button is released over a widget.
For example, you might use it to implement drag-and-drop functionality, or to perform an action when the user clicks a button. The possibilities are endless!
<ButtonRelease-2> tkinter event
The <ButtonRelease-2> event is used to detect when the middle mouse button is released over a widget.
Here is an example of how to use it in a code example:
import tkinter as tk
def button_release(event):
print("Middle mouse button released")
root = tk.Tk()
frame = tk.Frame(root, width=200, height=100)
frame.pack()
# bind the button release event to the function
frame.bind("<ButtonRelease-2>", button_release)
root.mainloop()
In this example, we have created a Frame widget with an initial width of 200 and height of 100, and packed it into the main window using the pack() method.
We then bound the <ButtonRelease-2> event to the button_release function using the bind() method. When the user releases the middle mouse button over the frame, the button_release function will be called and the message “Middle mouse button released” will be printed to the console.
You can use this event to perform any action you want when the middle mouse button is released over a widget. For example, you might use it to implement zoom functionality, or to perform an action when the user clicks a button. The possibilities are endless!
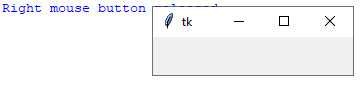
<ButtonRelease-3> tkinter event
The <ButtonRelease-3> event is used to detect when the right mouse button is released over a widget.
Here is an example of how to use it in a code example:
import tkinter as tk
def button_release(event):
print("Right mouse button released")
root = tk.Tk()
frame = tk.Frame(root, width=200, height=100)
frame.pack()
# bind the button release event to the function
frame.bind("<ButtonRelease-3>", button_release)
root.mainloop()
In this example, we have created a Frame widget with an initial width of 200 and height of 100, and packed it into the main window using the pack() method.
We then bound the <ButtonRelease-3> event to the button_release function using the bind() method. When the user releases the right mouse button over the frame, the button_release function will be called and the message “Right mouse button released” will be printed to the console.
You can use this event to perform any action you want when the right mouse button is released over a widget. For example, you might use it to implement a context menu or to perform an action when the user clicks a button. The possibilities are endless!
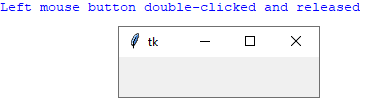
<Double-ButtonRelease-1> tkinter event
The <Double-ButtonRelease-1> event is used to detect when the left mouse button is double-clicked and released over a widget.
Here is an example of how to use it in a code example:
import tkinter as tk
def button_double_click(event):
print("Left mouse button double-clicked and released")
root = tk.Tk()
frame = tk.Frame(root, width=200, height=100)
frame.pack()
# bind the double-click and release event to the function
frame.bind("<Double-ButtonRelease-1>", button_double_click)
root.mainloop()
In this example, we have created a Frame widget with an initial width of 200 and height of 100, and packed it into the main window using the pack() method.
We then bound the <Double-ButtonRelease-1> event to the button_double_click function using the bind() method. When the user double-clicks and releases the left mouse button over the frame, the button_double_click function will be called and the message “Left mouse button double-clicked and released” will be printed to the console.
You can use this event to perform any action you want when the user double-clicks and releases the left mouse button over a widget.
For example, you might use it to implement a feature where double-clicking on an item in a list selects and opens it. The possibilities are endless!
<Double-ButtonRelease-2> thkinter event
The <Double-ButtonRelease-2> event is used to detect when the middle mouse button is double-clicked and released over a widget.
Here is an example of how to use it in a code example:
import tkinter as tk
def button_double_click(event):
print("Middle mouse button double-clicked and released")
root = tk.Tk()
frame = tk.Frame(root, width=200, height=100)
frame.pack()
# bind the double-click and release event to the function
frame.bind("<Double-ButtonRelease-2>", button_double_click)
root.mainloop()
In this example, we have created a Frame widget with an initial width of 200 and height of 100, and packed it into the main window using the pack() method.
We then bound the <Double-ButtonRelease-2> event to the button_double_click function using the bind() method.
When the user double-clicks and releases the middle mouse button over the frame, the button_double_click function will be called and the message “Middle mouse button double-clicked and released” will be printed to the console.
You can use this event to perform any action you want when the user double-clicks and releases the middle mouse button over a widget.
For example, you might use it to implement a feature where double-clicking on a tab closes it in a tabbed interface. The possibilities are endless!
<Double-ButtonRelease-3> tkinter event
The <Double-ButtonRelease-3> event is used to detect when the right mouse button is double-clicked and released over a widget.
Here is an example of how to use it in a code example:
import tkinter as tk
def button_double_click(event):
print("Right mouse button double-clicked and released")
root = tk.Tk()
frame = tk.Frame(root, width=200, height=100)
frame.pack()
# bind the double-click and release event to the function
frame.bind("<Double-ButtonRelease-3>", button_double_click)
root.mainloop()
In this example, we have created a Frame widget with an initial width of 200 and height of 100, and packed it into the main window using the pack() method.
We then bound the <Double-ButtonRelease-3> event to the button_double_click function using the bind() method.
When the user double-clicks and releases the right mouse button over the frame, the button_double_click function will be called and the message “Right mouse button double-clicked and released” will be printed to the console.
You can use this event to perform any action you want when the user double-clicks and releases the right mouse button over a widget.
For example, you might use it to implement a feature where double-clicking on a file in a file browser opens it. The possibilities are endless!
<KeyPress> tkinter event
The <KeyPress> event is used to detect when a key is pressed down while a widget has the focus.
Here is an example of how to use it in a code example:
import tkinter as tk
def key_pressed(event):
print("Key pressed:", event.char)
root = tk.Tk()
entry = tk.Entry(root)
entry.pack()
# bind the key press event to the function
entry.bind("<KeyPress>", key_pressed)
root.mainloop()
In this example, we have created an Entry widget where the user can type text, and packed it into the main window using the pack() method.
We then bound the <KeyPress> event to the key_pressed function using the bind() method.
When the user presses a key while the Entry widget has the focus, the key_pressed function will be called with an event object that contains information about the key that was pressed.
In this example, we simply print the character of the key that was pressed to the console.
You can use this event to perform any action you want when the user presses a key while a widget has the focus. For example, you might use it to implement a feature where typing in a search box filters a list of items. The possibilities are endless!
<KeyRelease> tkinter event
The <KeyRelease> event is used to detect when a key that was previously pressed down is released while a widget has the focus.
Here is an example of how to use it in a code example:
import tkinter as tk
def key_released(event):
print("Key released:", event.char)
root = tk.Tk()
entry = tk.Entry(root)
entry.pack()
# bind the key release event to the function
entry.bind("<KeyRelease>", key_released)
root.mainloop()
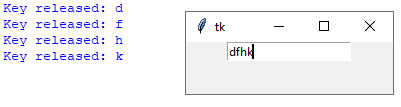
In this example, we have created an Entry widget where the user can type text, and packed it into the main window using the pack() method.
We then bound the <KeyRelease> event to the key_released function using the bind() method.
When the user releases a key that was previously pressed while the Entry widget has the focus, the key_released function will be called with an event object that contains information about the key that was released. In this example, we simply print the character of the key that was released to the console.
You can use this event to perform any action you want when the user releases a key while a widget has the focus. For example, you might use it to implement a feature where pressing and holding down a key causes a character to be repeated until the key is released. The possibilities are endless!
<Map> tkinter event
The <Map> event is used to detect when a widget is mapped to the screen (i.e., made visible) for the first time.
Here is an example of how to use it in a code example:
import tkinter as tk
def widget_mapped(event):
print("Widget mapped")
root = tk.Tk()
label = tk.Label(root, text="Hello, world!")
label.pack()
# bind the widget map event to the function
label.bind("<Map>", widget_mapped)
root.mainloop()
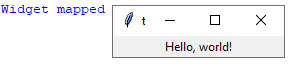
In this example, we have created a Label widget that displays the text “Hello, world!” and packed it into the main window using the pack() method.
We then bound the <Map> event to the widget_mapped function using the bind() method.
When the Label widget is mapped to the screen for the first time, the widget_mapped function will be called with an event object. In this example, we simply print a message to the console.
You can use this event to perform any action you want when a widget is first mapped to the screen.
For example, you might use it to initialize some data or to start an animation. The possibilities are endless!
<unmap> tkinter event
The <Unmap> event is used to detect when a widget is unmapped (i.e., hidden) from the screen.
Here is an example of how to use it in a code example:
import tkinter as tk
def widget_unmapped(event):
print("Widget unmapped")
root = tk.Tk()
label = tk.Label(root, text="Hello, world!")
label.pack()
# bind the widget unmap event to the function
label.bind("<Unmap>", widget_unmapped)
# hide the widget after 5 seconds
label.after(5000, label.pack_forget)
root.mainloop()
In this example, we have created a Label widget that displays the text “Hello, world!” and packed it into the main window using the pack() method. We then bound the <Unmap> event to the widget_unmapped function using the bind() method. After 5 seconds, we hide the widget using the pack_forget() method.
When the Label widget is unmapped from the screen, the widget_unmapped function will be called with an event object.
In this example, we simply print a message to the console.
You can use this event to perform any action you want when a widget is unmapped from the screen.
For example, you might use it to save some data or to stop an animation. The possibilities are endless!
<Visibility> tkinter event
The <Visibility> event is used to detect when a widget becomes visible or invisible.
Here is an example of how to use it in a code example:
import tkinter as tk
def widget_visibility(event):
if event.type == '7': # visibility state
if event.state == '1': # widget became visible
print("Widget became visible")
elif event.state == '0': # widget became invisible
print("Widget became invisible")
root = tk.Tk()
label = tk.Label(root, text="Hello, world!")
label.pack()
# bind the widget visibility event to the function
label.bind("<Visibility>", widget_visibility)
# hide the widget after 5 seconds
label.after(5000, label.pack_forget)
root.mainloop()
In this example, we have created a Label widget that displays the text “Hello, world!” and packed it into the main window using the pack() method.
We then bound the <Visibility> event to the widget_visibility function using the bind() method. When the visibility state of the Label widget changes, the widget_visibility function will be called with an event object. The type attribute of the event object will be set to ‘7’, which indicates a visibility state change. The state attribute of the event object will be set to ‘1’ if the widget becomes visible or ‘0’ if the widget becomes invisible.
In this example, we print a message to the console depending on the visibility state.
You can use this event to perform any action you want when a widget becomes visible or invisible.
For example, you might use it to start or stop a timer or to perform some action when a window is minimized or maximized. The possibilities are endless!
<MouseWheel> tkinter event
The <MouseWheel> event is used to detect when the user scrolls the mouse wheel.
Here is an example of how to use it in a code example:
import tkinter as tk
def mouse_wheel(event):
if event.delta > 0:
print("Scrolled up")
elif event.delta < 0:
print("Scrolled down")
root = tk.Tk()
# bind the mouse wheel event to the function
root.bind("<MouseWheel>", mouse_wheel)
root.mainloop()
In this example, we have bound the <MouseWheel> event to the mouse_wheel function using the bind() method. When the user scrolls the mouse wheel, the mouse_wheel function will be called with an event object.
The delta attribute of the event object will be set to a positive value if the user scrolls up or a negative value if the user scrolls down. In this example, we print a message to the console depending on the direction of the scroll.
You can use this event to perform any action you want when the user scrolls the mouse wheel.
For example, you might use it to scroll a canvas or to change the font size of a text widget. The possibilities are endless!
Quiz about tkinter events
1-What is an event in Tkinter?
- A) A user action or system generated occurrence that triggers a response from the application.
- B) A widget that displays information to the user.
- C) A method that updates the appearance of a widget.
Answer: A
2-How do you bind an event to a function in Tkinter?
- A) Using the connect() method.
- B) Using the add_event() method.
- C) Using the bind() method.
Answer: C
3-What is the <Button-1> event used for?
- A) Detecting when the user clicks the left mouse button.
- B) Detecting when the user clicks the middle mouse button.
- C) Detecting when the user clicks the right mouse button.
Answer: A
4-What is the <Return> event used for?
- A) Detecting when the user presses the Enter key.
- B) Detecting when the user releases a mouse button.
- C) Detecting when the user scrolls the mouse wheel.
Answer: A
5-What is the <Configure> event used for?
- A) Detecting when the user changes the size or position of a widget.
- B) Detecting when the user presses a key.
- C) Detecting when the user scrolls the mouse wheel.
Answer: A
6-What is the <Motion> event used for?
- A) Detecting when the user moves the mouse over a widget.
- B) Detecting when the user clicks the left mouse button.
- C) Detecting when the user scrolls the mouse wheel.
Answer: A
7-What is the <FocusIn> event used for?
- A) Detecting when a widget gains focus.
- B) Detecting when a widget loses focus.
- C) Detecting when the user clicks the left mouse button.
Answer: A
8-What is the <KeyPress> event used for?
- A) Detecting when the user presses a key.
- B) Detecting when the user clicks the left mouse button.
- C) Detecting when the user scrolls the mouse wheel.
Answer: A
9-What is the <Destroy> event used for?
- A) Detecting when a widget is destroyed.
- B) Detecting when the user releases a mouse button.
- C) Detecting when the user clicks the left mouse button.
Answer: A
10-What is the <Map> event used for?
- A) Detecting when a widget is mapped to the screen.
- B) Detecting when the user releases a mouse button.
- C) Detecting when the user clicks the left mouse button.
Answer: A
11-What is the <Leave> event used for?
- A) Detecting when the mouse leaves a widget.
- B) Detecting when the user clicks the left mouse button.
- C) Detecting when the user scrolls the mouse wheel.
Answer: A
12-What is the <ButtonRelease-1> event used for?
- A) Detecting when the user releases the left mouse button.
- B) Detecting when the user releases the middle mouse button.
- C) Detecting when the user releases the right mouse button.
Answer: A
13-What is the <Visibility> event used for?
- A) Detecting when a widget is visible on the screen.
- B) Detecting when the user clicks the left mouse button.
- C) Detecting when the user scrolls the mouse wheel.
Answer: A
14-What is the <Double-Button-1> event used for?
- A) Detecting when the user double-clicks the left mouse button.
- B) Detecting when the user double-clicks the middle mouse button.
- C) Detecting when the user double-clicks the right mouse button.
Answer: A
15-What is the <Map> event used for?
- A) Detecting when a widget is mapped to the screen.
- B) Detecting when the user releases a mouse button.
- C) Detecting when the user clicks the left mouse button.
Answer: A
16-What is the <FocusIn> event used for?
- A) Detecting when a widget receives focus.
- B) Detecting when the user clicks the left mouse button.
- C) Detecting when the user scrolls the mouse wheel.
Answer: A
17-What is the <Configure> event used for?
- A) Detecting when a widget is resized or moved.
- B) Detecting when the user releases a mouse button.
- C) Detecting when the user clicks the left mouse button.
Answer: A
18-What is the <Destroy> event used for?
- A) Detecting when a widget is destroyed or closed.
- B) Detecting when the user releases a mouse button.
- C) Detecting when the user clicks the left mouse button.
Answer: A
19-What is the <MouseWheel> event used for?
- A) Detecting when the user scrolls the mouse wheel.
- B) Detecting when the user clicks the left mouse button.
- C) Detecting when the user releases a mouse button.
Answer: A
20-What is the difference between the <Button-1> and <ButtonRelease-1> events?
- A) <Button-1> is triggered when the user presses the left mouse button, while <ButtonRelease-1> is triggered when the user releases it.
- B) <ButtonRelease-1> is triggered when the user presses the left mouse button, while <Button-1> is triggered when the user releases it.
- C) <Button-1> and <ButtonRelease-1> are equivalent and can be used interchangeably.
Answer: A
Refrences of this lesson with links
Here are some references for the tkinter events covered in this lesson:
Official Python documentation on tkinter events:
TkDocs tutorial on tkinter events:
Real Python tutorial on tkinter events:
Tutorialspoint tutorial on tkinter events:
GeeksforGeeks tutorial on tkinter events:
Here are some books on tkinter that cover events:
“Python GUI Programming with Tkinter” by Alan D. Moore:
This book provides an in-depth coverage of Tkinter, including its event handling capabilities.
“Tkinter GUI Application Development Blueprints – Second Edition” by Bhaskar Chaudhary:
This book offers practical projects using Tkinter, with a focus on event handling and customizing widget behavior.
“Python GUI Programming Cookbook – Second Edition” by Burkhard A. Meier:
This book covers various aspects of Python GUI programming, including working with events in Tkinter.
“Tkinter GUI Application Development” by David Love:
This book covers Tkinter event handling, as well as other topics such as layout management and custom widgets.
“Python and Tkinter Programming” by John E. Grayson:
This book provides a comprehensive overview of Python and Tkinter programming, including an extensive section on events.